background image

2

3

SUGGESTED APPLICATIONS 

These are some suggestions of appliances which could be 
powered by this generator. These suggestions cannot all be 
run at the same time, please read page 13 for full details:
•   Laptop computers up to 700W
•   Televisions up to 150W
•   DVD/Video players up to 400W
•   TV and DVD/Video player combination up to 800W
•   AC/DC Camping fridges up to 150W
•   Lighting up to 1750W
•   Mobile phone/hand held games charging up to 900W
Never exceed 1650W in total when using multiple appliances.

Thank you for purchasing this generator which has passed 
through our extensive quality assurance processes. Every 
care has been taken to ensure that it reaches you in perfect 
condition. However, in the unlikely event that you should 
experience a problem, or if you require any assistance 
please do not hesitate to contact us;
If you have a problem, call customer service do not return 
this generator to the place of purchase.
Due to continual product development, the actual product 
may differ slightly from the product pictured.

CUSTOMER SERVICE

Australia: 1300 660 457 
New Zealand: 0800 474 876 
Operating times: Monday – Friday 
8.00 am - 5.00 pm 
Australian Eastern Standard Time (AEST)

You are not required to do anything to register your 
generator purchase. Please attach the purchase receipt to 
this manual and ensure both are kept safe.  We hope you 
enjoy your new generator, and if you have any problems 
call customer service on the above phone numbers. Do not 
return to place of purchase.

Note: For convenience we suggest taking a 
photocopy of your purchase receipt as the original 
may fade.

Smart Marketing Group Pty Ltd (SMG) warrants that this 
generator will be free from manufacturing faults or defects 
for 12 months from the date of purchase, providing original 
purchase receipt is kept and shown when needed and is 
subject to the terms and conditions below.

Please take note of serial number and write here for 
ease of reference:
 
Serial Number: 
___________________________________________
Date of Purchase: 
___________________________________________
Place of Purchase:
___________________________________________
Receipt Number: 
___________________________________________

If you encounter any issues with this product, 
please call our Customer Service. Do not return 
the product to the place of purchase

Section

Page

Contents

2

Suggested Applications

2

Introduction

2

Warranty

3-4

General Safety Instructions

3

Specific Safety Instructions

5

Personal Safety

6

General Safety

6-7

Electrical Information

8

Fuel & Oil Information

8

Components & Controls

9

Operating Instructions 

10-15

Maintenance Chart

16

Maintenance

17-18

Fault Chart

19-20

Service Log

21

Specifications

23

INTRODUCTION/GENERAL INFORMATION

Summary of Contents for XTM2000DG

Page 1: ...ENGINE OIL AND WILL NOT START UNTIL FILLED TO THE CORRECT LEVEL Oil type 4 stroke fully synthetic motor oil SAE 15W 40 API SN Category Oil Capacity 400ml Approximately Refer to page 8 and page 10 wit...

Page 2: ...se attach the purchase receipt to this manual and ensure both are kept safe We hope you enjoy your new generator and if you have any problems call customer service on the above phone numbers Do not re...

Page 3: ...g and trouble free service life from your generator This generator is not intended for use by persons including children with reduced physical sensory or mental capabilities or lack of experience and...

Page 4: ...nformation please contact customer service Australia 1300 660 457 New Zealand 0800 474 876 CONTACT DETAILS Smart Marketing Group Pty Ltd 33 35 Lionel Road Mt Waverley Victoria 3149 Australia Tel 613 9...

Page 5: ...oolant on the generator as a fatal electric shock could occur Never use coolant in the generator as damage may occur Do not touch the generator with wet hands as this may cause electrocution Never use...

Page 6: ...moving machinery Gloves may be worn when filling generator with fuel Hair Long hair should be tied back or contained in a protective covering Eye Protection The use of safety goggles is highly recomm...

Page 7: ...elect the right generator for the job Do not use a generator to do a job for which it was not designed Do not force a small generator to do the job of a heavy duty generator Any damage caused by overl...

Page 8: ...store your unleaded petrol ULP in before decanting into the fuel tank If contaminated dirty or old stale fuel is used any damage caused will not be covered under warranty OIL CHECK DAILY ONLY USE 4 S...

Page 9: ...indicator red This indicator light is on when the generator is overloaded when the red light turns on the power supply will be automatically disconnected Check the attached products power requirement...

Page 10: ...at the bottom 3 Use oil as detailed on page 8 4 stroke fully synthetic motor oil SAE 15W 40 API SN Category 4 Ensure generator is level when filling with oil DO NOT TIP USE A FUNNEL NOT SUPPLIED 5 Rem...

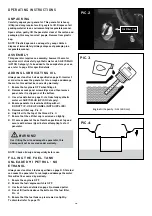
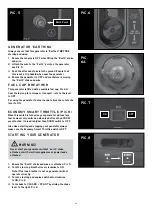
Page 11: ...ON 1 Ensure the Earth stake and wire are attached Pic 5 2 Turn the fuel cap breather lever clockwise to ON Note If fuel cap breather is not on generator will not operate correctly 3 Turn the fuel tap...

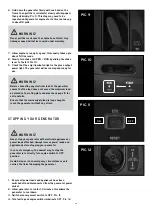
Page 12: ...witch economy smart switch to OFF Pic 11 4 Turn fuel tap and engine switch clockwise to OFF Pic 12 PIC 10 PIC 11 PIC 12 PIC 9 WARNING Never pull the recoil once the engine has started Any damage cause...

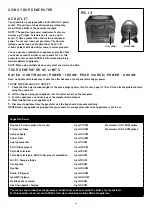
Page 13: ...he problem before using the generator 2 Lift the flap and plug your appliance into the outlet socket on the face plate 3 Turn the appliance on and use as per the manufacturers manual 4 When finished t...

Page 14: ...nce s required power is greater than the generator s output check the appliances wattage requirements refer Page 13 Output indicator light green will remain ON during operation However if it goes out...

Page 15: ...d fuel responsibly 6 Fit access panel at the bottom then position at top and secure with screws 2pcs 1 Remove fuel tank cap 2 Remove the fuel tank filter 3 Position a fuel safe container next to the g...

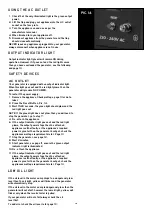
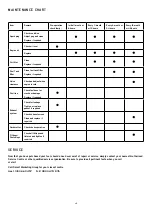
Page 16: ...for cracks or damage Replace if required Exhaust system Check for leakage Tighten or replace gasket if required Check exhaust screen Clean and replace if required Carburettor Check choke operation Fi...

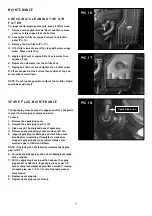
Page 17: ...properly gapped and free of deposits in order to ensure proper engine operation To check 1 Remove the spark plug cover 2 Remove the spark plug cap Pic 18 3 Clean any dirt from around base of spark pl...

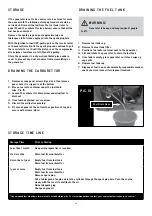
Page 18: ...enerator to drain the oil out of the oil fill 8 Once oil sump is empty place generator on its feet wipe up any spills 9 Replace oil filler cap If changing oil refer to page 10 for oil filling details...

Page 19: ...pplied with fuel Poor spark Pull Recoil Quickly Clean tank Clean fuel line Fill with Correct Fuel See Page 8 Rotate START Switch to ON Spark plug dirty with carbon or wet with fuel Clean spark plug Da...

Page 20: ...onsult Service Agent Generator problem Indicator light OFF No AC output Output power too high or low EngineRPM set too highor low Consult Service Agent Loose Consult Service Agent t n e n o p m o c In...

Page 21: ...TER SPARK PLUG Authorised Service Agent Name or Company Stamp Technician Date This service is to be completed within 36 hours or 9 months of purchase which ever comes first REPLACE CHECK ADJUST ENGINE...

Page 22: ...22 This page has been left intentionally blank...

Page 23: ...ATEGORY Fuel tank capacity 4 2L Fuel type Unleaded 91 Petrol no ethanol Spark plug A7RTC Rated voltage 230 240V AC 50Hz Rated output 1800W Maximum output 2000W Rated current 7 5A Power factor 1 0 Maxi...

Page 24: ...ROUP AUSTRALIA PTY LTD Mon Fri 8 00am 5 00pm AEST Do not return to place of purchase Keep your purchase receipt this will be required to make any claims under the 12 month warranty Australia 1300 660...

Reviews: