background image

Installation and Setup 


40 

Xerox

®

 WorkCentre

®

 4265 Multifunction Printer 


User Guide 


Turning the Printer On and Off 

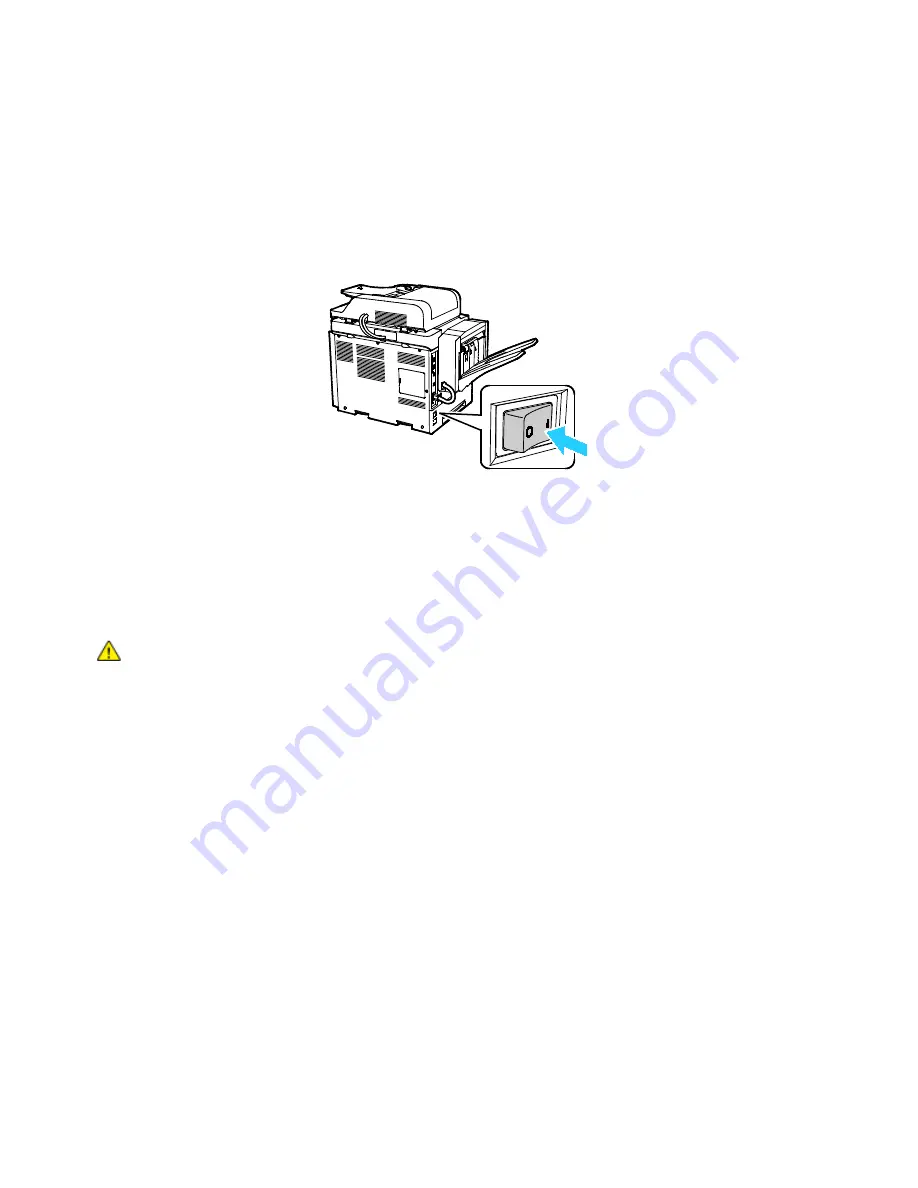
The printer has a Power Down button on the touch screen and a power switch on the left side. ThePower 

Down button on the touch screen initiates an orderly shutdown of the printer electronic components The 

power switch on the side of the printer controls the main power to the printer. 

To turn on the printer: 
1.


Turn on the power switch. 


If the power switch is on, but the printer is powered off, the printer was turned off using the control 

panel. To turn on the printer, flip the power switch first to the 

Off

 position and then to the 

On


position. 

To turn off the printer: 
1.


At the printer control panel, press the 

Power Saver

 button. 

Touch 

Power Down


CAUTIONS:


To prevent a printer malfunction, perform the control panel shutdown first. 


Do not plug or unplug the power cord while the printer is powered on. 


Note: 

When all of the control panel lights are off, the printer power off sequence is complete. 

Turning the power switch off is optional. 


Summary of Contents for WorkCentre 4265

Page 1: ...buch Español Guía del usuario Português Guia do usuário Nederlands Gebruikershandleiding Svenska Användarhandbok Dansk Betjeningsvejledning Suomi Käyttöopas Norsk Brukerhåndbok Русский Руководство пользователя Čeština Uživatelská příručka Polski Przewodnik użytkownika Magyar Felhasználói útmutató Türkçe Kullanıcı Kılavuzu Ελληνικά Εγχειρίδιο χρήστη ...

Page 2: ...Apple Bonjour EtherTalk TrueType iPad iPhone iPod iPod touch Mac and Mac OS are trademarks of Apple Inc registered in the U S and other countries AirPrint and the AirPrint logo are trademarks of Apple Inc HP GL HP UX and PCL are trademarks of Hewlett Packard Corporation in the United States and or other countries IBM and AIX are trademarks of International Business Machines Corporation in the Unit...

Page 3: ... Front View 20 Rear View 23 Internal Components 24 Optional 500 Sheet Finisher 24 Control Panel 25 Information Pages 27 Printing the Information Pages 27 Power Saver Mode 28 Power Saver Levels 28 Exiting Power Saver Mode 28 Administration Features 29 CentreWare Internet Services 29 Accessing CentreWare Internet Services 29 Finding the IP Address of the Printer 30 Automatic Data Collection 30 Billi...

Page 4: ...Supported Paper 50 Ordering Paper 50 General Paper Loading Guidelines 50 Paper That Can Damage Your Printer 51 Paper Storage Guidelines 51 Supported Paper Types and Weights 52 Supported Standard Paper Sizes 53 Supported Custom Paper Sizes 53 Supported Paper Types and Weights for Automatic 2 Sided Printing 54 Supported Standard Paper Sizes for Automatic 2 Sided Printing 54 Supported Custom Paper Si...

Page 5: ...t Quality 80 Special Job Types 81 Secure Print 81 Personal Print Job 81 Sample Set 82 Saved Jobs 83 Printing from Saved Jobs 83 Held Print Jobs 84 Releasing Held Print Jobs 84 Printing from a USB Flash Drive 85 6 Copying 87 Basic Copying 88 Document Glass 88 Document Glass Guidelines 89 Document Feeder 89 Document Feeder Guidelines 89 Adjusting Copying Options 90 Selecting Copy Settings 94 Output ...

Page 6: ...SB Flash Drive 114 Scanning to a Computer 115 Scanning to a Computer 115 8 Faxing 117 Basic Faxing 118 Document Glass 118 Document Feeder 119 Duplex Automatic Document Feeder Guidelines 119 Selecting Fax Options 120 Specifying the Size of the Original 120 Sending a Delayed Fax 120 Automatically Suppressing Background Variation 121 Sending Header Text 121 To Lighten or Darken an Image 121 Building ...

Page 7: ... Prints from Wrong Tray 146 Automatic 2 Sided Printing Problems 147 Paper Tray Fails to Close 147 Printing Takes Too Long 147 Printer Fails to Print 148 Printer is Making Unusual Noises 148 Condensation Has Formed Inside the Printer 149 Paper Jams 150 Minimizing Paper Jams 150 Locating Paper Jams 151 Clearing Paper Jams 152 Troubleshooting Paper Jams 164 Print Quality Problems 166 Controlling Prin...

Page 8: ...and Frequency 185 Power Consumption 185 ENERGY STAR Qualified Product 185 Performance Specifications 186 Print Speed 186 B Regulatory Information 187 Basic Regulations 188 United States FCC Regulations 188 Canada 188 European Union 189 European Union Lot 4 Imaging Equipment Agreement Environmental Information 189 Germany 191 Turkey RoHS Regulation 192 Regulatory Information for 2 4 GHz Wireless Ne...

Page 9: ...Contents Xerox WorkCentre 4265 Multifunction Printer 9 User Guide Collection and Disposal of Equipment and Batteries 205 Battery Symbol Note 205 Battery Removal 205 Other Countries 206 ...

Page 10: ......

Page 11: ...fety 14 Maintenance Safety 16 Printer Symbols 17 Environmental Health and Safety Contact Information 18 Your printer and the recommended supplies have been designed and tested to meet strict safety requirements Attention to the following information ensures the continued safe operation of your Xerox printer 1 Safety ...

Page 12: ...d when removing covers and guards for installing optional equipment Except for user installable options there are no parts that you can maintain or service behind these covers The following are hazards to your safety The power cord is damaged or frayed Liquid is spilled into the printer The printer is exposed to water The printer emits smoke or the surface is unusually hot The printer emits unusua...

Page 13: ...p the plug when unplugging the power cord Ensure that the electrical outlet is near the printer and is easily accessible The power cord is attached to the printer as a plug in device on the back of the printer If it is necessary to disconnect all electrical power from the printer disconnect the power cord from the electrical outlet Emergency Turn Off If any of the following conditions occur turn o...

Page 14: ...gh to harm anyone Install the printer in a well ventilated room For more information in the United States and Canada go to www xerox com environment In other markets please contact your local Xerox representative or go to www xerox com environment_europe Printer Location Place the printer on a level solid non vibrating surface with adequate strength to hold its weight To find the weight for your p...

Page 15: ...ner containers into an open flame When handling cartridges for example toner cartridges avoid skin or eye contact Eye contact can cause irritation and inflammation Do not attempt to disassemble the cartridge which can increase the risk of skin or eye contact CAUTION Use of non Xerox supplies is not recommended The Xerox Warranty Service Agreement and Total Satisfaction Guarantee do not cover damag...

Page 16: ...mentation supplied with your printer Do not use aerosol cleaners Clean with a dry lint free cloth only Do not burn any consumables or routine maintenance items For information on Xerox supplies recycling programs go to www xerox com gwa WARNING Do not use aerosol cleaners Aerosol cleaners can cause explosions or fires when used on electromechanical equipment ...

Page 17: ...o avoid damage to the property Hot surface on or in the printer Use caution to avoid personal injury Do not burn the item Do not expose the imaging unit to light for more than 10 minutes Do not expose the imaging unit to direct sunlight Do not touch the part or area of the printer Warning Wait for the printer to cool for the specified time before touching the fuser This item can be recycled For de...

Page 18: ...lth and Safety in relation to this Xerox product and supplies contact the following customer help lines United States and Canada 1 800 ASK XEROX 1 800 275 9376 Europe 44 1707 353 434 For product safety information in the United States and Canada go to www xerox com environment For product safety information in Europe go to www xerox com environment_europe ...

Page 19: ...Xerox WorkCentre 4265 Multifunction Printer 19 User Guide This chapter includes Parts of the Printer 20 Information Pages 27 Power Saver Mode 28 Administration Features 29 More Information 31 2 Features ...

Page 20: ...ernal Components 24 Optional 500 Sheet Finisher 24 Control Panel 25 Front View Standard Configuration 1 Tray 1 with 520 sheet capacity 2 Document Output Tray with 500 Sheet Capacity 3 USB Port 4 Document Feeder with 100 Sheet Capacity 5 Document Feeder Top Cover 6 Control Panel 7 Side Door 8 Bypass tray with 100 sheet capacity 9 Front Door ...

Page 21: ...eder with 100 Sheet Capacity 5 Document Feeder Top Cover 6 Control Panel 7 Side Door 8 Bypass tray with 100 sheet capacity 9 Front Door 10 Tray 1 with 520 sheet capacity 11 Feeder Tray Outside Cover 12 Feeder Tray Inside Cover 13 Optional Feeder Tray 2 with 520 Sheet Capacity 14 High Capacity Feeder Outside Cover 15 High Capacity Feeder Inside Cover 16 Optional 2100 Sheet High Capacity Feeder ...

Page 22: ... Printer User Guide Alternate Configuration with Trays 1 4 1 Bypass tray with 100 sheet capacity 2 Tray 1 with 520 sheet capacity 3 Optional Feeder Tray 2 with 520 Sheet Capacity 4 Optional 520 Sheet Feeder Tray 3 5 Optional 520 Sheet Feeder Tray 4 ...

Page 23: ... 4 Power Switch 5 Red LED 6 Card Reader Slot 7 Green LED 8 Finisher Interface 9 Optional Foreign Device Interface 10 Ethernet Connection 11 USB Port for Service Only 12 Direct Connect Port for USB Printing 13 Direct Connect Port for USB Printing 14 Handset Extension Connector for Optional Fax Kit 15 Fax Line In for Optional Fax Kit ...

Page 24: ...ter User Guide Internal Components 1 Toner Cartridge 2 Drum Cartridge 3 Smart Kit Drum Cartridge 4 Document Glass 5 Document Feeder 6 Fuser 7 Transfer Roller Optional 500 Sheet Finisher 1 Finisher Connector Cable 2 Finisher Front Door 3 Staple Cartridge ...

Page 25: ...ax on the touch screen 3 Services Button This button returns to the active service from the Job Status or Machine Status screens or to a preset service 4 Job Status Button This button displays lists of all active secure or completed jobs on the touch screen 5 Machine Status Button This button displays the status of the printer on the touch screen 6 Alphanumeric Keypad The keypad enters alphanumeri...

Page 26: ...to their default settings and clear existing scans press this button twice 13 Language Button This button changes the touch screen language and keyboard settings 14 Power Saver button This button enters and exits the low power mode 15 Help Button This button displays information about the current selection on the touch screen 16 Log In Out Button This button provides access to password protected f...

Page 27: ...d font information demonstration pages and more Printing the Information Pages 1 At the printer control panel press the Machine Status button 2 On the Machine Information tab touch Self Help 3 To print an information page select an option then touch Print Note To scroll through the list of available items touch and drag your finger up or down on the menu 4 Touch Close ...

Page 28: ...ms and the printer operates on reduced power consumption Power Saver Mode 2 After a specified period of inactivity the touch screen turns off and the printer enters standby mode Exiting Power Saver Mode The printer exits Power Saver mode automatically when any of the following events occur You press a button on the control panel The printer receives data from a connected device You open any door o...

Page 29: ...and configuration software installed on the embedded Web server in the printer It allows you to configure and administer the printer from a Web browser CentreWare Internet Services requires A TCP IP connection between the printer and the network in Windows Macintosh UNIX or Linux environments TCP IP and HTTP enabled in the printer A network connected computer with a Web browser that supports JavaS...

Page 30: ...iguration Report The TCP IP address appears in the Network section of the page If the IP address listed on the page is 0 0 0 0 the printer needs more time to acquire an IP address from the DHCP server Wait two minutes then print the Configuration Report again Automatic Data Collection This printer automatically collects data and transmits it to a secure offsite location Xerox or a designated servi...

Page 31: ...ror messages Press the control panel Help button Information Pages Print from the control panel or from CentreWare Internet Services click Status Information Pages CentreWare Internet Services documentation In CentreWare Internet Services click Help Order supplies for your printer www xerox com office WC4265supplies A resource for tools and information including interactive tutorials printing temp...

Page 32: ......

Page 33: ...5 Configuring the Printer at Setup 36 Connecting the Printer 38 Configuring Network Settings 41 Enabling the Printer for Scanning 42 Installing the Software 43 Installing the Printer as a Web Service on Devices 47 See also Installation Guide packaged with your printer System Administrator Guide at www xerox com office WC4265docs 3 Installation and Setup ...

Page 34: ...ements vary for the different connection methods Routers network hubs network switches modems Ethernet cables and USB cables are not included with your printer and must be purchased separately Xerox recommends an Ethernet connection because it is typically faster than a USB connection and it provides access to CentreWare Internet Services Note If the Software and Documentation disc is not availabl...

Page 35: ...ansfer Place the printer on a level solid non vibrating surface with adequate strength for the weight of the printer The printer must be horizontal with all four feet in solid contact with the surface To find the weight for your printer configuration see Physical Specifications on page 180 Select a location with adequate clearance to access supplies and to provide proper ventilation To find the cl...

Page 36: ... is packaged in a plastic tube contained inside the box with the printer To configure the printer using the Product Enablement Key 1 Remove the plastic card that contains the Product Enablement Key from the tube 2 To remove the Product Enablement Key from the plastic card carefully press it out 3 Attach the power cord to the printer plug the cord into an electrical outlet then turn on the printer ...

Page 37: ...Key into the card reader slot at the back of the printer 7 When the green LED light stops blinking and remains illuminated for approximately 10 seconds remove the Product Enablement Key from the card reader slot 8 Touch Continue 9 Configure settings as needed then to restart the printer and save your settings touch Restart To adjust your settings touch Back 10 When the Services screen appears the ...

Page 38: ...rk switches modems Ethernet cables and USB cables are not included with your printer and must be purchased separately Network If your computer is connected to an office network or home network use an Ethernet cable to connect the printer to a network port Ethernet networks can support many computers printers and devices simultaneously In most cases Ethernet connection is faster than USB and provid...

Page 39: ...fice WC4265docs Connecting to a Computer Using USB To connect using USB you need Windows XP SP3 Windows 7 Windows 8 or later Windows Server 2003 or later or Macintosh OS X version 10 5 or later To connect the printer to the computer using a USB cable 1 Connect the B end of a standard A B USB 2 0 cable to the USB Port on the left side of the printer 2 Connect the A end of the USB cable to the USB p...

Page 40: ...1 Turn on the power switch If the power switch is on but the printer is powered off the printer was turned off using the control panel To turn on the printer flip the power switch first to the Off position and then to the On position To turn off the printer 1 At the printer control panel press the Power Saver button Touch Power Down CAUTIONS To prevent a printer malfunction perform the control pan...

Page 41: ...unicate with a network printer For Macintosh OS X systems TCP IP is preferred Unlike TCP IP however Bonjour does not require printers or computers to have IP addresses With TCP IP protocols each printer and computer must have a unique IP address Many networks and cable and DSL routers have a Dynamic Host Configuration Protocol DHCP server A DHCP server automatically assigns an IP address to every ...

Page 42: ...following locations FTP SMB HTTP HTTPS SFTP An email address A shared folder on your computer For details see CentreWare Internet Services on page 29 Note If your printer is connected using the USB cable you cannot scan to an email address or a network location such as a shared folder on your computer For details see the System Administrator Guide at www xerox com office WC4265docs ...

Page 43: ...ndows Server 2008 Windows Server 2008 R2 and Windows Server 2012 Macintosh OS X version 10 5 and later UNIX and Linux Your printer supports connection to various UNIX platforms through the network interface For details see www xerox com office WC4265drivers Installing Drivers and Utilities for Windows To access all the features of your printer install the Xerox print driver and the Xerox scan driv...

Page 44: ...nd Subnet Mask fields c If you know the address of another printer on the same subnet click the middle button and enter the address in the IP Address field d Click Search e From the list of discovered printers select your printer then click Next Note When the printer appears in the Discovered Printers window it displays the IP address Record the IP address for future use 10 Select the desired driv...

Page 45: ...nters then click Continue 11 To accept the print queue message click Continue 12 To accept the installation success message click Close To verify that the print driver recognizes the installed options 1 From the Apple menu click System Preferences Printers and Scanners 2 Select the printer from the list then click Options Supplies 3 Click Options 4 Confirm that all of the options installed on the ...

Page 46: ... on page 27 3 At your computer do the following a From the print driver website for your printer select your printer model b From the Operating System menu select UNIX then click Go c Select the appropriate package for your operating system d To begin downloading click the Start button 4 In the notes below the driver package that you selected click the Installation Guide link then follow the insta...

Page 47: ... Close To install a WSD printer using the Add Printer Wizard 1 At your computer click Start then select Devices and Printers 2 To launch the Add Printer Wizard click Add a Printer 3 Click Add a network wireless or Bluetooth printer 4 In the list of available devices select the one you want to use then click Next 5 If the printer that you want does not appear in the list click The printer that I wa...

Page 48: ......

Page 49: ...Xerox WorkCentre 4265 Multifunction Printer 49 User Guide This chapter includes Supported Paper 50 Loading Paper 56 Printing on Special Paper 63 4 Paper and Media ...

Page 50: ...aper and other media types To ensure the best print quality and to avoid jams follow the guidelines in this section For best results use Xerox paper and media recommended for your printer Ordering Paper To order paper or other media contact your local reseller or visit www xerox com office WC4265supplies General Paper Loading Guidelines Do not overfill the paper trays Do not load paper above the m...

Page 51: ...ils Paper Storage Guidelines Storing your paper and other media properly contributes to optimum print quality Store paper in dark cool relatively dry locations Most paper is susceptible to damage from ultraviolet and visible light Ultraviolet light from the sun and fluorescent bulbs is particularly damaging to paper Reduce the exposure of paper to strong lights for long periods of time Maintain co...

Page 52: ...in Lightweight Bond Hole Punched Pre Printed Recycled Envelope Transparency Labels Cardstock Cotton Letterhead 70 90 g m 60 69 g m 105 120 g m 60 90 g m 75 85 g m 60 85 g m 75 90 g m 138 146 g m 120 150 g m 90 163 g m 90 g m Optional 2100 Sheet High Capacity Feeder Plain Lightweight Bond Hole Punched Pre Printed Recycled Cardstock Cotton Letterhead 70 90 g m 60 69 g m 105 120 g m 60 90 g m 75 85 g...

Page 53: ...2 x 257 mm 7 2 x 10 1 in A4 210 x 297 mm 8 3 x 11 7 in Statement 140 x 216 mm 5 5 x 8 5 in Executive 184 x 267 mm 7 25 x 10 5 in Letter 216 x 279 mm 8 5 x 11 in Folio 216 x 330 mm 8 5 x 13 in Oficio 216 x 343 mm 8 5 x 13 5 in Legal 216 x 356 mm 8 5 x 14 in Bypass Tray A4 210 x 297 mm 8 3 x 11 7 in A5 148 x 210 mm 5 8 x 8 3 in JIS B5 182 x 257 mm 7 2 x 10 1 in ISO B5 176 x 250 mm 6 9 x 9 8 in A6 10...

Page 54: ...3 in Legal 216 x 356 mm 8 5 x 14 in Oficio 216 x 343 mm 8 5 x 13 5 in Folio 216 x 330 mm 8 5 x 13 in Letter 216 x 279 mm 8 5 x 11 in Executive 184 x 267 mm 7 25 x 10 5 in Statement 140 x 216 mm 5 5 x 8 5 in Supported Custom Paper Sizes for Automatic 2 Sided Printing Tray Width Length Trays 1 4 and Bypass Tray Only 98 216 mm 3 9 8 5 in 148 356 mm 5 8 14 in All Trays 98 216 mm 3 9 8 5 in 152 4 356 m...

Page 55: ... in JIS B5 182 x 257 mm 7 2 x 10 1 in Legal 216 x 356 mm 8 5 x 14 in Oficio 216 x 343 mm 8 5 x 13 5 in Folio 216 x 330 mm 8 5 x 13 in Letter 216 x 279 mm 8 5 x 11 in Executive 184 x 267 mm 7 25 x 10 5 in Custom paper sizes within the following ranges are supported for automatic stapling Tray Width Length Tray 1 and Bypass Tray 182 216 mm 7 2 8 5 in 148 356 mm 5 8 14 in Trays 1 and 2 182 216 mm 7 2...

Page 56: ...56 Loading Paper in a 520 Sheet Feeder Trays 1 4 58 Loading Paper in the 2100 Sheet High Capacity Feeder 60 Loading Paper in the Bypass Tray To load paper in the bypass tray 1 Open the bypass tray 2 If the bypass tray is loaded with paper already remove any paper that is a different size or type 3 Move the width guides to the edges of the tray ...

Page 57: ...eady to use it 5 Load the paper in the tray 6 Load hole punched paper with the holes toward the rear of the printer 7 For 1 sided and 2 sided printing to load letterhead or pre printed paper place letterhead face down with the top edge going into the printer Note Do not load paper above the maximum fill line Overfilling the tray can cause the printer to jam 8 Adjust the width guides until they tou...

Page 58: ... out the tray until it stops 2 Move the length and width guides out a Pinch the guide lever on each guide b Slide the guides outward until they stop c Release the levers 3 Flex the sheets back and forth and fan them then align the edges of the stack on a level surface This procedure separates any sheets that are stuck together and reduces the possibility of jams ...

Page 59: ...with the print side face up Load hole punched paper with the holes toward the rear of the printer Do not load paper above the maximum fill line Overfilling can cause paper jams 5 Adjust the paper guides in the tray to match the size of the paper 6 Close the tray 7 If the control panel prompts you verify the paper size type and color in the Paper Settings screen 8 Touch Confirm ...

Page 60: ...nction Printer User Guide Loading Paper in the 2100 Sheet High Capacity Feeder To load paper in the high capacity feeder 1 Pull out the tray until it stops 2 To unlock the paper guides lift turn then remove the locking pins from the side paper guides ...

Page 61: ...fit JIS B5 paper 4 To lock the paper guides in place insert the locking pins into the desired slot then turn pins to the left until they fit snugly CAUTION If you force the pin into place it can result in breakage 5 Flex the sheets back and forth and fan them then align the edges of the stack on a level surface This procedure separates any sheets that are stuck together and reduces the possibility...

Page 62: ...per into the tray with the print side face down Load hole punched paper with the holes toward the rear of the printer Do not load paper above the maximum fill line Overfilling the tray can cause the printer to jam 7 Close the tray 8 If the control panel prompts you verify the paper size type and color in the Paper Settings screen 9 When finished touch Confirm ...

Page 63: ...ality depends on the quality and construction of the envelopes Try another envelope brand if you do not get desired results Maintain constant temperatures and relative humidity Store unused envelopes in their packaging to avoid excess moisture and dryness which can affect print quality and cause wrinkling Excessive moisture can cause the envelopes to seal before or during printing Remove air bubbl...

Page 64: ... until it stops 2 Remove any paper left in the tray 3 Load the envelopes in the tray with the flaps closed flap side down flaps toward the rear of the tray 4 Adjust the paper guides so they rest lightly against the edges of the envelopes 5 Close the tray 6 If the control panel prompts you verify the paper size type and color in the Paper Settings screen 7 When finished touch Confirm ...

Page 65: ...ray 2 Move the width guides to the edges of the tray Note If you do not load envelopes in the bypass tray right after they have been removed from the packaging they can bulge Flatten them to avoid jams 3 To load envelopes with long edge flaps place the envelopes with the short edge going into the printer flaps up and to the right ...

Page 66: ...eet of labels Use full sheet labels only Store unused labels flat in their original packaging Leave the sheets of labels inside the original packaging until ready to use Return any unused sheets of labels to the original packaging and reseal it Do not store labels in extremely dry or humid conditions or extremely hot or cold conditions Storing them in extreme conditions can cause print quality pro...

Page 67: ... Settings screen 6 When finished touch Confirm Transparencies You can print transparencies from the bypass tray or from Trays 1 4 Guidelines for Printing Transparencies Remove all paper before loading transparencies in the tray Handle transparencies by the edges using both hands Fingerprints or creases can cause poor print quality After loading transparencies change the paper type to Transparency ...

Page 68: ......

Page 69: ...on Printer 69 User Guide This chapter includes Printing Overview 70 Selecting Printing Options 71 Managing Jobs 76 Printing Features 78 Special Job Types 81 Saved Jobs 83 Held Print Jobs 84 Printing from a USB Flash Drive 85 5 Printing ...

Page 70: ...e appropriate tray 3 At the printer control panel specify the size and type 4 In your software application access the print settings For most software applications press CTRL P for Windows or CMD P for Macintosh 5 Select your printer 6 To access the print driver settings for Windows select Properties or Preferences For Macintosh select Xerox Features 7 Select the desired options 8 Click Print to s...

Page 71: ...options that are set from within the software application are temporary The application and the computer do not save the settings after the application is closed Print Driver Help Xerox print driver software Help information is available from the Printing Preferences window Click the Help button in the bottom left corner of the Printing Preferences window to see the Help Information about Printing...

Page 72: ...ize Control Panel Home Devices and Printers 2 In the list right click the icon for your printer and click Printing Preferences 3 In the Printing Preferences window click a tab select the options then click OK to save Note For more information about Windows print driver options click the Help button in the Printing Preferences window Selecting Printing Options for an Individual Job for Windows To u...

Page 73: ...ange the settings before sending the job to the printer 1 With the document open in your application click File Print 2 Select your printer 3 Select Xerox Features 4 Select the desired options 5 Click Print Selecting Finishing Options for Macintosh If your printer has a finisher installed select finishing options in the Xerox Features of the print driver To select finishing options in the Macintos...

Page 74: ...e information about Linux printing click the Help button in the Xerox GUI print driver To print from a Linux workstation 1 Create a print queue 2 With the desired document or graphic open in your application open the Print dialog box For most software applications click File Print or press CTRL P 3 Select the target print queue 4 Close the Print dialog box 5 In the Xerox GUI print driver select th...

Page 75: ...following commands are examples of how to print using a job ticket lp d Target_Queue oJT Absolute_Path_To_Job_Ticket Path_To_Print_File lp dMyQueue oJT tmp DuplexedLetterhead home user PrintReadyFile lp dMyQueue oJT tmp Secure oSecurePasscode 1234 home user PrintReadyFile ...

Page 76: ...trol panel press the Stop button 2 To resume the print job touch Resume 3 To delete the print job touch Cancel To view active secure or completed jobs 1 At the control panel press the Job Status button 2 To see a list of specific job types touch a tab To view jobs that are in process or waiting to process touch the Active Jobs tab To view Secure Print jobs touch the Personal Secure Jobs tab Touch ...

Page 77: ...red the Hold All Jobs feature any job sent to the printer is held until you release it For details see Releasing Held Print Jobs on page 84 Unidentified jobs are jobs that are not associated with a user name Unidentified jobs originate from a computer that does not require a user to log in Examples are a job sent from a DOS or UNIX window using LPR Port 9100 or from the Jobs tab in CentreWare Inte...

Page 78: ...per type and weight are supported For details see Supported Paper Types and Weights for Automatic 2 Sided Printing on page 54 Printing a 2 Sided Document Options for Automatic 2 Sided Printing are specified in the print driver The print driver uses the settings for portrait or landscape orientation from the application for printing the document 2 Sided Page Layout Options You can specify the page ...

Page 79: ...tray loaded with the desired paper Printing Multiple Pages to a Single Sheet When printing a multiple page document you can print more than one page on a single sheet of paper Print 1 2 4 6 9 or 16 pages per side by selecting Pages Per Sheet on the Page Layout tab Page Layout is on the Document Options tab Scaling You can reduce the image to as little as 25 of its original size or enlarge it as mu...

Page 80: ...tomatically reduces each page image and prints four page images per sheet of paper two page images on each side The pages are printed in the correct order so that you can fold and staple the pages to create the booklet When you print booklets using the Windows PostScript or Macintosh driver you can specify the gutter and creep Gutter Specifies the horizontal distance in points between the page ima...

Page 81: ...ou must use a different passcode you can override it in the application print driver Releasing a Secure Print 1 At the printer control panel press the Job Status button 2 Touch the Personal Secure Jobs tab 3 Touch the folder that holds the print job 4 Enter the passcode number that you assigned to the print job using the keypad 5 Touch the corresponding print job in the list then touch Print Delet...

Page 82: ...Secure Jobs tab 3 Touch the folder that holds the print job 4 Touch the corresponding print job in the list then touch Delete Sample Set The Sample Set job type allows you to print a sample copy of a multiple copy job and hold the remaining copies at the printer After you review the sample copy you can select the job name from the printer control panel to print the additional copies Releasing the ...

Page 83: ...ou can print and save the job for future use Printing from Saved Jobs 1 At the control panel press the Services button then touch Reprint Saved Jobs 2 Touch the name of the saved job that you want to print 3 Touch OK 4 Select the number of copies 5 Press the green Start button 6 After the job prints to return to the list of saved jobs touch Browse ...

Page 84: ...d the rest of the copies hold until you release them If the system administrator has configured the Hold All Jobs feature any job sent to the printer is held until you release it Releasing Held Print Jobs 1 At the control panel press the Job Status button 2 Touch Active Jobs 3 To determine why a job was held touch the job then touch Details 4 To release a held job touch the job then touch Release ...

Page 85: ...ocs To print from a USB Flash drive 1 Insert your USB Flash drive in a USB port on the printer The Print from USB window appears The list at the bottom of the window displays the folders and printable files on the USB Flash drive 2 To scroll through the list and locate the printable file next to the list use the arrows 3 If the print file is in a folder to open the folder touch the name 4 Touch th...

Page 86: ......

Page 87: ...Xerox WorkCentre 4265 Multifunction Printer 87 User Guide This chapter includes Basic Copying 88 Selecting Copy Settings 94 6 Copying ...

Page 88: ...ps from the pages and place them face up in the document feeder 3 Press the Services Home button then touch Copy 4 To enter the number of copies use the alphanumeric keypad on the touch screen or the control panel 5 Change the copy settings as needed 6 Press the green Start button Notes To pause or cancel a copy job press the red Stop button on the control panel To interrupt a copy job at the cont...

Page 89: ...0 105 g m 12 5 28 lb for 2 sided pages The document feeder accepts paper sizes from 145 x 145 mm 5 7 x 5 7 in through 216 x 356 mm 8 5 x 14 in for 1 sided pages and 176 x 250 6 93 x 9 84 in through 216 x 356 mm 8 5 x 14 in for 2 sided pages The maximum feeder capacity is approximately 100 sheets of 75 g m paper The document feeder automatically detects Legal or Letter A4 size paper Document Feeder...

Page 90: ...gs 91 Image Quality Settings 92 Finishing 93 You can adjust numerous options for your copy jobs specify characteristics of the original documents and customize the output For details see Basic Copying on page 91 You can also modify the default settings for many options For details see Selecting Default Copy Settings on page 94 ...

Page 91: ...Home button 2 Touch Copy 3 Touch the Copy tab 4 For Paper Supply touch the desired tray 5 Touch OK Making the Image Lighter or Darker 1 At the printer control panel press the Services Home button 2 Touch Copy 3 Touch More Features Lighten Darken 4 Adjust the sliders up or down as needed 5 Touch OK Setting 2 Sided Copying 1 At the printer control panel press the Services Home button 2 Touch Copy 3 ...

Page 92: ...eatures Original Type 3 Select an option 4 Touch OK Adjusting Brightness 1 Press the Services Home button then touch Copy 2 Touch More Features Lighten Darken 3 Adjust the sliders up or down as needed 4 Touch OK Automatically Suppressing Background Variation When scanning originals printed on thin paper text or images printed on one side of the paper can be seen on the other side Use the Auto Supp...

Page 93: ...the following order 1 1 1 2 2 2 3 3 3 4 4 4 5 5 5 6 6 6 To select Collate options 1 At the printer control panel press the Services Home button 2 Touch Copy 3 Touch Finishing then select an option Collated turns on collation for all copies made regardless of where the originals are placed Uncollated turns off collation Stapling Copies If your printer has a finisher it can staple your copies To sel...

Page 94: ...ntally touch Plus or Minus To reduce or enlarge the percentage incrementally touch the arrows To reduce or enlarge the percentage using the alphanumeric keypad touch the current displayed value 4 Touch OK Specifying the Size of the Original To scan the correct area of the original specify the original size 1 Press the Services Home button then touch Copy 2 Touch More Features Original Size 3 Touch...

Page 95: ...inal Size is selected To specify the page layout 1 Press the Services Home button then touch Copy 2 Touch More Features Page Layout 3 Select an option 4 For Paper Supply touch the desired tray 5 Touch OK Shifting the Image You can change the placement of an image on the copy page For Image Shift to function correctly position originals as follows For the Document Feeder position originals face up ...

Page 96: ...e image on one sheet of paper Note Book Copying is disabled unless a preset Original Size is selected To set up book copying 1 Press the Services Home button then touch Copy 2 Touch More Features Book Copying 3 Touch an option then touch OK Creating a Booklet You can print copies in booklet format The booklet feature reduces the original page images to fit two images on each side of the printed pa...

Page 97: ...Supply touch the tray containing the paper for the body pages of the job 3 Touch OK 4 Touch More Features Covers 5 Touch an option then touch OK Adding Transparency Separators You can add blank sheets of paper between each printed transparency Ensure that the size and orientation of the separators is the same as the transparencies Note If the paper supply is set to Auto Select you cannot add trans...

Page 98: ...aper supply to lighten or darken an image or to turn on auto suppression in the ID Card Copy screen touch Edit 3 Lift the document cover 4 Place the ID card or a document smaller than half the selected paper supply size in the upper left corner of the document glass 5 To enter the number of copies use the alphanumeric keypad on the touch screen or the control panel 6 Press the green Start button 7...

Page 99: ...opy 2 Touch More Features Build Job 3 Touch On 4 Touch Options a Select or clear the Display Summary window between segments check box b Select or clear the Turn Build Job Off after Job is Submitted check box 5 Touch OK 6 Program and copy the first segment a Load the originals for the first segment b Press the green Start button 7 If a password is required contact the system administrator 8 Progra...

Page 100: ......

Page 101: ... a USB Flash Drive 114 Scanning to a Computer 115 The system administrator must set up this feature before you can use it For details see the System Administrator Guide at www xerox com office WC4265docs If the system administrator enables Remote Start in CentreWare Internet Services you can scan images directly from the scanner to a PC Using Microsoft Clip Organizer you can scan import and store ...

Page 102: ...drive Import scanned images into applications using TWAIN and WIA Notes The printer must be connected to a network to retrieve a scan file remotely Print copy and fax jobs can print while you are scanning original documents or downloading files from the printer hard drive For details see the Help in CentreWare Internet Services To scan an image 1 Load your original documents Use the document glass...

Page 103: ...b for 2 sided pages The document feeder accepts paper sizes from 145 x 145 mm 5 7 x 5 7 in through 216 x 356 mm 8 5 x 14 in for 1 sided pages and 176 x 250 6 93 x 9 84 in through 216 x 356 mm 8 5 x 14 in for 2 sided pages The maximum feeder capacity is approximately 100 sheets of 75 g m paper The document feeder automatically detects Legal or Letter A4 size paper Document Feeder Guidelines When lo...

Page 104: ...d white significantly reduces the file size of the scanned images To set the output color 1 At the printer control panel press Clear All then press Services Home 2 Touch Scan To then select an option 3 Touch the More Features tab 4 Touch Output Color 5 Select a color mode 6 Touch OK Setting the Scan Resolution The scan resolution depends on how you plan to use the scanned image Scan resolution aff...

Page 105: ... or select one from the menu 5 Touch OK Lightening or Darkening the Image 1 At the printer control panel press Clear All then press Services Home 2 Touch Scan To then select an option 3 Touch More Features Lighten Darken 4 To lighten or darken the image move the slider up or down 5 Touch OK Automatically Suppressing Background Variation When scanning originals printed on thin paper text or images ...

Page 106: ...ress Services Home 2 Touch Scan To then select an option 3 Touch Original Size then select an option 4 Touch OK Erasing Edges To use Edge Erase 1 At the printer control panel press Clear All then press Services Home 2 Touch Scan To then select an option 3 Touch More Features Scan to Edge 4 To change the Edge Erase settings select an option 5 Touch OK ...

Page 107: ...een segments check box b Select or clear the Turn Build Job Off after Job is Submitted check box 6 Touch OK 7 Program and scan the first segment a Load the originals for the first segment b Press the green Start button on the control panel 8 If a password is required contact the system administrator 9 Program and scan additional segments a Load the originals for the next segment b When the Build J...

Page 108: ...System Administrator Guide at www xerox com office WC4265docs To select filing options 1 At the printer control panel press Clear All then press Services Home 2 Touch Workflow Scanning File To select a file format 1 Type a file extension or select one from the menu 2 Touch OK To select the action to take if a file already exists 1 Touch the More Features tab 2 Touch If File Already Exists 3 Select...

Page 109: ...n To Destination properties are not properly configured the Scan To icon appears grayed out on the touch screen To scan an image and send it to a destination 1 Load the original on the document glass or in the document feeder 2 At the printer control panel press Clear All then press Services Home 3 Touch Scan To Scan Contacts 4 Select an option 5 Select the desired name from the list then touch OK...

Page 110: ...e computer Note For more information see Connecting the Printer on page 38 Sharing a Folder on a Windows Computer Before you begin Verify that your computer security software allows for file sharing Verify that File and Printer Sharing For Microsoft Networks is enabled for each of your connections Note For assistance contact your system administrator To turn on sharing 1 Open Windows Explorer 2 Ri...

Page 111: ... Read Write 8 Click Options 9 To share the folder with Windows computers select Share files and folders using SMB 10 To share the folder with specific users next to the user name select On 11 Click Done 12 Close the System Preferences window Note When you open a shared folder a Shared Folder banner appears in the Finder for the folder and subfolders Scanning to a Folder on a Network Computer 1 Loa...

Page 112: ...to Home function you must log in with a valid user name and passcode To scan an image to your home directory 1 Load the original on the document glass or in the document feeder 2 At the printer control panel press Clear All then press Services Home 3 Touch Workflow Scanning 4 Select the template that the system administrator created 5 Change scan settings as needed 6 Press the green Start button ...

Page 113: ...t glass or in the document feeder 2 Press the Services Home button then touch Email 3 To enter an email address do the following a Touch Enter Recipient b Touch the down arrow then from the menu select To or Cc or Bcc c Type the email address d Touch OK 4 To enter an email address from the network address book do the following a Touch Device Address Book b Select the desired name from the list the...

Page 114: ...original on the document glass or in the duplex automatic document feeder 2 Insert your USB Flash drive into the USB port on the side of the printer 3 Touch USB Scan to USB 4 Change scan settings as needed For details see Adjusting Scanning Settings on page 104 5 To begin the scan press Start WARNING Do not remove the USB Flash drive until prompted If you remove the Flash drive before the transfer...

Page 115: ...Select Scan Device select the scanner then click Select 7 To select a size for the scanned image click Scan Size and select an option 8 To select the sides to scan from the original click Side to Scan and select an option 1 Sided Scan This setting scans only one side of the original document or image and produces 1 sided output files 2 Sided Scan This setting scans both sides of the original docum...

Page 116: ......

Page 117: ...ing Local Mailbox Documents 124 Sending a Fax to a Remote Mailbox 125 Storing a Fax for Local or Remote Polling 126 Polling a Remote Fax 127 Printing or Deleting Stored Faxes 128 Using the Address Book 129 The system administrator must set up this feature before you can use it For details see the System Administrator Guide at www xerox com office WC4265docs 8 Faxing ...

Page 118: ... allows you to enter a fax number manually Manual Dial Mode This option allows you to insert characters such as Dial Pause in a fax number Device Address Book This option allows you to access the printer address book 4 Adjust additional fax options as needed For details see Selecting Fax Options on page 120 5 Press the green Start button The printer scans the pages and transmits the document when ...

Page 119: ...5 x 14 in for 2 sided pages The maximum feeder capacity is approximately 100 sheets of 75 g m paper The document feeder automatically detects Legal or Letter A4 size paper Duplex Automatic Document Feeder Guidelines When loading originals into the duplex automatic document feeder follow these guidelines Insert originals face up with the top of the page entering the feeder first Only place loose sh...

Page 120: ...To specify the original size 1 At the printer control panel press Clear All then press Services Home 2 Touch Fax then touch an option 3 Touch More Features Original Size 4 Touch an option then touch OK Sending a Delayed Fax You can scan and save a fax on the printer then send it at a later time 1 At the printer control panel press Clear All then press Services Home 2 Touch Fax then touch an option...

Page 121: ...ax then touch an option 3 Touch More Features Background Suppression 4 Touch Auto Suppression 5 Touch OK Sending Header Text The system administrator must set up this feature before you can use it For details see the System Administrator Guide at www xerox com office WC4265docs To include the fax header text 1 At the printer control panel press Clear All then press Services Home 2 Touch Fax then t...

Page 122: ...tween segments check box Select or clear the Turn Build Job Off after Job is Submitted check box 6 Program and scan the first segment a Load the originals for the first segment b Select the required settings such as layout adjustments image quality and options c Press the green Start button 7 Program and scan additional segments a Load the originals for the next segment b When the Build Job screen...

Page 123: ... create a mailbox before you can use this feature For details see the System Administrator Guide at www xerox com office WC4265docs To store a fax in a local mailbox 1 At the printer control panel press Clear All then press Services Home 2 Touch Fax Mailboxes 3 Touch Store To Mailbox Local Mailbox 4 Touch an option then touch OK ...

Page 124: ...e this feature you must have documents stored in a mailbox For details see Storing a Fax in a Local Mailbox on page 123 To print local mailbox documents 1 At the printer control panel press Clear All then press Services Home 2 Touch Fax Mailboxes 3 Touch Print From Mailbox 4 Touch an option 5 Touch Print ...

Page 125: ...tifunction Printer 125 User Guide Sending a Fax to a Remote Mailbox 1 At the printer control panel press Clear All then press Services Home 2 Touch Fax Mailboxes 3 Touch Store To Mailbox Remote Mailbox 4 Touch an option then touch OK ...

Page 126: ...s stored on one printer available for remote polling by other printers When Secure Local Polling is on you create a list of fax numbers that are allowed to access the stored faxes on the printer To store a fax 1 At the printer control panel press Clear All then press Services Home 2 Touch Fax Polling 3 Touch Store Locally for Remote Polling 4 Touch an option 5 Touch Save ...

Page 127: ...stored using local polling on another fax machine Note If Local Polling is turned on Remote Polling is not available To turn off Local Polling touch Local Polling Off Save To poll a remote fax 1 At the printer control panel press Clear All then press Services Home 2 Touch Fax Polling 3 Touch Retrieve Print Remote Files 4 Type the fax number 5 Touch Print ...

Page 128: ...Centre 4265 Multifunction Printer User Guide Printing or Deleting Stored Faxes 1 At the printer control panel press Clear All then press Services Home 2 Touch Fax Polling 3 Touch Local File Management then select an option ...

Page 129: ...reen for All Users To add a recipient to the Device Address Book 1 At the printer control panel press Clear All then press Services Home 2 Touch Fax Device Address Book 3 Touch Create New Contact 4 To enter a name fax number or optional email address touch each field then enter the details 5 To add a company name touch the i icon 6 To mark any entered contact information as a favorite touch the st...

Page 130: ......

Page 131: ...Xerox WorkCentre 4265 Multifunction Printer 131 User Guide This chapter includes Cleaning the Printer 132 Ordering Supplies 136 Managing the Printer 140 9 Maintenance ...

Page 132: ...ive mixtures and are not suitable for use in electrical applications Use of pressurized spray cleaners increases the risk of fire and explosion WARNING Do not remove the covers or guards that are fastened with screws You cannot maintain or service any parts that are behind these covers and guards Do not attempt any maintenance procedure that is not described in the documentation supplied with your...

Page 133: ...ain off CAUTION Do not spray detergent directly on the printer Liquid detergent could enter the printer through a gap and cause problems Never use cleaning agents other than water or mild detergent Cleaning the Scanner Clean the scanner about once a month when anything is spilled on it or when debris or dust collect on any of the surfaces Keep the feed rollers clean to ensure the best possible cop...

Page 134: ... Debris and toner stains on the document feeder feed rollers separation pads and scanner components can cause stains or unwanted marks on printed documents To remove stains use a soft lint free cloth dampened with a neutral detergent or water You can view a video on the control panel that shows how to clean the feed rollers separation pads and scanner components To view the video 1 At the printer ...

Page 135: ...inter before closing the printer covers and doors Remove any remaining pieces of paper or debris For details see Clearing Paper Jams on page 152 Remove any dust or stains with a dry clean cloth WARNING To avoid injury never touch a labeled area on or near the heat roller in the fuser If a sheet of paper is wrapped around the heat roller do not try to remove it immediately Switch off the printer im...

Page 136: ...ner other than genuine Xerox Toner can affect print quality and printer reliability Xerox Toner is the only toner designed and manufactured under strict quality controls by Xerox for specific use with this printer Routine Maintenance Items Routine maintenance items are printer parts that have a limited life and require periodic replacement Replacements can be parts or kits Routine maintenance item...

Page 137: ...on Guarantee do not cover damage malfunction or degradation of performance caused by use of non Xerox supplies or the use of Xerox supplies not specified for this printer The Total Satisfaction Guarantee is available in the United States and Canada Coverage could vary outside these areas Please contact your Xerox representative for details Viewing Printer Supply Status You can check the status and...

Page 138: ...olume of toner contact your local Xerox representative Never throw a toner cartridge into an open flame Remaining toner in the cartridge can catch fire and cause burn injuries or an explosion WARNING Do not remove the covers or guards that are fastened with screws You cannot maintain or service any parts that are behind these covers and guards Do not attempt any maintenance procedure that is not d...

Page 139: ...ssage on the control panel Note Each toner cartridge includes installation instructions Printer Status Message Cause and Solution Low Toner Status Ensure that a new Toner Cartridge is available The toner cartridge is low Order a new toner cartridge Replace Toner Cartridge The toner cartridge is empty Open the side door and then the front door then replace the toner cartridge Recycling Supplies For...

Page 140: ...cord Pulling the cord can damage it which can lead to fire or electric shock When moving the printer do not tilt it more than 10 degrees to the front back left or right Tilting the printer more than 10 degrees can cause toner spillage Follow these instructions when moving the printer 1 Turn off the printer and disconnect the power cord and other cables from the back of the printer For details see ...

Page 141: ...rranty Service Agreement or Total Satisfaction Guarantee The Xerox Warranty Service Agreement or Total Satisfaction Guarantee do not cover damage to the printer caused by improper moving After moving the printer 1 Reinstall any parts you removed 2 Reconnect the printer to the cables and power cord 3 Plug in and turn on the printer Billing and Usage Information Billing and printer usage information...

Page 142: ......

Page 143: ...re 4265 Multifunction Printer 143 User Guide This chapter includes General Troubleshooting 144 Paper Jams 150 Print Quality Problems 166 Copy and Scan Problems 170 Fax Problems 171 Getting Help 173 10 Troubleshooting ...

Page 144: ...by simply restarting the printer General Precautions To maintain and operate your printer safely follow each of the precautions mentioned in this section Avoiding Damage to the Printer Do not place anything on top of the printer Do not leave the covers and doors open for any length of time Do not open covers and doors during printing Do not tilt the printer while it is in use Do not touch the elec...

Page 145: ... Never use cleaning agents other than water or mild detergent WARNING Keep all cleaning materials out of the reach of children Maintenance Restrictions WARNING Do not remove the covers or guards that are fastened with screws You cannot maintain or service any parts that are behind these covers and guards Do not attempt any maintenance procedure that is not described in the documentation supplied w...

Page 146: ... or Turns Off Frequently Probable Causes Solutions The power cord is not plugged into the outlet correctly Turn off the printer confirm that the power cord is plugged in correctly to the printer and the outlet then turn on the printer A system error occurred Turn off the printer then turn it on again Print the Error History report from the Information Pages menu If the error persists contact your ...

Page 147: ...le the printer could be set to print on Heavyweight paper It takes more time to print on certain types of special paper Ensure that the paper type is set properly in the driver and at the printer control panel For details see Print Speed on page 186 The printer is in Power Saver mode It takes time for printing to start when the printer is coming out of Power Saver mode The way the printer was inst...

Page 148: ...ontact your Xerox representative The printer is busy A previous print job could be the problem On your computer you can use the printer properties to delete all print jobs in the print queue Load the paper in the tray At the printer control panel press the Job Status button If the print job does not appear check the Ethernet connection between the printer and the computer At the printer control pa...

Page 149: ...rinter after it has been sitting in a cold room that is heated quickly Probable Causes Solutions The printer has been sitting in a cold room Allow the printer to acclimate for several hours before operation Allow the printer to operate for several hours at room temperature The relative humidity of the room is too high Reduce the humidity in the room Move the printer to a location where the tempera...

Page 150: ...e paper guides improperly Most jams can be prevented by following a simple set of rules Use only supported paper For details see Supported Paper on page 50 Follow proper paper handling and loading techniques Always use clean undamaged paper Avoid paper that is curled torn moist creased or folded To separate the sheets before loading into the tray fan the paper Observe the paper tray fill line neve...

Page 151: ...m paper Locating Paper Jams WARNING To avoid injury never touch a labeled area on or near the heat roller in the fuser If a sheet of paper is wrapped around the heat roller do not try to remove it immediately Switch off the printer immediately and wait 30 minutes for the fuser to cool After the printer cools try to remove the jammed paper If the error persists contact your Xerox representative The...

Page 152: ...g Jams in the Optional Finisher 157 Clearing Paper Jams from the Document Feeder 158 Clearing Paper Jams from the Fuser Area 161 Clearing Paper Jams from the Duplex Area 162 Clearing Paper Jams at the Bypass Tray 163 Clearing Paper Jams from Tray 1 To resolve the error displayed on the control panel you must clear all paper from the paper path 1 Remove Tray 1 from the printer 2 Remove any crumpled...

Page 153: ...kCentre 4265 Multifunction Printer 153 User Guide 3 Insert tray 1 into the printer then push it in all the way 4 If the control panel prompts you verify the paper size type and color in the Paper Settings screen 5 Touch Confirm ...

Page 154: ...s from Trays 2 4 To resolve the error displayed on the control panel you must clear all paper from the paper path 1 Remove tray 2 from the printer 2 Remove any crumpled paper from the tray and any remaining paper jammed in the printer 3 Insert tray 2 into the printer then push it all the way in ...

Page 155: ...outside covers 6 If the control panel prompts you verify the paper size type and color in the Paper Settings screen 7 Touch Confirm Clearing Paper Jams from the 2100 Sheet High Capacity Feeder 1 Before removing the paper tray from the printer look at the jam message on the control panel If another jam is shown clear that jam first 2 Open the high capacity feeder tray then remove any damaged paper ...

Page 156: ...aper does not move easily to remove it reach behind the high capacity feeder tray and grasp the paper then pull gently 4 If the paper is torn remove all torn pieces from the printer 5 Push the tray back into the printer completely then close the inside and outside covers 6 If the control panel prompts you verify the paper size type and color in the Paper Settings screen 7 Touch Confirm ...

Page 157: ...ams in the Optional Finisher 1 Open the finisher front door 2 To access the finisher release lever 1c then slide the finisher unit to the left CAUTION To avoid dropping the finisher do not slide the finisher too far to the left 1a 3 Remove any jammed paper from inside the finisher area ...

Page 158: ...torn pieces from the finisher 5 Close the finisher front door 6 To return the finisher to its original position lift slightly and push to the right until the finisher clicks into place Clearing Paper Jams from the Document Feeder 1 Remove any paper from the document feeder 2 Open the document feeder top cover ...

Page 159: ...aper is jammed in the exit of the document feeder pull it out as illustrated 4 To access the document feeder to remove jammed paper lift the document feeder cover 5 To open the document feeder inside cover gently pull the green lever 6 Remove any paper or debris from the paper path ...

Page 160: ...er User Guide 7 Press the document feeder inside cover into its original position then ensure that the lever is locked in place Note Ensure that the magnetic edge of the white plastic strip rests securely against the metal strip 8 Close the document feeder cover ...

Page 161: ...ea To resolve the error displayed on the control panel you must clear all paper from the paper path 1 To access jammed paper in the fuser area open the right side door 2 Gently remove any paper from the fuser area WARNING The area around the fuser can be hot Use caution to avoid injury 3 Close the right side door ...

Page 162: ...rkCentre 4265 Multifunction Printer User Guide Clearing Paper Jams from the Duplex Area 1 To access paper jams in the duplex area open the right side door 2 Gently remove any paper from the duplex area 3 Close the right side door ...

Page 163: ...If the paper is torn check inside the printer for pieces of paper then gently remove them If you cannot remove the paper fragments easily contact your Xerox representative WARNING The area around the fuser can be hot Use caution to avoid injury 3 When you reload the bypass tray fan the paper and ensure that all four corners align neatly 4 If the control panel prompts you verify the size and type o...

Page 164: ...upported paper Use only Xerox approved paper For details see Supported Paper on page 50 Humidity is too high for coated paper Feed paper one sheet at a time Paper Misfeeds Probable Causes Solutions The paper is not correctly positioned in the tray Remove the misfed paper and reposition it properly in the tray Adjust the paper guides in the tray to match the size of the paper The paper tray is too ...

Page 165: ... edge of the envelopes without restricting their movement Paper Jam Message Stays On Probable Causes Solutions Some paper remains jammed in the printer Recheck the media path and make sure that you have removed all of the jammed paper One of the printer doors is open Check the doors on the printer Close any door that is open Note Check for and remove torn pieces of paper in the paper path Jams Dur...

Page 166: ...e output of your printer For consistent and optimum print quality use paper designed for your printer and set the paper type correctly Follow the guidelines in this section to maintain optimum print quality from your printer Temperature and humidity affect the quality of the printed output The guaranteed range for optimal print quality is 10 30 C 50 90 F and 20 80 relative humidity Solving Print Q...

Page 167: ...ng of the printer For details see the System Administrator Guide at www xerox com office WC4265docs Toner smears or print comes off The output has stains on the back side Change the Paper Type settings in the print driver For example change Plain to Lightweight Cardstock In the Printing Preferences of the print driver on the Paper Output tab change the Paper Type setting Verify that the paper is t...

Page 168: ...d appearance Verify that the paper is the correct size type and weight If not change the paper settings Ensure that the humidity is within specifications For details see Selecting a Location for the Printer on page 35 Ghosting appears in the printed output Verify that the paper is the correct size type and weight If not change the paper settings Change the Paper Type settings in the print driver I...

Page 169: ...t change the paper Try a new ream of paper Change the Paper Type settings in the print driver In the Printing Preferences of the print driver on the Paper Output tab change the Paper Type setting Envelopes are wrinkled or creased when printed Ensure that envelopes are loaded properly in the bypass tray or in trays 1 4 Follow the guidelines for printing on envelopes For details see Guidelines for P...

Page 170: ...bris creating lines or streaks Clean all glass surfaces with a lint free cloth Spots present in copies taken from the document glass There is debris on the document glass When scanning the debris creates a spot on the image Clean all glass surfaces with a lint free cloth The reverse side of the original is showing on the copy or scan Turn on Background Suppression Image is too light or too dark To...

Page 171: ...n Adjust the contrast There is a problem with the telephone connection Verify that the telephone line is working then send the fax again There is a problem with the fax machine of the caller Make a copy to verify that your printer is operating correctly If the copy was printed correctly have the recipient verify the condition of their fax machine The fax received by the recipient is blank The docu...

Page 172: ...ases available memory The received fax size is reduced The paper supply in the printer does not match the document size sent Confirm the original size of the documents Documents could be reduced based on the available paper supply in the printer Faxes cannot be received automatically The printer is set to receive faxes manually Set the printer to automatic reception The memory is full Load paper i...

Page 173: ...nel also displays an animated graphic showing the location of the problem such as the location of a paper jam For many status and warning messages the control panel Help provides additional information Control Panel Help To view more information about error or status messages on the control panel touch the Help button The control panel menu items also have associated help text that describes the m...

Page 174: ...ect the operation of the printer and their corresponding fault codes Alerts This menu shows alert messages regarding the current job status of the printer and the corresponding alert codes Viewing Job Status on the Control Panel To view current or saved jobs on the control panel 1 At the control panel press the Job Status button 2 To view a list of active jobs touch Active Jobs 3 To view a list of...

Page 175: ...adcast Report The Fax Broadcast Report provides a record of broadcast faxes including total pages scanned remote station start time and result Fax Options Report The Fax Options Report displays the current fax settings Fax Phone Book The Fax Phone Book displays a list of names and fax numbers Fax Protocol Report The Fax Protocol Report provides fax control field data fax information field data and...

Page 176: ...ss of Your Printer on page 30 More Information You can obtain more information about your printer from these sources Resource Location Installation Guide Packaged with the printer Other documentation for your printer www xerox com office WC4265docs Technical support information for your printer including online technical support Online Support Assistant and driver downloads www xerox com office WC...

Page 177: ...nction Printer 177 User Guide This appendix includes Printer Configurations and Options 178 Physical Specifications 180 Environmental Specifications 184 Electrical Specifications 185 Performance Specifications 186 A Specifications ...

Page 178: ...supports up to 50 ppm for Letter and 48 ppm for A4 Print resolution Standard print quality mode 600 x 600 dpi Enhanced print quality mode 1200 x 1200 dpi Paper capacity Bypass tray with 100 sheet capacity Tray 1 with 520 sheet capacity Maximum print size Legal 216 x 356 mm 8 5 x 14 in 2 Sided Printing Standard Copy speed 1 sided copy 55 copies per minute 2 sided copy 50 copies per minute Copy reso...

Page 179: ...nter 179 User Guide Email and Scan file formats JPEG TIFF PDF XPS Control panel 4 3 inch LCD touch screen and keypad navigation Connectivity Universal Serial Bus USB 2 0 USB Flash drive Ethernet 10 100 1000Base T Remote access CentreWare Internet Services ...

Page 180: ...Specifications 180 Xerox WorkCentre 4265 Multifunction Printer User Guide Physical Specifications Clearance Requirements for Standard Configuration ...

Page 181: ...Specifications Xerox WorkCentre 4265 Multifunction Printer 181 User Guide Clearance Requirements for Standard Configuration with Optional Finisher ...

Page 182: ...Specifications 182 Xerox WorkCentre 4265 Multifunction Printer User Guide Clearance Requirements for Standard Configuration with Optional Feeders ...

Page 183: ...quirements for Standard Configuration with Optional Finisher and Feeders Weights and Dimensions Width 62 17 cm 24 5 in Depth 51 13 cm 20 1 in Height 62 40 cm 24 6 in Weight S configuration 42 41 kg 93 63lb Weight X configuration 42 53 kg 93 89 lb Weight XF configuration 92 39 kg 203 9 lb ...

Page 184: ...0 86 F Optimum Temperature 16 30 C 61 86 F Storage Temperature from 20 through 40 C from 4 through 104 F Relative Humidity Minimum Maximum Humidity Range 10 90 less than 90 when in the packaging Optimum Humidity 30 70 Operating Humidity 20 80 Relative Humidity Elevation For optimum performance use the printer at elevations below 3100 m 10 170 ft ...

Page 185: ...roduct is ENERGY STAR qualified under the ENERGY STAR Program Requirements for Imaging Equipment The ENERGY STAR and ENERGY STAR mark are registered United States trademarks The ENERGY STAR Imaging Equipment Program is a team effort between United States European Union and Japanese governments and the office equipment industry to promote energy efficient copiers printers fax multifunction printers...

Page 186: ...7 mm Several factors affect print speed 2 sided printing The maximum print speeds for 2 sided continuous printing are 50 ppm for Letter 8 5 x 11 in and 48 ppm for A4 210 x 297 mm Print mode Standard is the fastest print mode Enhanced is half speed or slower Paper size Letter 8 5 x 11 in and A4 210 x 297 mm sizes share the fastest print speed Paper type Plain paper prints faster than Cardstock or H...

Page 187: ...Xerox WorkCentre 4265 Multifunction Printer 187 User Guide This appendix includes Basic Regulations 188 Copy Regulations 193 Fax Regulations 196 Material Safety Data Sheets 200 B Regulatory Information ...

Page 188: ...ment in a residential area is likely to cause harmful interference in which case the user will be required to correct the interference at his her own expense If this equipment does cause harmful interference to radio or television reception which can be determined by turning the equipment off and on the user is encouraged to try to correct the interference by one or more of the following measures ...

Page 189: ...ist users and has been issued in relation to the European Union EU Energy Related Products Directive specifically the Lot 4 study on Imaging Equipment This requires manufacturers to improve environmental performance of in scope products and supports the EU action plan on energy efficiency In scope products are Household and Office equipment that meet the following criteria Standard monochrome form...

Page 190: ...ncourage you to check if this is suitable for your printing needs ENERGY STAR The ENERGY STAR program is a voluntary scheme to promote the development and purchase of energy efficient models which help to reduce environmental impact Details on the ENERGY STAR program and models qualified to ENERGY STAR can be found at the following website www energystar gov index cfm fuseaction find_a_product sho...

Page 191: ...cation This certification indicates that a product has undergone rigorous scientific testing exhaustive auditing or both to prove its compliance with stringent third party environmental performance standards Germany Germany Blue Angel RAL the German Institute for Quality Assurance and Labeling has awarded this device the Blue Angel Environmental Label This label distinguishes it as a device that s...

Page 192: ...N radio transmitter module which complies with the requirements specified in FCC Part 15 Industry Canada RSS 210 and European Council Directive 99 5 EC Operation of this device is subject to the following two conditions 1 this device may not cause harmful interference and 2 this device must accept any interference received including interference that may cause undesired operation Changes or modifi...

Page 193: ...reproduce a legal document on which there is a canceled revenue stamp this may be done provided the reproduction of the document is performed for lawful purposes Postage Stamps canceled or uncanceled For philatelic purposes Postage Stamps may be photographed provided the reproduction is in black and white and is less than 75 or more than 150 of the linear dimensions of the original Postal Money Or...

Page 194: ... is assumed for its completeness or accuracy In case of doubt consult your attorney For more information about these provisions contact the Copyright Office Library of Congress Washington D C 20559 Ask for Circular R21 Canada Parliament by stature has forbidden the reproduction of the following subjects under certain circumstances Penalties of fine or imprisonment may be imposed on those guilty of...

Page 195: ... owner This list is provided for your convenience and assistance but it is not all inclusive and no liability is assumed for its completeness or accuracy In case of doubt consult your solicitor Other Countries Copying certain documents may be illegal in your country Penalties of fine or imprisonment may be imposed on those found guilty of making such reproductions Currency notes Bank notes and che...

Page 196: ...r must be provided to the Telephone Company A plug and jack used to connect this equipment to the premises wiring and telephone network must comply with the applicable FCC Part 68 rules and requirements adopted by the ACTA A compliant telephone cord and modular plug is provided with this product It connects to a compatible modular jack that is also compliant See installation instructions for detai...

Page 197: ...ething that affects the operation of the equipment they should notify you in order for you to make necessary modifications to maintain uninterrupted service If you experience trouble with this Xerox equipment please contact the appropriate service center for repair or warranty information Contact information is contained in the Machine Status menu on the printer and in the back of the Troubleshoot...

Page 198: ...see the label on the equipment European Union Radio Equipment and Telecommunications Terminal Equipment Directive The Facsimile has been approved in accordance with the Council Decision 1999 5 EC for pan European single terminal connection to the public switched telephone network PSTN However due to differences between the individual PSTNs provided in different countries the approval does not give...

Page 199: ...Use of pulse dialing when this equipment is connected to the same line as other equipment may give rise to bell tinkle or noise and cause a false answer condition If you encounter such problems do not contact the Telecom Faults Service 6 DTMF tones dialing is the preferred method because it is faster than pulse decadic dialing and is readily available on almost all New Zealand telephone exchanges ...

Page 200: ...User Guide Material Safety Data Sheets For Material Safety Data information regarding your printer go to North America www xerox com msds European Union www xerox com environment_europe For the Customer Support Center phone numbers go to www xerox com office worldcontacts ...

Page 201: ...Xerox WorkCentre 4265 Multifunction Printer 201 User Guide This appendix includes All Countries 202 North America 203 European Union 204 Other Countries 206 C Recycling and Disposal ...

Page 202: ... may be regulated due to environmental considerations The presence of these materials is fully consistent with global regulations applicable at the time that the product was placed on the market For recycling and disposal information contact your local authorities Perchlorate Material This product may contain one or more Perchlorate containing devices such as batteries Special handling may apply p...

Page 203: ... equipment take back and reuse recycle program Contact your Xerox representative 1 800 ASK XEROX to determine if this Xerox product is part of the program For more information about Xerox environmental programs visit www xerox com environment or for recycling and disposal information contact your local authorities ...

Page 204: ...ed electrical and electronic equipment to designated collection facilities free of charge Please contact your local disposal authority for information In some member states when you purchase new equipment your local retailer may be required to take back your old equipment free of charge Please ask your retailer for information Professional Business Environment Application of this symbol on your eq...

Page 205: ...andling For more information about collection and recycling of old products and batteries please contact your local municipality your waste disposal service or the point of sale where you purchased the items Penalties may be applicable for incorrect disposal of this waste in accordance with national legislation Business Users in the European Union If you wish to discard electrical and electronic e...

Page 206: ...Recycling and Disposal 206 Xerox WorkCentre 4265 Multifunction Printer User Guide Other Countries Please contact your local waste management authority to request disposal guidance ...

Reviews: