


Disassembly
6-26
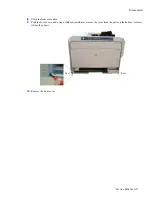
9.
Remove the washer and then remove the drum gear and pin. (The drum gear can be found inside the printer after
removing the imaging unit.)
Note
Take care that the pin is not lost as you remove the gear.
10.
Disconnect CN 23, 24, 27, and 32.
11.
Remove 5 screws (3*10 silver) and then take out the main drive assembly.
>> On Re-assembly:
1.
Be sure to reconnect the grounding wire.
Gear-Drive
Pin-Drive
Washer-Plain
Screw
Screw
Screw
Screw
Screw
Screw
Summary of Contents for Phaser 6100
Page 1: ...Service Manual X XEROX P h a s e r C o l o r L a s e r P r i n t e r 6100 ...
Page 2: ......
Page 10: ...vi ...
Page 22: ...Reference Information 2 6 ...
Page 28: ...Specifications 3 6 ...
Page 38: ...Summary of Product 4 10 RAM DIMM SPGPm Main Control FLASH MEMORY ENGINE CONTROL ...
Page 44: ...Summary of Product 4 16 ...
Page 66: ...Disassembly 6 10 3 Remove the toner caps and fit them to the inlets as shown below Toner Cap ...
Page 94: ...Disassembly 6 38 6 Disconnect 2 harnesses and remove the laser unit Harness Harness ...
Page 130: ...Maintenance and Diagnostics 7 20 ...
Page 196: ...Parts List 9 42 9 21 Transfer Belt Cam Assembly S18 9 0 8 S8 7 6 5 10 1 2 14 3 12 13 S8 11 4 ...
Page 200: ...Parts List 9 46 ...


