


Troubleshooting
8-16
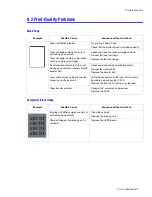
8.4.10 Curved or Distorted Vertical Lines
Symptoms: Curved, wavy or distorted vertical lines on prints.
8.4.11 Low Toner
Symptoms: “Replace [Color] Toner Soon” is displayed on the control panel.
8.4.12 Replace Toner [Color]
Symptoms: “Replace [Color] Toner Soon” is displayed on the control panel.
Checks and Causes
Repair Actions
Use EDC mode to test the laser.
Check the +24V signal between the main board
(CN12) and the laser.
Replace the laser
Replace the main board.
Checks and Causes
Repair Actions
If 10% or less toner remains in any of the
cartridges, this message will be displayed.
Check the toners percent remaining using the control panel.
If the toner is low or empty, replace toner cartridge.
Check the condition of the contacts on the
DEVE_OEM Board.
Replace the DEVE-OEM board.
Replace the main board.
Checks and Causes
Repair Actions
“Replace [Color] Toner Soon” is displayed when
the cartridge life is over 100%. Image Density may
be reduced. Engine would not print if cartridge life
is over 110%.
Replace the toner cartridge.
Summary of Contents for Phaser 6100
Page 1: ...Service Manual X XEROX P h a s e r C o l o r L a s e r P r i n t e r 6100 ...
Page 2: ......
Page 10: ...vi ...
Page 22: ...Reference Information 2 6 ...
Page 28: ...Specifications 3 6 ...
Page 38: ...Summary of Product 4 10 RAM DIMM SPGPm Main Control FLASH MEMORY ENGINE CONTROL ...
Page 44: ...Summary of Product 4 16 ...
Page 66: ...Disassembly 6 10 3 Remove the toner caps and fit them to the inlets as shown below Toner Cap ...
Page 94: ...Disassembly 6 38 6 Disconnect 2 harnesses and remove the laser unit Harness Harness ...
Page 130: ...Maintenance and Diagnostics 7 20 ...
Page 196: ...Parts List 9 42 9 21 Transfer Belt Cam Assembly S18 9 0 8 S8 7 6 5 10 1 2 14 3 12 13 S8 11 4 ...
Page 200: ...Parts List 9 46 ...


