


Troubleshooting
8-6
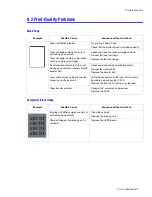
White Spots / Black Spots / Colored Spots
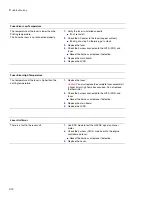
Toner Smudges on the Reverse Side of the Page
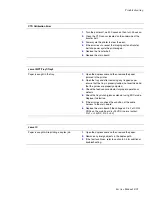
Foggy Background
Example
Possible Cause
Sequence of Repair Actions
Contamination of the internal
mechanism of the toner cartridge.
Replace the toner cartridge.
Imaging unit surface contaminated or
damaged.
Replace the imaging unit.
Transfer belt is contaminated or
damaged.
Replace the transfer belt.
Fuser unit is contaminated.
Run the fuser cleaning page up to 5 times.
Replace the fuser.
Are the spots a repeating defect?
See the topic “Evenly repeating defect” .
Example
Possible Cause
Sequence of Repair Actions
Paper path is contaminated.
Open covers fully and clean the paper path.
Transfer belt is contaminated.
Clean or replace the transfer belt.
Pressure roller in the fuser is
contaminated.
Run the fuser cleaning page up to 5 times.
Replace the fuser if needed.
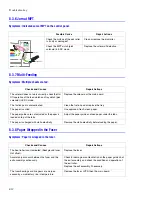
Example
Possible Cause
Sequence of Repair Actions
The developer roller is contaminated.
Replace the toner cartridge.
Printing density is to dark.
Replace the imaging unit.
Summary of Contents for Phaser 6100
Page 1: ...Service Manual X XEROX P h a s e r C o l o r L a s e r P r i n t e r 6100 ...
Page 2: ......
Page 10: ...vi ...
Page 22: ...Reference Information 2 6 ...
Page 28: ...Specifications 3 6 ...
Page 38: ...Summary of Product 4 10 RAM DIMM SPGPm Main Control FLASH MEMORY ENGINE CONTROL ...
Page 44: ...Summary of Product 4 16 ...
Page 66: ...Disassembly 6 10 3 Remove the toner caps and fit them to the inlets as shown below Toner Cap ...
Page 94: ...Disassembly 6 38 6 Disconnect 2 harnesses and remove the laser unit Harness Harness ...
Page 130: ...Maintenance and Diagnostics 7 20 ...
Page 196: ...Parts List 9 42 9 21 Transfer Belt Cam Assembly S18 9 0 8 S8 7 6 5 10 1 2 14 3 12 13 S8 11 4 ...
Page 200: ...Parts List 9 46 ...


