Advanced Features and Troubleshooting Manual
63
Networking
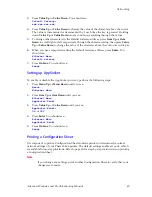
3.
Press
Value Up
or
Value Down
. You should see:
Default Gateway=
xxx.xxx.xxx.xxx
4.
Press
Value Up
or
Value Down
to change the value of the character above the cursor.
The value is incremented or decremented by 1 each time the key is pressed. Holding
down
Value Up
or
Value Down
causes continuous scrolling through the values.
5.
To change other characters in the Default Gateway address, press
Item Up
or
Item
Down
to scroll right or left respectively through the character string, then press
Value
Up
or
Value Down
to change the value of the character above the cursor (as in Step 4).
6.
When you have completed setting the Default Gateway address, press
Enter
. You
should see:
Ethernet Menu
Default Gateway
7.
Press
On Line
. You should see:
Ready
Setting up AppSocket
To enable or disable the AppSocket protocol, perform the following steps:
1.
Press
Menu Up
or
Menu Down
until you see:
Menus
Ethernet Menu
2.
Press
Item Up
or
Item Down
until you see:
Ethernet Menu
AppSocket Enabl
3.
Press
Value Up
or
Value Down
until you see:
AppSocket Enabl=
On
or
Off
4.
Press
Enter
. You should see:
Ethernet Menu
AppSocket Enabl
5.
Press
On Line
. You should see:
Ready
Printing a Configuration Sheet
It is important to print a Configuration Sheet from the printer to determine the current
network settings of your Phaser 5400 printer. The default settings enable all ports, which
are suitable for most applications. Refer to page 30 for step-by-step instructions on printing
a Configuration Sheet.
Note
If you change any settings, print another Configuration Sheet to verify that your
changes were made.
Summary of Contents for PHASER 5400
Page 1: ...P H A S E R 5 4 0 0 L A S E R P R I N T E R Advanced Features and Troubleshooting Manual ...
Page 2: ......
Page 3: ...Xerox Phaser 5400 Laser Printer Advanced Features and Troubleshooting Manual September 2001 ...
Page 10: ...viii Xerox Phaser 5400 Laser Printer ...
Page 16: ......
Page 122: ...106 Xerox Phaser 5400 Laser Printer Appendix C Unique Printer Commands ...
Page 126: ......
Page 127: ...7 2 1 P 5 8 0 1 0 ...


