June 2014
2-3
Xerox® Phaser® 3020 Printer Service Manual
01-100 , 06-100 / 200
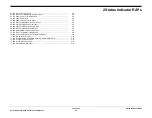
Status Indicator RAPs
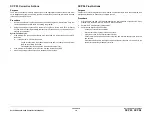
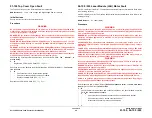
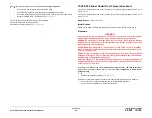
01-100 Top Cover Open Fault
The Top Cover is open or the Cover Open Switch is defective.
BSD-Reference:
1.1 AC / Low Voltage and High Voltage Power / Interlock
Initial Actions
Ensure that the front cover is completely closed.
Procedure
WARNING
Do not perform repair activities with the power on or electrical power supplied to the
machine. The machine could activate and cause serious personal injury when the power
is on or electrical power is supplied.
DANGER: Ne pas effectuer de dépannage avec le contact principal activé ou avec l'ali-
mentation électrique appliquée à la machine: celle-ci pourrait démarrer et causer de
graves blessures.
AVVERTENZA: Non effettuare alcuna riparazione con la macchina accesa o con l'ali-
mentazione elettrica inserita. La macchina potrebbe avviarsi all'improvviso e causare
gravi ferite.
VORSICHT: Es dürfen keine Reparaturarbeiten durchgeführt werden, solange das Gerät
eingeschalten oder mit der Stromquelle verbunden ist. Das Gerät kann u.U in den Aktiv-
Zustand übergehen und somit erhebliche körperliche Schäden verursachen.
AVISO: No realice reparaciones con la máquina encendida o conectada a la corriente. La
máquina podría activarse y ocasionar daños personales graves.
Check the Top Cover Open Switch Actuator on the LVPS / HVPS PWB. The Actuator is
moves freely.
Y
N
Replace the LVPS / HVPS PWB (
REP 1.5
),
PL 3.1
.
Check the connection between the Main PWB and the HVPS PWB (BSD 1.1). The connec-
tion is secure.
Y
N
•
Check that there is no contamination present.
•
Check for broken and defective wires or cables.
•
Replace the Main PWB (
REP 1.6
),
PL 1.1
.
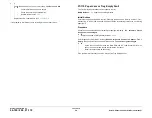
Replace the LVPS / HVPS PWB (
REP 1.5
),
PL 3.1
.
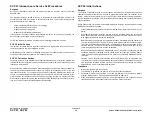
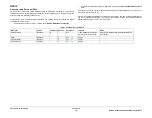
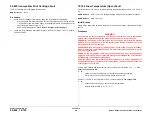
06-100 / 200 Laser Module (LSU) Motor Fault
06-100 - LSU Motor Lock Error: The machine has detected that the Laser Module Drive Motor
is not working correctly.
06-200 - LSU HSync Error: The machine has detected that the Laser Module Drive Motor is not
working correctly.
BSD-Reference:
6.1 Laser (ROS)
Procedure
WARNING
Do not perform repair activities with the power on or electrical power supplied to the
machine. The machine could activate and cause serious personal injury when the power
is on or electrical power is supplied.
DANGER: Ne pas effectuer de dépannage avec le contact principal activé ou avec l'ali-
mentation électrique appliquée à la machine: celle-ci pourrait démarrer et causer de
graves blessures.
AVVERTENZA: Non effettuare alcuna riparazione con la macchina accesa o con l'ali-
mentazione elettrica inserita. La macchina potrebbe avviarsi all'improvviso e causare
gravi ferite.
VORSICHT: Es dürfen keine Reparaturarbeiten durchgeführt werden, solange das Gerät
eingeschalten oder mit der Stromquelle verbunden ist. Das Gerät kann u.U in den Aktiv-
Zustand übergehen und somit erhebliche körperliche Schäden verursachen.
AVISO: No realice reparaciones con la máquina encendida o conectada a la corriente. La
máquina podría activarse y ocasionar daños personales graves.
WARNING
Use eye protection when performing the following procedure. Failure to wear eye pro-
tection could result in serious personal injury.
DANGER: Porter des lunettes de sécurité pendant la procédure suivante. À défaut, de
graves blessures peuvent se produire.
AVVERTENZA: Indossare occhiali di protezione durante la seguente procedura. In caso
contrario, si possono provocare gravi ferite.
VORSICHT: Folgende Verfahren dürfen nicht ohne Schutzbrille angewandt werden. Die
Nichteinhaltung dieser Regel kann zu ernsthaften körperlichen Verletzungen führen.
AVISO: Use gafas de protección para realizar el procedimiento siguiente. No proteger
los ojos puede ocasionar daños personales graves.
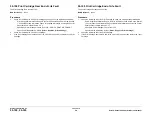
Enter Diagnostic (EDC) Mode. Select: [DC330 Component Control, 110 LSU, LSU Mot1
Run] to test the LSU motor. The motor runs.
Y
N
Check the Main Wire Harness and connectors between the Laser Module and Main
PWB. The connections are secure.
Y
N
•
Check that the connectors are secure and no contamination is present.
•
Check that there are no broken or defective wires.
•
Disconnect and securely reconnect the harness.
A
B
Summary of Contents for Phaser 3020
Page 1: ...Xerox Phaser 3020 Service Manual 702P02829 June 2014 Initial Issue ...
Page 2: ......
Page 4: ...June 2014 2 Xerox Phaser 3020 Printer Service Manual Initial Issue ...
Page 6: ...June 2014 ii Xerox Phaser 3020 Printer Service Manual Introduction ...
Page 18: ...June 2014 1 2 Xerox Phaser 3020 Printer Service Manual Service Call Procedures ...
Page 24: ...June 2014 2 2 Xerox Phaser 3020 Printer Service Manual Status Indicator RAPs ...
Page 36: ...June 2014 3 2 Xerox Phaser 3020 Printer Service Manual Image Quality ...
Page 46: ...June 2014 3 12 Xerox Phaser 3020 Printer Service Manual IQ11 Image Quality ...
Page 48: ...June 2014 4 2 Xerox Phaser 3020 Printer Service Manual Repairs ...
Page 74: ...June 2014 4 28 Xerox Phaser 3020 Printer Service Manual REP 1 18 Repairs ...
Page 76: ...June 2014 5 2 Xerox Phaser 3020 Printer Service Manual Parts List ...
Page 88: ...June 2014 6 2 Xerox Phaser 3020 Printer Service Manual General Procedures and Information ...
Page 108: ...Xerox Phaser 3020 Printer Service Manual June 2014 BSDs THIS PAGE INTENTIONALLY BLANK ...

