General Procedures / Information
6-40
12/04
FaxCentre F110
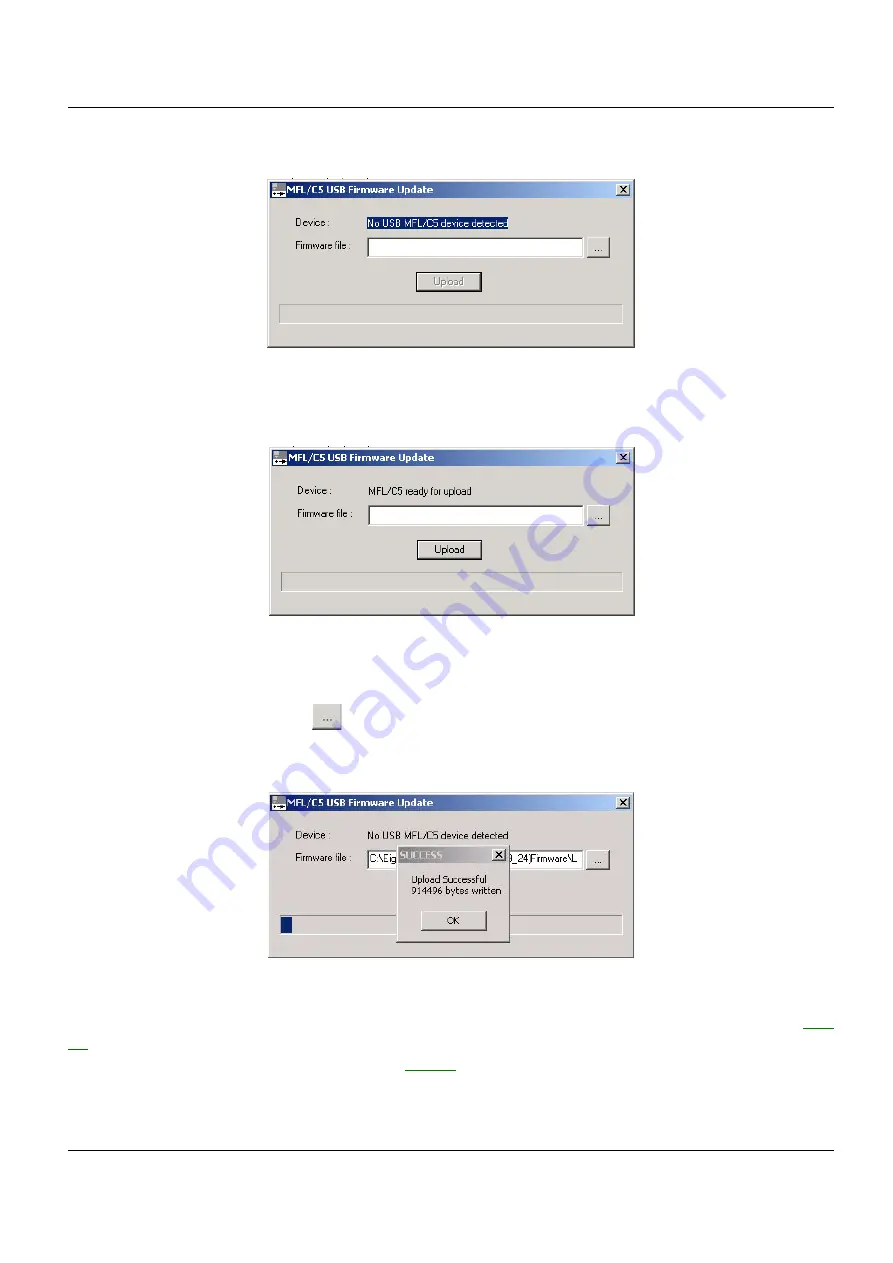
8. Following windows can appear on the PC screen (see Figure 1 and Figure 2).
Figure 1
No
“USB MFL/C5 device detected”
, means device not connected to PC or connected but without
power or.
Figure 2
“MFL/C5 ready for upload”
means the device is ready for firmware upgrade
9. Press the Browse Button
to select the location of the Firmware Binary file
10. Press the Upload Button and the upload will start.
Figure 3
You will get the message above in case of a successfully upload (see figure 3).
After a while the device will continue with a reboot and starts with the easy install procedure,
11. Go through the easy install procedure,
, to finish the update process.
12. Make a “ White Reference (Menu * W) “ adjustment.
Summary of Contents for FaxCentre F110
Page 1: ...12 04 FaxCentre F110 SERVICE MANUAL ...
Page 4: ...Introduction ii 12 04 FaxCentre F110 Page intentionally blank ...
Page 10: ...Service Call Procedures 1 2 12 04 FaxCentre F110 Page intentionally blank ...
Page 14: ...Status Indicator RAPs 2 2 12 04 FaxCentre F110 Page intentionally blank ...
Page 40: ...Image Quality 3 2 12 04 FaxCentre F110 Page intentionally blank ...
Page 56: ...Repairs Adjustments 4 2 12 04 FaxCentre F110 Page intentionally blank ...
Page 72: ...Repairs Adjustments 4 18 12 04 FaxCentre F110 Page intentionally blank ...
Page 74: ...Spare Parts List 5 2 12 04 FaxCentre F110 Page intentionally blank ...
Page 137: ...General Procedures Information FaxCentre F110 12 04 6 51 GP 17 18 Not Used ...
Page 190: ...General Procedures Information 6 104 12 04 FaxCentre F110 Page intentionally blank ...
Page 192: ...Wiring Diagrams 7 2 12 04 FaxCentre F110 Page intentionally blank ...
Page 198: ...Wiring Diagrams 7 8 12 04 FaxCentre F110 WD 6 Wiring Diagram Figure 1 ...
Page 200: ...Page intentionally blank ...
Page 202: ...XEROX EUROPE ...


