


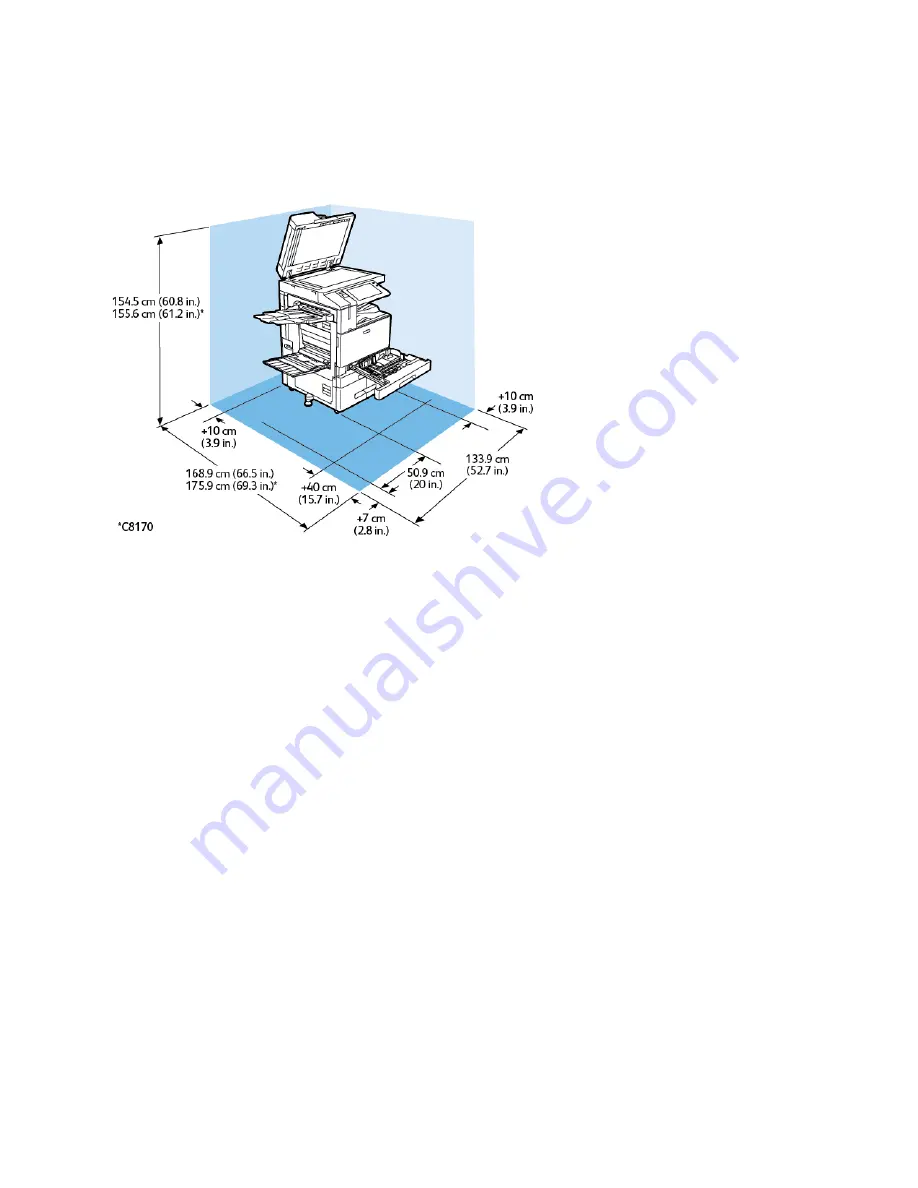
Clearance Requirements
B A S E C O N F I G U R AT I O N
Installation Space
• Width: 133.9 cm (52.7 in.)
• Depth:
–
C8130 / C8135 / C8145 / C8155: 168.9 cm (66.5 in.)
–
*C8170: 175.9 cm (69.3 in.)
• Height:
–
C8130 / C8135 / C8145 / C8155: 154.5 cm (60.8 in.)
–
*C8170: 155.6 cm (61.2 in.)
Clearance
• Front: 40 cm (15.7 in.)
• Rear: 10 cm (3.9 in.)
• Left: 57.9 cm (22.8 in.)
• Right: 10 cm (3.9 in.)
366
Xerox
®
AltaLink
®
C8130/C8135/C8145/C8155/C8170 Series Color Multifunction Printer User Guide


