


5.
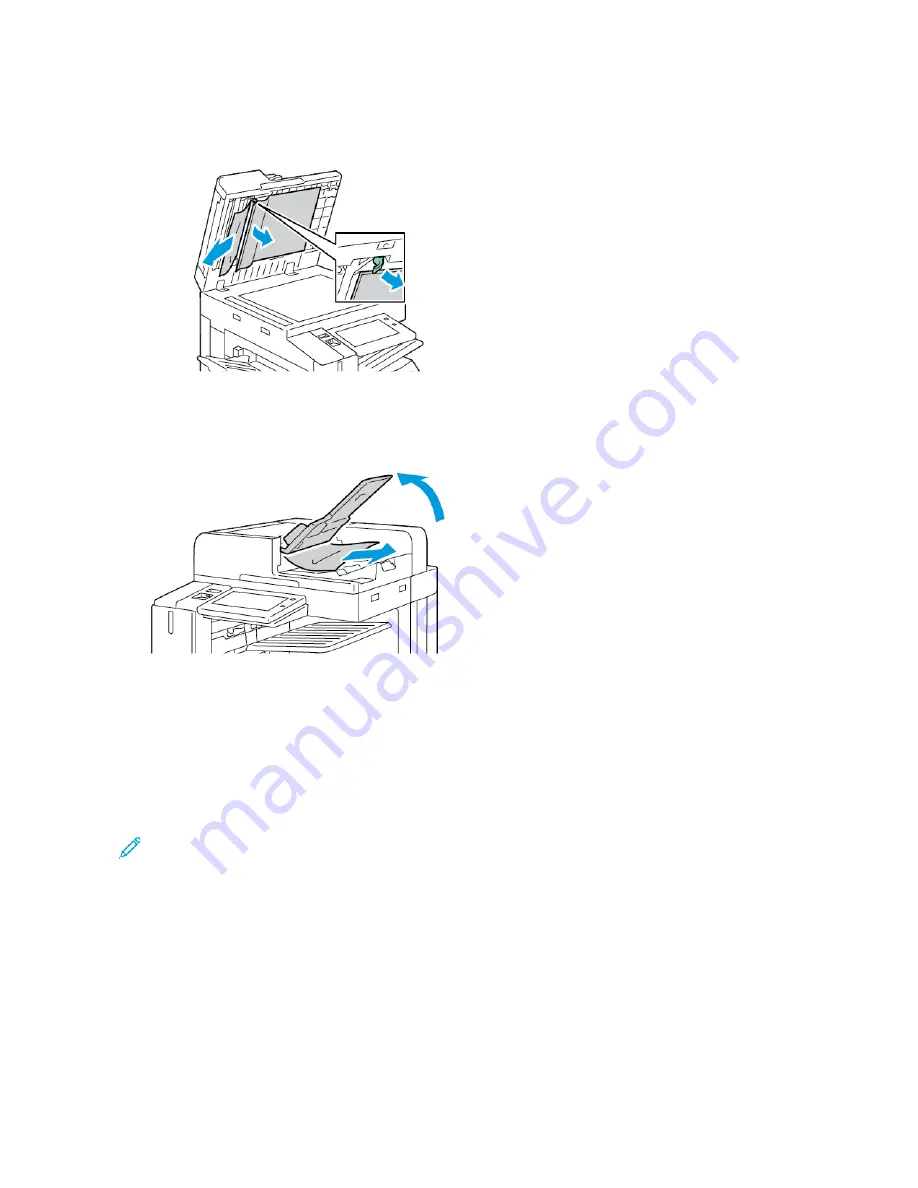
To access the second-side scanning lens assembly, on the left side of the document cover, lower the lever.
Remove the original document in the direction shown.
6.
If the original document is not visible when the document feeder top cover is opened, close the document
feeder. Lift the document feeder tray, then remove the jammed paper.
7.
Lower the document feeder tray.
8.
If the original document is not wrinkled or torn, load document into the feeder again, following the instructions
on the control panel. If your device has the multi-feed detection sensor, do one of the following:
• To continue the job with multi-feed detection enabled, touch TTrryy A
Aggaaiinn.
• To continue the job without multi-feed detection enabled, touch SSuupppprreessss M
Muullttii--ffeeeedd D
Deetteeccttiioonn.
• To cancel the job, touch C
Caanncceell JJoobb.
Note: After clearing a document-feeder jam, reload the entire document, including the pages that are
scanned already. The printer skips the scanned pages automatically, then scans the remaining pages.
Paper Tray Jams
If a jam occurs in the paper tray areas, a message appears to indicate the areas or paper tray that requires clearing.
To clear the jam, follow the instructions on the touch screen to locate the jammed paper, then clear the jam. When
removing jammed paper from the device, remove the paper in the direction it was feeding, and take care not to
leave any remnants of paper in the device.
After the paper tray jam has been cleared, the device continues printing the job from where the job stopped.
If further paper tray jams are experienced, try to load fresh paper in the paper tray. The paper could have excessive
Xerox
®
AltaLink
®
C8130/C8135/C8145/C8155/C8170 Series Color Multifunction Printer User Guide
299


