Tel: +49 (0) 8641 6948 - 60 | xgloo.com | [email protected]
27
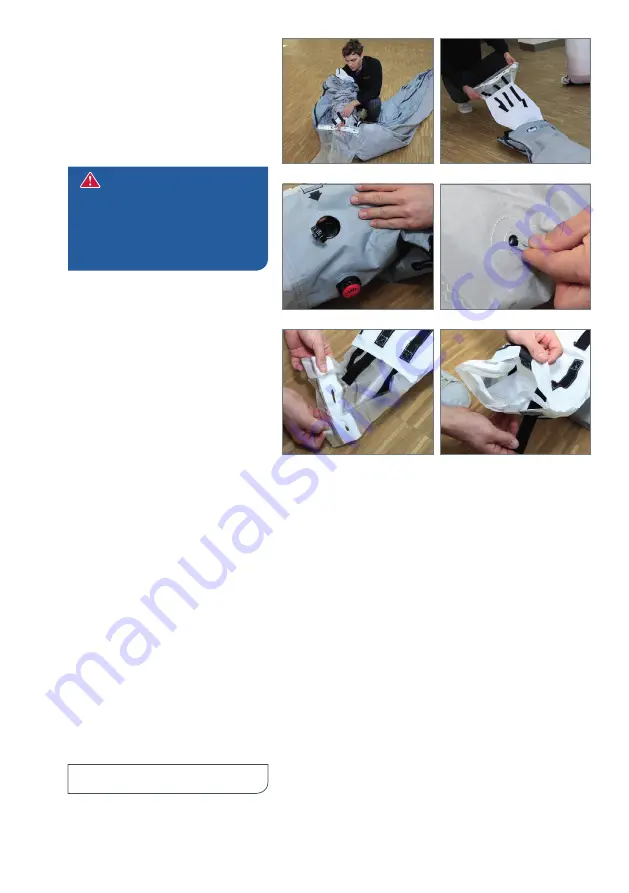
12 Now, starting from the bladder
sack at the opposite end, thread
the Tube completely onto your
arm. Grasp the end of the repla-
cement bladder through the up-
per bladder sack (k). Pull the re-
placement bladder carefully
into the Tube.
CAUTION:
Make sure that
the replacement bladder does
not get twisted when pulling
it in. Try to enlist the help of a
second person to help with this
procedure.
13 Feed the replacement bladder
completely through the Tube,
until the bladder extends be-
yond the opening in the bladder
sack at both ends (l).
14 Push both valves through the
corresponding holes in the Tube
and press firmly to secure the
velcro. Make sure that the blad-
der does not get caught or pin-
ched in the velcro (m).
15 Using the Fixing Element Tool
included with in your repair kit
(or a loop of thin rope or cord),
pull each of the fixing elements
through the corresponding holes
in the Tube (n).
16 Fold over the corners of the ex-
posed bladder so the ou-
ter-most elongated holes in the
bladder line up on top of those
just beside them. The result
should look like a row of three
visible holes instead of five (o).
17 Thread the three long velcro
straps through the correspon-
ding holes in the bladder and
bladder sack (p).
Continued on the next page...
m
o
n
p
k
l


