


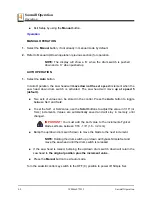


Sawmill Operation
Hydraulic Control Operation
4
4-2
WMdoc072919
Sawmill Operation
4.
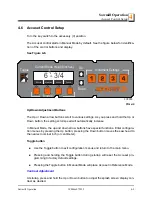
Unpin both log loader arms from the transport position.
5.
Raise the
LOG LOADER
lever to extend the legs of the log loader out as far as they will
go.
6.
Press down on the
TURNER UP/DOWN
lever to completely lower the turner arm.
IMPORTANT!
After the turner arm is all the way down, the side sup-
port braces will begin to lower.
Release the turner lever after the
turner arm is lowered, but before the side supports begin to
lower.
This stops the log being loaded from damaging the turner
and/or falling off the side of the sawmill.
7.
When raising the
TURNER UP/DOWN
lever, the side supports rise first. After reaching a
fully vertical position, the turner arm will engage and start to rise.
8.
Manually lower the log loader so it rests on the ground.
CAUTION!
Be careful when manually lowering the log loader. Do not
drop the loader onto the ground or perform any action which might
break the velocity fuse valves on the loader cylinders. These valves
control hydraulic flow and are necessary to prevent the loading arm
from collapsing during use.
9.
Press down on the
LOG LOADER
lever to lower the loading arm as far as it will go. Logs
must be rolled onto the loading arm one at a time for loading onto the bed of the mill.
TOE BOARDS
The front and rear toe boards should be below bed level when not in use. Once a tapered
log has been loaded, the front or rear end of the log may be lifted to parallel the heart of
the log to the path of the blade.
The front toe board is raised by lifting the
FRONT TOE BOARD
lever up. The rear toe
board is raised by lifting the
REAR TOE BOARD
lever up. Once a flat has been made
and the log is ready to be turned, push the appropriate toe board lever down to lower
either toe board until it falls below the level of the bed.


