42
WPS-550-BUL-IP Installation Manual
9.4. Camera A/V Settings
9.4.1. Image Settings Menu
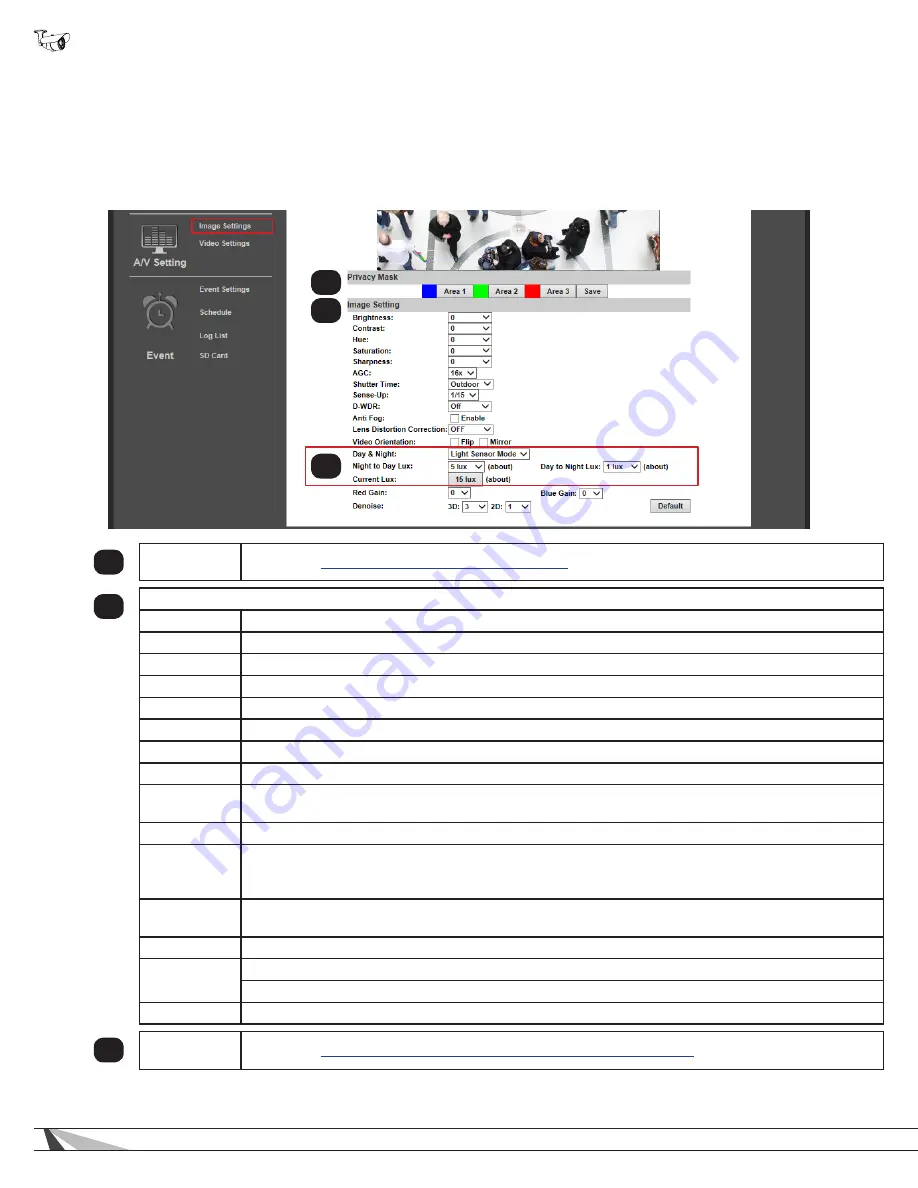
The image setting menu is used to set up the camera view for the best image possible. Brief descriptions of the menu are given
below. Complete instructions for setup are in the following sections.
•
Navigation: Log in as an administrator.
From Home Screen, click “Config” button in top right corner, then click “Image
Settings” in the left column menu.
1
Privacy Mask
See section
9.4.2.4. How To Configure Privacy Masks
2
Image Setting
Brightness
Adjust overall brightness from -4 (Low) to +4 (High). Default: zero (0).
Contrast
Adjust white levels from -4 (Low) to +4 (High). Default: zero (0).
Hue
Adjust the color tone (or tint) between -4 (Blue) and +4 (Red). Default: zero (0).
Saturation
Adjust color intensity from -4 (Low) to +4 (High). Default: zero (0).
Sharpness
Adjust edge detail from -4 (Low) to +4 (High). Default: zero (0).
AGC
Auto Gain Control balances high contrast scenes. Adjust from 16x (Low) to 64x (High). Default: 16x.
Shutter Time
Use automatic Indoor or Outdoor preset modes or set 1/30(Slow)-1/1000 (Fast). Default: Outdoor.
Sense-Up
Set slow shutter time for use in low light areas from 1/5 (Slow) to 1/30 (Fast). Default: 1/15.
D-WDR
Digital Wide Dynamic Range balances dark and bright areas in low-light scenes to maintain high image
quality. Turn on and set from 1 (Low) to 8 (High). Default: Off.
Anti-Fog
Check Enable to clear foggy scenes using software, Default: Off.
Lens
Distortion
Correction
Adjust the image so that curvature image distortion caused by the lens is reduced to a minimum. Turn
on and set from 1 (Low) to 8 (High). Default: Off.
Video
Orientation
Check the box for Flip or Mirror to change the image appearance. Both settings are disabled by default.
Red/Blue Gain
Set the red and blue balance from -5 (Low) to 5 (High). Default: 0.
Digital Noise
Reduction
3D -
Reduces noise around moving objects. Default: 5.
2D -
Reduces noise around stationary objects. Default: 1.
Default
Click to reset all Image Setting menu values.
3
Day and
Night Setting
See section
9.4.2. How to Configure Day and Night Settings (Color Modes)
1
2
3


