background image

14

ENGLISH INSTRUCTIONS

1. After grinding the meat following the 

“Grinding Instructions”, mix the ground 

meat with the sausage seasonings.

2. Follow the “Stuffer Assembly 

Instructions” or the “High-Speed Stuffer 

Assembly Instructions” to fully assemble 

the Grinder as a Stuffer including the 

Tray.

NOTE:  While one person can stuff 

sausage with this Grinder, it 

is recommended that two people 

perform this operation.  For best results 

when using the High-Speed Stainless 

Steel 10 mm Stuffing Funnel do not 

grind the meat through the 4.5 mm 

Grinding Plate.

3. Place seasoned ground meat into the 

Tray.  Do not overfill the Tray, place just 

enough meat to leave the Feed Chute 

area open.

4. Slide a sausage casing over the 

Stuffing Funnel.  See the “Sausage 

Information / Casing” section of 

this manual for more 

information.

5. Slide 4”-6” (10-15 cm) 

of casing from the end of 

the Stuffing Funnel and 

tie a knot in the end of the casing.  If you are using large diameter fibrous 

casing, hold the closed end of the casing tightly against the  end of the 

Stuffing Funnel 

(FIGURE 11).

6. Make sure the Grinder is in the “OFF” position. Attach the Grinder to the power 

supply.

7. Switch the Grinder to the forward “FWD” position.  Carefully start feeding 

ground meat into the Feed Chute.  ONLY USE THE STOMPER TO PUSH 

MEAT INTO THE HEAD,  DO NOT USE YOUR FINGERS OR ANY OTHER 

OBJECT.

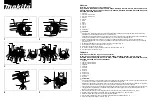
FIGURE 11

Tray

Stomper

Motor

Cover

Feed

Chute

Gear

Housing

CAUTION!

  It is important to follow the

“Food Safety” guidelines outlined in this

manual. For the most up to date 

instruction visit the USDA website.

NEVER operate Grinder without the

Tray/Safety Guard secured in place.

To avoid serious or fatal injury, NEVER reach 

into any Grinder inlet.

ALWAYS use the Stomper to push meat

into the Grinder Head.

Read & fully understand all instructions

& warnings prior to use.

WARNING!

STUFFING INSTRUCTIONS

WARNING!

  Before cleaning, assembling or disassembling the 

Grinder, make sure the Grinder Motor is OFF and the PLUG IS REMOVED 

FROM THE OUTLET/POWER SOURCE!

Summary of Contents for 08-0801-W

Page 1: ...pro series MEAT GRINDER SAUSAGE STUFFER REV111214 8 08 0801 W 12 08 1201 W 22 08 2201 W 32 08 3201 W E258759...

Page 2: ...N DE REVERSA INSTRUCCIONES PARA EL CORTADOR DE CIRCUITOS INSTRUCCIONES DE LA GUARDA DE SEGURIDAD SEGURIDAD DE LOS ALIMENTOS INFORMACI N DE LA SALCHICHA INFORMACI N DE GARANT A WESTON IMPORTANTES R GLE...

Page 3: ...r without the Tray Safety Guard secured in place To avoid serious or fatal injury NEVER reach into any Grinder inlet ALWAYS use the Stomper to push meat into the Grinder Head Read fully understand all...

Page 4: ...ETY RULES READ AND FULLY UNDERSTAND ALL INSTRUCTIONS AND WARNINGS PRIOR TO USING THIS UNIT YOUR SAFETY IS MOST IMPORTANT FAILURE TO COMPLY WITH PROCEDURES AND SAFE GUARDS MAY RESULT IN SERIOUS INJURY...

Page 5: ......

Page 6: ...EEL TRAY 08 0824 S 08 1224 S 08 2224 S 08 3224 S 12 SAFETY STOMPER 08 0877 08 0877 08 2277 N 08 2277 N 13 FUNNEL 40 MM 08 1040 08 1040 08 1040 08 1040 14 FUNNEL 30 MM 08 1030 08 1030 08 1030 08 1030 1...

Page 7: ...ker On Off Reverse Power Switch 8 12 Grinders 22 32 Grinders 8 12 Stomper 22 32 Stomper 8 12 Tray 22 32 Tray Flat head Screwdriver included with 22 32 Model Grinders only for the Safety Guard Safety G...

Page 8: ...he grounding tab which extends from the adapter must be connected to a permanent ground such as a properly grounded outlet box as shown in Figure C using a metal screw EXTENSION CORDS Use only 3 wire...

Page 9: ...ith a damp towel and wipe dry DO NOT IMMERSE THE MOTOR IN WATER OR OTHER LIQUIDS IMPORTANT Any metal parts should be coated with a food safe silicone spray to prevent rusting If not properly protected...

Page 10: ...inder Plates onto the Auger Pin align the notch in the Grinder Plate with the Pin in the Grinder Head 6 Install the Front Ring Nut DO NOT OVERTIGHTEN Turn the Front Ring Nut until it makes contact wit...

Page 11: ...er is in the OFF position Attach the Grinder to the power supply 8 Switch the Grinder to the forward FWD position Carefully start feeding cubes of meat into the Feed Chute ONLY USE THE STOMPER TO PUSH...

Page 12: ...Star over the round portion of the Auger Pin 5 Slide one of the Stuffing Funnels through the Flange and place it through the Front Ring Nut 6 Install the Front Ring Nut DO NOT OVERTIGHTEN Turn the Fro...

Page 13: ...nspect the Auger Bearing for wear If the Auger Bearing has excessive wear replace it to prevent head damage 4 Slide the High Speed Plastic Auger onto the Auger Pin making sure the square part of the P...

Page 14: ...end of the casing If you are using large diameter fibrous casing hold the closed end of the casing tightly against the end of the Stuffing Funnel FIGURE 11 6 Make sure the Grinder is in the OFF posit...

Page 15: ...appear in the sausage use a pin to prick the bubbles The small holes will seal naturally NEVER operate Grinder without the Tray Safety Guard secured in place To avoid serious or fatal injury NEVER rea...

Page 16: ...none of the above steps remedy the situation or if the Circuit Breaker repeatedly shuts off the Grinder contact a customer service for further assistance WARNING DO NOT continue to use the Grinder if...

Page 17: ...ray FIGURE 14 There is no need to completely remove the screws from the Safety Guard as they can be easily lost Remove the Safety Guard clean as instructed in the Cleaning Instructions then IMMEDIATEL...

Page 18: ...meat on a clean platter Don t use the same platter you used to carry the food out to the grill Wash the utensils used in grilling after the food is turned for the last time on the grill as well as sp...

Page 19: ...SING There are many different types of casings available the right choice depends on personal preference as well as the type of sausage you wish to make For most sausages your choices are natural or c...

Page 20: ...ON FROM WESTON PRODUCTS LLC LIMITATIONS The warranty is void if the product is used for any purpose other than that for which it is designed The product must not have been previously altered repaired...

Page 21: ...W 22 08 2201 W 32 08 3201 W Equipo de preparaci n de alimentos con potencia comercial E258759 Molino el ctrico de grado comercial para carne REV111214 Debido a constantes mejoras en la f brica el prod...

Page 22: ...lugar Para evitar lesiones serias o fatales NUNCA ingrese a ninguna entrada en el molino Utilice SIEMPRE el pis n para empujar los alimentos dentro del cabezal del molino Lea y entienda por completo...

Page 23: ...RTENCIAS ANTES DE UTILIZAR ESTA UNIDAD SU SEGURIDAD ES LO M S IMPORTANTE NO SEGUIR LOS PROCEDIMIENTOS Y PRECAUCIONES PUEDE PROVOCAR LESIONES GRAVES Y DA OS MATERIALES RECUERDE SU SEGURIDAD PERSONAL ES...

Page 24: ...2 U 08 1202 08 2202 N 08 3202 N 7 COJINETE DEL TORNILLO SINF N 08 0847 08 0847 08 3047 08 3047 8 CABEZAL DE ACERO INOXIDABLE 08 0809 W 08 1209 08 2209 W 08 3209 W 9 PATA DE CAUCHO CON TUERCAS 4 08 200...

Page 25: ...a Interruptor de encendido y apagado Los molinos 8 12 Los molinos 22 32 8 12 Pis n 22 32 Pis n 8 12 Charola 22 32 Charola Destornillador plano incluido con molinos Modelos 22 y 32 nicamente para la gu...

Page 26: ...idamente aterrizada como la que se muestra en la figura C usando un tornillo de metal NO modifique la clavija de ninguna manera CABLES DE EXTENSI N Use solamente cables de extensi n de 3 alambres que...

Page 27: ...iente todas las partes que entren en contacto con la carne PROCURE LIMPIAR LAS PARTES INMEDIATAMENTE DESPU S DE USARLAS NO SUMERJA EL MOTOR EN AGUA NI EN NING N OTRO L QUIDO 5 Enjuague las partes del...

Page 28: ...dor del tornillo sinf n alinee la muesca en la placa del molino con el pasador en el cabezal del molino 6 Instale la tuerca del anillo frontal NO APRIETE DEMASIADO Gire la tuerca del anillo frontal ha...

Page 29: ...r abierta el rea de la tolva de alimentaci n 6 Coloque un plato o un cuenco para recolectar la carne molida en el extremo del cabezal del molino FIGURA 4 INSTRUCCIONES PARA MOLER FIGURA 4 Charola Pis...

Page 30: ...rellenado en el extremo redondo del perno del taladro 5 Deslice uno de los embudos de rellenado a trav s de la brida y para hacerlo a trav s de la tuerca de anillo frontal 6 Instale la tuerca del ani...

Page 31: ...tiras del tornillo sinf n con el eje de transmisi n del molino NOTA Inspeccione de forma peri dica el cojinete del tornillo sinf n en busca de desgaste Si el cojinete del tornillo sinf n est desgastad...

Page 32: ...4 y 6 10 15 cm de funda desde el extremo del embudo de rellenado y haga un nudo en el extremo de la funda Si est utilizando una funda fibrosa de gran di metro mantenga el extremo cerrado de la funda f...

Page 33: ...e rellene salchichas rellene lentamente la funda para evitar bolsas de aire Si aparecen bolsas de aire en la salchicha utilice un alfiler para perforar las burbujas Los peque os agujeros se cerrar n d...

Page 34: ...e manera repetida p ngase en contacto con servicio al cliente para mayor asistencia ADVERTENCIA NO contin e utilizando el molino si el cortador de circuitos se dispara de forma repetida Seguir utiliz...

Page 35: ...seguridad ya que pueden perderse con facilidad Remueva la guarda de seguridad limpie seg n lo que se indica en las Instrucciones de limpieza y VUELVA A COLOCAR INMEDIATAMENTE la guarda de seguridad so...

Page 36: ...para llevar la carne al asador Lave los utensilios usados en el asador despu s de haber volteado los alimentos por ltima vez as como las cucharas y esp tulas usadas para fre r o para voltear la carne...

Page 37: ...ten muchos tipos diferentes de forros disponibles la elecci n correcta depende de su la preferencia personal as como del tipo de salchicha que desea elaborar Para la mayor a de las salchichas sus opci...

Page 38: ...A UNIDAD SIN LA AUTORIZACI N DE WESTON PRODUCTS LLC LIMITACIONES La garant a queda invalidada si el producto se utiliza para alg n objetivo que no sea aqu l para el cual est dise ado El producto no de...

Page 39: ...RIQUE ET REMPLISSEUR DE SAUCISSE 8 08 0801 W 12 08 1201 W 22 08 2201 W 32 08 3201 W PRO SERIES Motoris Commercial Homologu Pour Pr paration de Produits Aalimentaires E258759 lectrique et remplisseur d...

Page 40: ...ures graves voire mortelles NE JAMAIS METTRE LES MAINS dans l entr e du hachoir TOUJOURS utiliser le poussoir d aliments pour pousser la viande dans la t te du hachoir Lire et bien comprendre toutes l...

Page 41: ...CURIT LIRE ET COMPRENDRE COMPL TEMENT TOUTES LES DIRECTIVES ET AVERTISSEMENTS AVANT D UTILISER CE PRODUIT LE PLUS IMPORTANT EST VOTRE S CURIT LE D FAUT D OBSERVER LES PROC DURES ET MISES EN GARDE PEUT...

Page 42: ...CURIT 08 0877 08 0877 08 2277 N 08 2277 N 13 ENTONNOIR 40 MM 08 1040 08 1040 08 1040 08 1040 14 ENTONNOIR 30 MM 08 1030 08 1030 08 1030 08 1030 15 ENTONNOIR 20 MM 08 1020 08 1020 08 1020 08 1020 16 SU...

Page 43: ...re Hachoirs n 8 et n 12 Hachoirs n 22 et n 32 N 8 et n 12 Poussoir N 22 et n 32 Poussoir N 8 et n 12 Plateau N 22 et n 32 Plateau Tournevis t te plate inclus avec les mod les de hachoir n 22 et n 32 u...

Page 44: ...tre branch e une masse permanente comme une prise de courant correctement mise la terre l aide d une vis en m tal comme il est illustr la figure C RALLONGES Utiliser uniquement des rallonges polaris e...

Page 45: ...ite NE JAMAIS IMMERGER LE MOTEUR DANS L EAU OU TOUT AUTRE LIQUIDE IMPORTANT Toutes les pi ces m talliques doivent tre vaporis es de silicone qualit alimentaire en pr vention de la rouille si ces pi ce...

Page 46: ...sur la vis sans fin aligner l encoche de la plaque de hachage la goupille de la t te du hachoir 6 Installer l crou annulaire avant NE PAS SERRER AVEC EXC S Tourner l crou annulaire avant jusqu ce qu...

Page 47: ...iton d avancement FWD Placer soigneusement des cubes de viande dans la chute d aliments POUR POUSSER LA VIANDE DANS LA T TE UTILISER UNIQUEMENT LE POUSSOIR D ALIMENTS NE PAS UTILISER LES DOIGTS OU UN...

Page 48: ...bourrage sur la partie ronde de la goupille de la vis sans fin 5 D placer l un des entonnoirs de bourragepar la bride puis par l crou annulaire avant 6 Installer l crou annulaire avant NE PAS SERRER A...

Page 49: ...rement us le remplacer imm diatement pour ne pas endommager la t te 4 D placer la vis sans fin en plastique haute vitesse sur la goupille de la vis sans fin en veillant ce que la section carr e de la...

Page 50: ...u Placer une quantit suffisante de viande et ne pas obstruer la zone de la chue d aliments 4 Placer une enveloppe de saucisse par dessus l entonnoir de bourrage Pour de plus amples informations voir l...

Page 51: ...dans le hachoir mesure que la farce remplit l enveloppe l taler sur une surface propre et s che REMARQUE Lors de l utilisation d enveloppe naturelle humidifier la surface 9 Ne pas remplir les derniers...

Page 52: ...e probl me ou si le disjoncteurcontinue d teindre brusquement le hachoir contacter un repr sentant du service client le AVERTISSEMENT CESSER d utiliser le hachoir si le disjoncteur est d clench plusie...

Page 53: ...positif de s curit qui peuvent en outre se perdre facilement Retirer le dispositif de s curit le nettoyer selon les Instructions de nettoyage et REPLACER IMM DIATEMENT Le dispositif de s curit sur le...

Page 54: ...ur la derni re fois sur le grill aussi bien que les spatules et cuillers utilis es pour faire sauter feu vif en remuant ou pour tourner la viande au fur et mesure qu elle cuit Assurez vous de bien lav...

Page 55: ...reux types de boyaux diff rents disponibles le bon choix d pend de la pr f rence personnelle aussi bien que le type de saucisse que vous d sirez faire Pour la plupart des saucisses vos choix sont natu...

Page 56: ......

Page 57: ...est annul e si le produit est utilis pour toute raison autre que pour laquelle il est con u Le produit ne doit pas avoir t ant rieurement modifi r par ou entretenu par quelqu un autre que Weston Produ...

Page 58: ......

Page 59: ......

Page 60: ...HNE du lundi au vendredi CustomerService WestonProducts com Num ro de t l phone du service client le pour les r sidents des U 1 440 638 3131 Num ro de t l phone l ext rieur des U 001 440 638 3131 Wes...

Reviews: