·
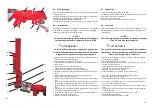
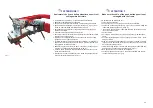
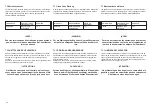
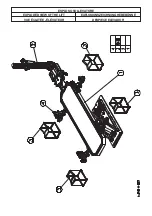
Regolare in altezza le morse ,alentando le viti(4) che scorrono su ap-
posite asole,in modo da portare l'autovettura in piano; quindi serrarle.
·
Serrare le viti(5);
·
Serrare le viti(6);
·
A questo punto il sollevatore puo' esssere comandato in salitya per
qualche centimetro.
·
Posizionare per ciascuna staffa ,la rispettiva piastra (2) e serrare le
viti di fissaggio.
f.Utilizzo del braccio di tiro
·
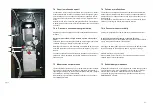
Effettuare la procedura di installazione del braccio di tiro,come de-
scritto nel paragrafo 4.4
·
Attaccare il gancio montato sulla catena alla zona della carrozzeria
da porre in trazione.
·
Ruotare il braccio orizzontale nella posizione desiderata e bloccarlo
con il proprio perno.
·
Collegare l'apposito cavo di sicurezza.
·
Utilizzando la pompa esterna, azionare il cilindro in modo da trazio-
nare la catena.
!!! PERICOLO!!!
Una volta sistemato il braccio e la castena,prima di
comandare l'azione di tiro,occorre assicurarsi che
nelle immediate vicinanze del braccio e in particolare
dietro lo stesso ,non sia presente nessun operatore.
5.4 Regolzioni
Il sollevatore non necessita di nessun tipo di regolazioni sia in sede
d'installazione che durante il funzionamento.
·
Adjust the vices in height, loosening the screws (4) that slide in the
slots, to bring the car level and then tighten them.
·
Tighten the screws (5).
·
Tighten the screws (6).
·
The lift can now be raised a few centimetres.
·
Position each bracket’s plate (2) and tighten the securing screws.
f.Using the pulling arm
·
Proceed with installation of the pulling arm as described in paragraph
4.4.
·
Fasten the hook mounted on the chain to the part of the bodywork
that has to be pulled.
·
Turn the horizontal arm into the position wanted and lock it with its
pin.
·
Connect the safety cable.
·
Operate the cylinder, using the external pump, to tension the chain.
!!!DANGER!!!
Once the arm and chain have been adjusted properly,
before giving the pull command, make sure there is
no one in the immediate vicinity of the arm and in
particular behind it.
5.4 Adjustments
The lift needs no adjustments, neither when installing it nor when it is
being used.
37

