


User’s Guide
Configuring your Computers
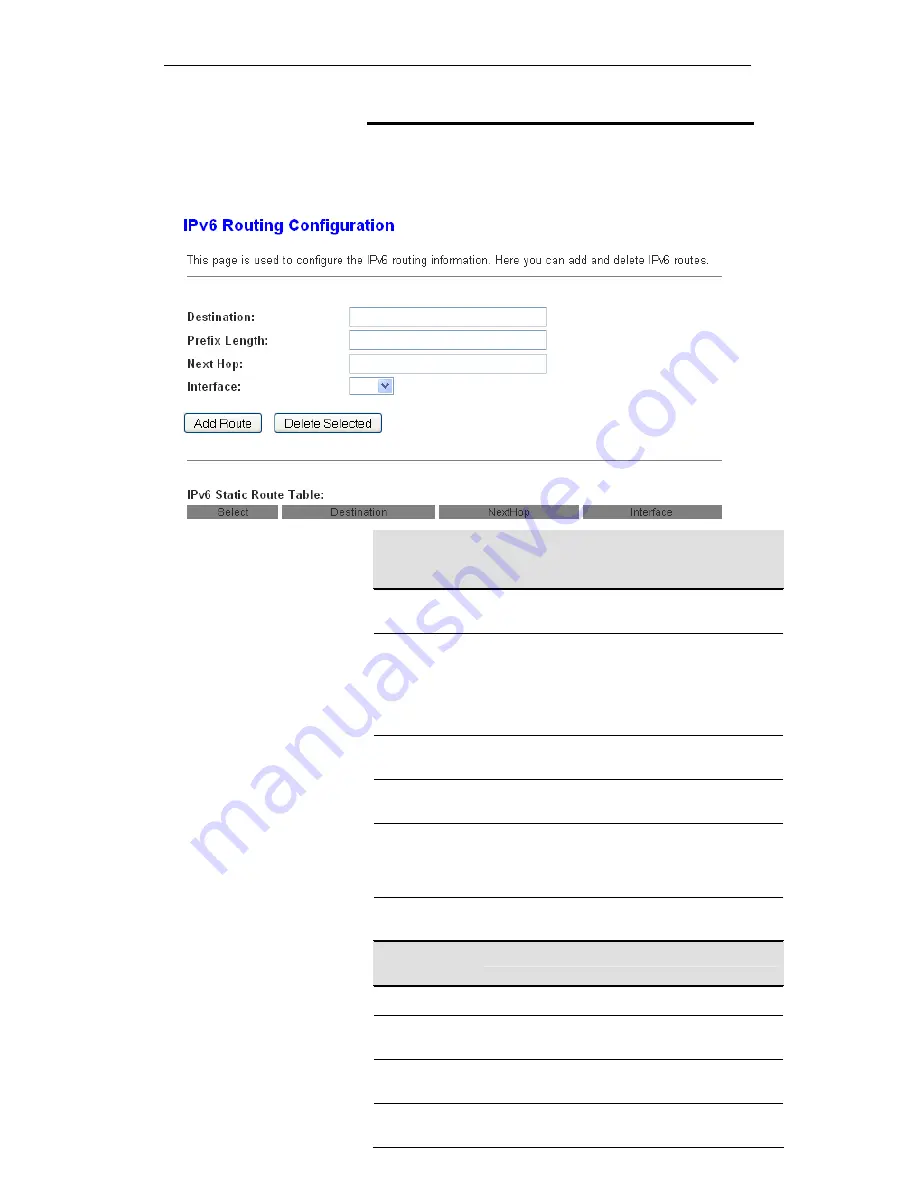
IPv6 Static Route
This page is used to configure the ipv6 routing information. Here
you can add/delete IPv6 routes.
2. From
the
head
Advance
menu, click on
Route -> IPv6
Static Route
. The following page is displayed:
114
Fields on the
first setting
block
Description
Enable
Check to enable the selected route or route to be
added.
Destination
The network IP address of the subnet. The destination
can be specified as the IP address of a subnet or a
specific host in the subnet. It can also be specified as
all zeros to indicate that this route should be used for
all destinations for which no other route is defined (this
is the route that creates the default gateway).
Subnet Mask
The network mask of the destination subnet. The
default gateway uses a mask of 0.0.0.0.
Next Hop
The IP address of the next hop through which traffic
will flow towards the destination subnet.
Metric
Defines the number of hops between network nodes
that data packets travel. The default value is 0, which
means that the subnet is directly one hop away on the
local LAN network.
Interface
The WAN interface to which a static routing subnet is
to be applied.
Function
buttons
Description
Add Route
Add a user-defined destination route.
Update
Update the selected destination route on the
Static
Route Table
.
Delete Selected
Delete a selected destination route on the
Static
Route Table
.
Show Routes
Click this button to view the DSL device’s routing table.
The IP Route Table displays, as shown in Figure.
Summary of Contents for DA-300N
Page 1: ...Wireless ADSL2 Router User s Guide WELL DA 300N Wireless ADSL2 Router User s Manual 1 ...
Page 15: ...Wireless ADSL2 Router User s Guide Figure3 RESET button 15 ...
Page 22: ...Wireless ADSL2 Router User s Guide 4 Double click on Internet Protocol Version 4 TCP IPv4 22 ...
Page 33: ...Wireless ADSL2 Router User s Guide Figure 1 Homepage 33 ...
Page 38: ...Wireless ADSL2 Router User s Guide 38 ...
Page 41: ...Wireless ADSL2 Router User s Guide 41 ...
Page 53: ...Wireless ADSL2 Router User s Guide 53 ...
Page 58: ......
Page 60: ...User s Guide Configuring your Computers 60 ...
Page 82: ...User s Guide Configuring your Computers 82 ...
Page 98: ...User s Guide Configuring your Computers 11 Enter AP s Self PIN Number and click next 98 ...
Page 100: ...User s Guide Configuring your Computers 13 Enter the Passphrase and then click Next 100 ...
Page 139: ...User s Guide Configuring your Computers 139 ...
Page 171: ...User s Guide Configuring your Computers 171 ...


