Benchmark Platinum-Edge: Operation-Service Manual
SECTION 8 – MAINTENANCE
OMM-0137_D • GF-211
•
7/16/2019
Technical Support
•
(800) 526-0288
•
Mon-Fri, 8 am - 5 pm EST Page 111 of 146
Rear Refractory Replacement Instructions
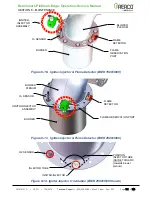
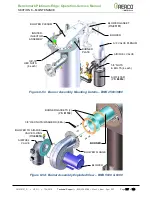
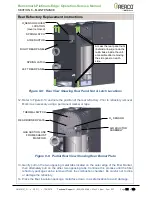
Figure 8-8: Rear View Showing Rear Panel Nut & Latch Locations
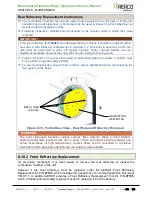
12. Refer to Figure 8-10 and note the position of the rear refractory. Prior to refractory removal.
Mark it as necessary using a permanent marker or tape.
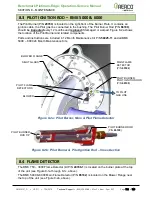
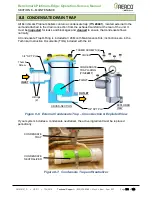
Figure 8-9: Partial Rear View Showing Rear Burner Plate
13. Gently pull on the two opposing metal tabs located on the outer edge of the fiber blanket,
then alternately pull on the other two opposing tabs. Continue this process until the fiber
refractory package can be removed from the combustion chamber. Be careful not to drop
or damage the refractory.
14. Place the fiber insulation package, metal face down, in a safe location to avoid damage.
LEFT REAR PANEL
SPRING LATCH
RIGHT REAR PANEL
SPRING LATCH
Access the rear panel nuts
(behind arrows) are on the
rail & base inside the unit,
accessible after removing
the side panel on each
side.
O
2
SENSOR COVER
LOCATION
(cover removed)
AIR EDUCTOR
THERMAL SWITCH
REAR BURNER PLATE
O
2
SENSOR
GAS SUCTION LINE
FROM EXHAUST
MANIFOLD
AIR EDUCTOR
ASSEMBLY

