Benchmark 750-3000 Installation & Startup Manual
SECTION 4
– INITIAL START-UP
OMM-115_D
•
GF-200
•
5/9/2019
Technical Support
•
(800) 526-0288
•
Mon-Fri, 8 am - 5 pm EST Page 63 of
126
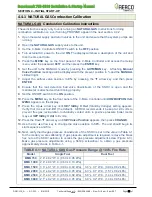
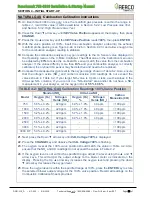
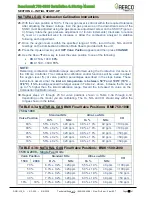
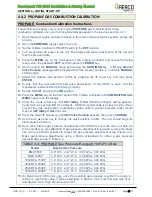
4.4.1 NATURAL GAS Combustion Calibration
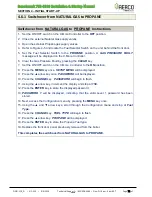
NATURAL GAS Combustion Calibration Instructions
These instructions apply only to units running on
NATURAL GAS
. Instructions for doing
combustion calibration on a unit running PROPANE appear in the next section, 4.4.2.
1.
Open the water supply and return valves to the unit and ensure that the system pumps are
running.
2.
Open the
NATURAL GAS
supply valve to the unit.
3.
Set the C-
More Controller’s ON/OFF switch to the
OFF
position
4.
Turn external AC power to the unit
ON
. The display will show a description of the unit and
then the time and date.
5.
Press the
MENU
key on the front panel of the C-More Controller and access the
Setup
menu, enter the password
6817
and then press the
ENTER
key.
6.
Set the unit to the MANUAL mode by pressing the
AUTO/MAN
key. A flashing
Manual
Valve Position
message will be displayed with the present position in % and the
MANUAL
LED will light.
7.
Adjust the air/fuel valve position to
0%
by pressing the
▼ arrow key and then press
ENTER
.
8.
Ensure that the leak detection ball valve downstream of the SSOV is open and the
manometer is attached and functioning properly.
9.
Set
the
ON/OFF
switch
to
the
ON
position
.
10.
Press the
MENU
key on the front panel of the C-More Controller until
COMBUSTION CAL
MENU
appears on the display.
11.
Press the Up ▲ arrow key until
SET
Stdby V Out (Standby Voltage)
setting appears.
Verify that it is set to
2.0 V
(the default). AERCO recommends it be kept at 2.0 volts to
prevent flue gas recirculation. Individually vented units in positive pressure boiler rooms
may set
SET
Stdby V Out
to
0
volts.
12.
Press the Down
▼ arrow key until
SET Valve Position
appears, then press
CHANGE
.
13.
Use the Up ▲ arrow key to change the valve position to
30
%. The unit should begin its
start sequence and fire.
14.
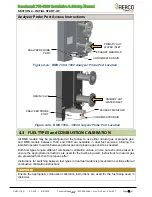
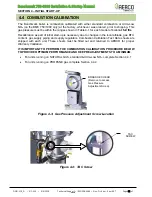
Next, verify that the gas pressure downstream of the SSOV is set to the value in Table 4-1
for the model you are calibrating. If gas pressure adjustment is required, remove the brass
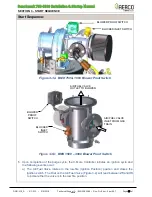
hex nut on the SSOV actuator to access the gas pressure adjustment screw (Figure 4-3).
Make gas pressure adjustments using a flat-tip screwdriver to obtain a gas pressure
approximately shown in Table 4-1.
TABLE 4-1: NATURAL GAS Gas Pressure Range @ 100% Fire Rate
Model
Single Fuel
Dual Fuel
BMK 750
2.0” ± 0.2” W.C. (0.50 ± 0.05 kPa)
-
BMK 1000
2.4” ± 0.4” W.C. (0.60 ± 0.10 kPa)
-
BMK 1500
3.6” ± 0.1” W.C. (0.90 ± 0.02 kPa)
3.6” ± 0.1” W.C. (0.90 ± 0.02 kPa)
BMK 2000
3.4” ± 0.2” W.C. (0.85 ± 0.05 kPa)
6.3” ± 0.1” W.C. (1.57 ± 0.02 kPa)
BMK 2500
2.0” ± 0.1” W.C. (0.50 ± 0.02 kPa)
5.8” ± 0.1” W.C. (1.44 ± 0.02 kPa)
BMK 3000
2.1” ± 0.2” W.C. (0.52 ± 0.05 kPa)
6.0” ± 0.2” W.C. (1.49 ± 0.05 kPa)

