16
☛
If the servo arm has more than four holes in it, it may
hit the side of the fuselage when it's installed. If that's the
case, use a modeling knife to cut the arm shorter.
❑
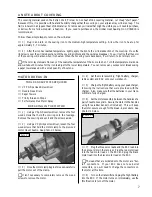
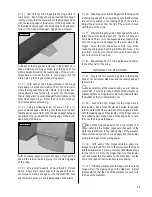
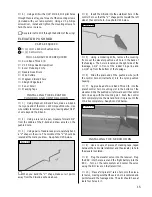
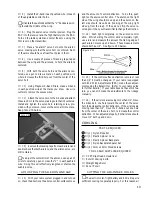
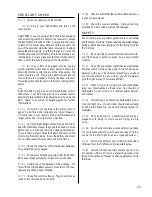
11) With both the servo horn and the elevator cen-
tered, use a pen and draw a mark on the pushrod wire
where it crosses the third hole out from the center of the
servo horn.
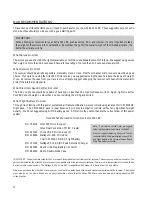
See photo # 23 below.
❑
12) Using Magnum Z-Bend Pliers, make a Z-bend
in the pushrod wire at the mark you drew. Use wire cut-
ters to remove the excess wire.
❑
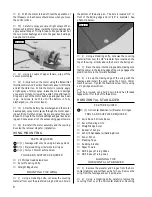
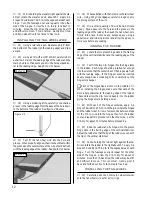
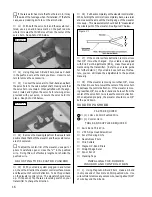
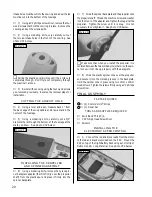
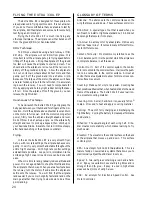
13) Connect the servo arm to the Z-bend and attach
the servo horn to the servo output shaft, making sure that
the servo horn is centered. When satisfied with the align-
ment, install and tighten the servo horn retaining screw,
provided with your servo, to secure the servo horn into
place.
See photo # 24 below.
Photo # 23
Photo # 24
❑
14) Remove the masking tape from the elevator and
double check that both the elevator and the elevator servo
are still centered.
☛
To adjust the center-trim of the elevator, use a pair of
pliers to carefully open or close the "V" in the pushrod
wire. Doing this will effectively lengthen or shorten the
pushrod wire.
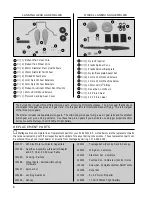
ADJUSTING THE ELEVATOR PUSHROD
❑
15) With your radio system plugged in and turned
on, check the direction the elevator control surface moves
and the amount of control deflection. To do this pull back
on the elevator control stick. The elevator should move
up. If it does not, flip the servo reversing switch on your
transmitter to change the direction.
❑
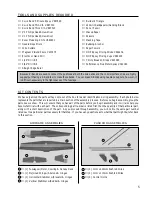
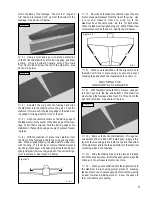
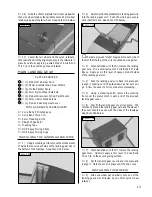
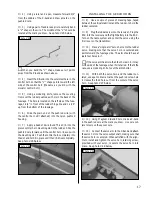
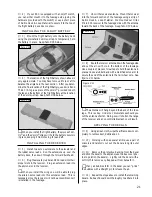
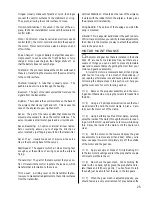
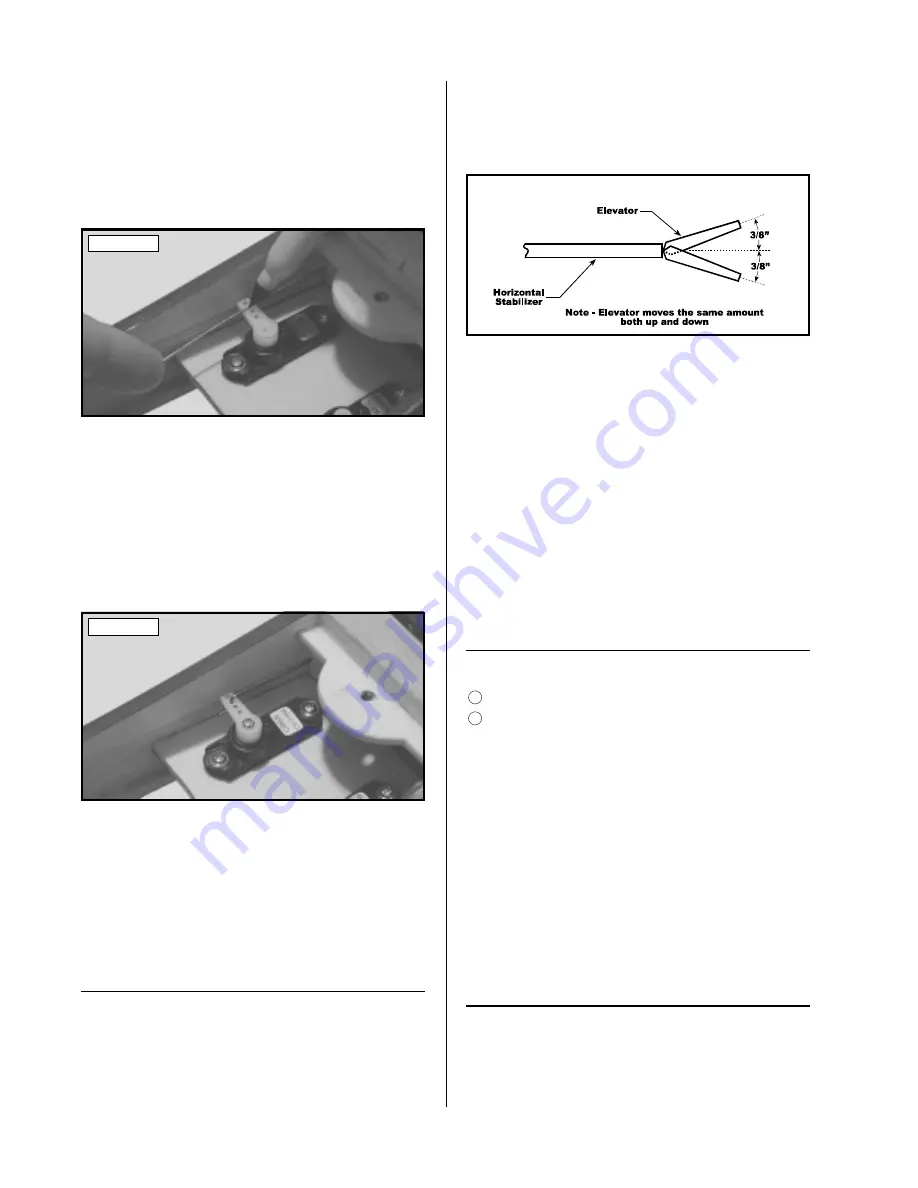
16) Pull back completely on the elevator control stick.
While holding the control stick completely back, use a ruler
and measure the amount the trailing edge of the elevator
moves up. This measurement should be 3/8" measured at
the widest point of the elevator.
See figure # 7 below.
Figure # 7
❑
17) If the control surface deflection is more or less
than 3/8" it must be changed. If your radio is equipped
with End Point Adjustments (EPA), make those adjust-
ments using the transmitter. (Refer to your radio guide
for further details.) If your radio does not have this fea-
ture, you can still make the adjustments to the pushrod
manually.
❑
18) If the elevator is moving
more
than 3/8", move
the Z-bend in one hole toward the center of the servo horn
to decrease the control deflection. If the elevator is mov-
ing
less
than 3/8", move the Z-bend one hole out from the
center of the servo horn to increase the control deflection.
When adjusted properly, the elevator should move 3/8"
both up and down.
PARTS REQUIRED
TOOLS AND SUPPLIES REQUIRED
RUDDER PUSHROD
❑
Kwik Bond Thick C/A
❑
# 0 Phillips Head Screwdriver
❑
Excel Modeling Knife
❑
Needle Nose Pliers
❑
Wire Cutters
❑
Magnum Z-Bend Pliers
❑
Straight Edge Ruler
❑
Pen or Pencil
❑
Masking Tape
❑
{1} 1mm x 420mm Pushrod Wire
❑
{1} Control Horn
5
7
INSTALLING THE RUDDER
PUSHROD AND CONTROL HORN
❑
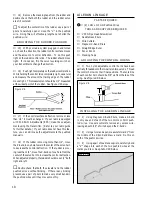
1) Using Magnum Z-Bend Pliers, make a Z-bend
in only one end of the 1mm x 420mm pushrod wire. Use
wire cutters to remove any excess wire, leaving about 3/16"
of wire beyond the Z-bend.


