10
PARTS REQUIRED
TOOLS AND SUPPLIES REQUIRED
VERTICAL STABILIZER
❑
Kwik Bond 5 Minute Epoxy
❑
Excel Modeling Knife
❑
Straight Edge Ruler
❑
Builder's Triangle
❑
220 Grit Sandpaper w/Sanding Block
❑
Pen or Pencil
❑
Masking Tape
❑
Rubbing Alcohol
❑
Paper Towels
❑
NHP Epoxy Mixing Sticks
❑
NHP Epoxy Mixing Cups
❑
{1} Vertical Stabilizer w/Rudder & Hinges
4
ALIGNING THE
VERTICAL STABILIZER
❑
1) Remove the rudder and hinges from the vertical
stabilizer and set them aside for now.
❑
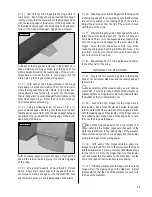
2) Using a modeling knife, carefully remove the
covering from over the vertical stabilizer mounting slot
in the top of the fuselage. The slot is 1-1/4" long and
1/8" wide, and is located 2-1/2" in front of the back edge
of the fuselage.
❑
3) Slide the vertical stabilizer into the mounting
slot in the fuselage. Push the stabilizer down firmly and
adjust it until the trailing edge is even with the back edge
of the fuselage.
❑
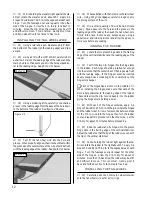
4) While holding the vertical stabilizer firmly in
place, use a pen to outline the base of the stabilizer onto
the top of the fuselage.
❑
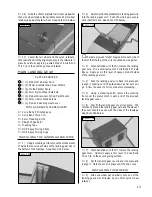
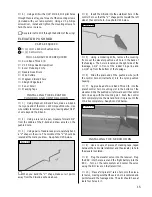
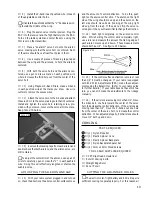
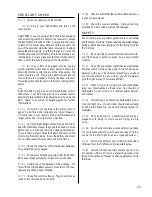
5) Remove the stabilizer. Using a modeling knife,
carefully cut away and remove the covering from inside
the outline you drew.
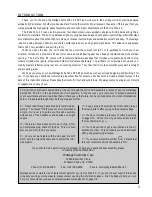
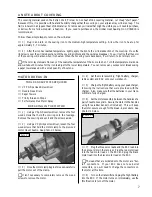
See photo # 8 below.
Photo # 8
❑
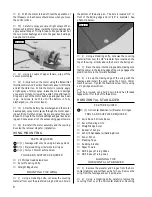
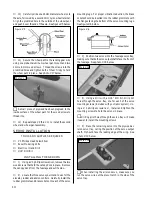
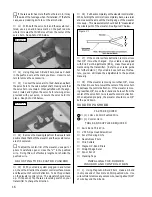
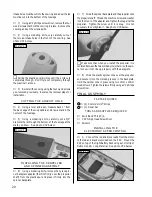
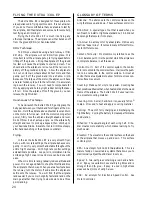
6) Slide the vertical stabilizer back into place and
realign it. Using a builder's triangle, check to ensure
that the vertical stabilizer is aligned 90º to the horizon-
tal stabilizer.
See figure # 3 below.
Figure # 3
❑
7) Mix a generous amount of Kwik Bond 5 Minute
Epoxy. Apply a thin layer to the mounting slot in the top
of the fuselage and to the sides and bottom of the vertical
stabilizer mounting area.
❑
8) Slide the stabilizer back into place and realign it,
double checking all of your measurements. Hold the sta-
bilizer in place using several pieces of masking tape and
remove any excess epoxy using a paper towel and rub-
bing alcohol before the epoxy sets up. Allow the epoxy
to fully cure before proceeding.
ALIGNING THE
VERTICAL STABILIZER
PARTS REQUIRED
TOOLS AND SUPPLIES REQUIRED
CONTROL SURFACE HINGING
❑
Kwik Bond 5 Minute Epoxy
❑
Kwik Bond Thin C/A
❑
Excel Modeling Knife
❑
Electric or Hand Drill
❑
1/16" Drill Bit
❑
Straight Edge Ruler
❑
220 Grit Sandpaper w/Sanding Block
❑
Pen or Pencil
❑
Waxed Paper
❑
Rubbing Alcohol
❑
Paper Towels
❑
NHP Epoxy Mixing Sticks
❑
NHP Epoxy Mixing Cups
❑
{1} Prebent Tail Wheel Wire
❑
{1} 15mm Tail Wheel
❑
{2} 1mm Nylon Tail Wheel Retainers
9
11
13
HINGING THE AILERONS
❑
1) Locate the three precut hinge slots in the trailing
edge of each half of the wing and the leading edge of each
of the two ailerons.


