background image

5-58

Maintenance Procedures

Fitting the ESI probe tip and gasket

Required materials

Chemical-resistant, powder-free gloves

10-mm  wrench

New metal gasket

To fit the ESI probe tip and gasket

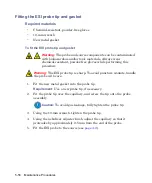
1. Fit the new metal gasket into the probe tip.

Requirement: 

Use a new probe tip, if necessary.

2. Fit the probe tip over the capillary, and screw the tip onto the probe 

assembly.

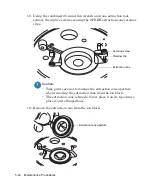
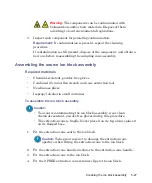
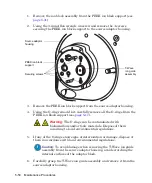
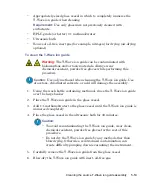
3. Using the 10-mm wrench, tighten the probe tip.

4. Using the nebulizer adjuster knob, adjust the capillary so that it 

protrudes by approximately 0.5 mm from the end of the probe.

5. Fit the ESI probe to the source (see 

page 3-2

).

Warning: 

The probe and source components can be contaminated 

with biohazardous and/or toxic materials. Always wear 

chemical-resistant, powder-free gloves while performing this 

procedure.

Warning: 

The ESI probe tip is sharp. To avoid puncture wounds, handle 

the probe with care.

Caution: 

To avoid gas leakage, fully tighten the probe tip.

Summary of Contents for SYNAPT G2

Page 1: ...Waters SYNAPT G2 Mass Spectrometry System Operator s Overview and Maintenance Guide Revision A Copyright Waters Corporation 2009 All rights reserved...

Page 2: ...ication In no event shall Waters Corporation be liable for incidental or consequential damages in connection with or arising from its use Trademarks ACQUITY ACQUITY UPLC Connections Insight ESCi UPLC...

Page 3: ...encounter in this document or to suggest ideas for otherwise improving it Please help us better understand what you expect from our documentation so that we can continuously improve its accuracy and u...

Page 4: ...esentative for guidance When you develop methods follow the Protocol for the Adoption of Analytical Methods in the Clinical Chemistry Laboratory American Journal of Medical Technology 44 1 pages 30 37...

Page 5: ...C solvent if the nitrogen supply fails Warning To confirm the integrity of the source exhaust system renew the source O rings at intervals not exceeding one year To avoid chemical degradation of the s...

Page 6: ...mperature hazard Mass spectrometer high temperature hazard Warning To avoid burn injuries avoid touching the source enclosure with your hand when operating or servicing the instrument Source ion block...

Page 7: ...vel of residual contamination permissible Management must also prescribe the method of decontamination to be used and the appropriate protection for personnel undertaking the decontamination process Y...

Page 8: ...ment to be used as a research tool to deliver authenticated exact mass measurement It is not for use in diagnostic procedures Symbol Definition Confirms that a manufactured product complies with all a...

Page 9: ...al normal and above normal levels of a compound Ensure that QC sample results fall within an acceptable range and evaluate precision from day to day and run to run Data collected when QC samples are o...

Page 10: ...x EC Authorized Representative Waters Corporation Micromass UK Ltd Floats Road Wythenshawe Manchester M23 9LZ United Kingdom Telephone 44 161 946 2400 Fax 44 161 946 2480 Contact Quality manager...

Page 11: ...viii Audience and purpose viii Intended use viii Calibrating ix Quality control ix ISM classification ix ISM Classification ISM Group 1 Class A ix EC Authorized Representative x 1 System Overview 1 1...

Page 12: ...analyzer 1 15 Mass spectrometer configuration 1 17 Triwave device 1 17 TOF 1 17 Leak sensors 1 18 Vacuum system 1 18 Controls on the instrument s rear panel 1 19 2 Starting Up and Shutting Down the Ma...

Page 13: ...from the source 3 18 Removing the APCI probe 3 18 Configuring for ESCi mode 3 19 Optimizing the ESI probe for ESCi operation 3 19 Installing the corona pin in the source 3 19 Removing the corona pin...

Page 14: ...pin 5 12 Installing the corona pin in the source 5 12 Removing the corona pin from the source 5 14 Operating the source isolation valve 5 15 Removing O rings and seals 5 17 Cleaning the mass spectrom...

Page 15: ...e T Wave ion guide assembly 5 54 Fitting the T Wave ion guide assembly PEEK ion block support and ion block assembly to the source assembly 5 54 Replacing the ESI probe tip and gasket 5 55 Removing th...

Page 16: ...ing the IntelliStart Fluidics tubing 5 98 Removing the IntelliStart Fluidics tubing 5 99 Plumbing the IntelliStart Fluidics LockSpray system 5 99 Plumbing the IntelliStart Fluidics sample delivery sys...

Page 17: ...connections B 18 Connecting the workstation system without ACQUITY UPLC B 21 Connecting Ethernet cables system with ACQUITY UPLC B 21 Connecting to the electricity source B 22 Connecting the NanoLockS...

Page 18: ...xviii Table of Contents...

Page 19: ...idics system Contents Topic Page Waters SYNAPT G2 MS 1 2 SYNAPT G2 MS UPLC MS MS systems 1 2 Software 1 3 Instrument sources 1 5 IntelliStart Fluidics system 1 9 Ion optics 1 12 Analyzers 1 13 Mass sp...

Page 20: ...rs MALDI SYNAPT G2 Mass Spectrometry System Overview and Maintenance Guide For the instrument s specifications see the Waters SYNAPT G2 MS Site Preparation Guide SYNAPT G2 MS UPLC MS MS systems The Wa...

Page 21: ...http www waters com click Services and Support Support Software IntelliStart IntelliStart software monitors the mass spectrometer s performance and reports when the instrument is ready for use The sof...

Page 22: ...art software to tune and mass calibrate the mass spectrometer Running samples Monitoring the run Acquiring data Processing data Reviewing data Printing data See the MassLynx 4 1 user documentation and...

Page 23: ...ay flow containing a compound of known mass flows through a separate ESI probe the LockSpray sprayer An oscillating baffle allows the sprays to be analyzed as two separate data functions The lock mass...

Page 24: ...L min making it suitable for LC applications in the range 100 L min to 2 mL min To reduce peak broadening for lower flow rate LC applications such as 1 mm UPLC columns use the optional small bore capi...

Page 25: ...tating high throughput processing and wider compound coverage NanoLockSpray source The NanoLockSpray source allows electrospray ionization performed in the flow rate range of 5 to 1000 nL min For a gi...

Page 26: ...s a pump to regulate the flow rate as low as 100 nL min Borosilicate glass capillary NanoFlow nanovials This option uses metal coated glass capillaries which allow the lowest flow rates Usable for one...

Page 27: ...ization Source Operator s Guide Matrix assisted laser desorption ionization The matrix assisted laser desorption ionization MALDI interface enables rapid tool free switching between API and MALDI mode...

Page 28: ...urce the IntelliStart Fluidics system delivers reference solution from vial B or for extended operating hours from a separate external bottle of reference solution IntelliStart Fluidics physical layou...

Page 29: ...ed You can simultaneously illuminate all three vials or extinguish the illumination when you are using light sensitive samples Generally vial A contains the sample solution vial B the reference soluti...

Page 30: ...pass into the Triwave region where they can undergo collision induced dissociation CID 5 The ions then pass into the time of flight TOF analyzer A high voltage pulse orthogonally accelerates the ions...

Page 31: ...solving dc voltage A broad mass to charge range of ions passes through and the TOF analyzer accurately measures their mass MS acquisition Applying the resolving dc voltage and selecting a specific mas...

Page 32: ...rs ions to the second T Wave ion guide and can function as a collision cell The second T Wave ion guide transfers ions to the third T Wave ion guide The third T Wave ion guide Transfer can function as...

Page 33: ...the high field pusher to the dual stage reflectron and then to the detector see the figure on page 1 16 Resolution Highest resolution using single pass TOF High Resolution This double pass TOF mode of...

Page 34: ...1 16 System Overview Single pass mode Double pass mode High field pusher Detector Dual stage reflectron Transfer lens High field pusher Detector Transfer lens Ion mirror Dual stage reflectron...

Page 35: ...sition status Acquiring data Processing data Viewing the data See also The MassLynx User s Guide Also the MassLynx online Help provides more information on installing and using the MassLynx software T...

Page 36: ...essage alerting you that a leak has developed See also Waters ACQUITY UPLC Leak Sensor maintenance instructions part number 71500082506 Vacuum system The vacuum system consists of a scroll pump and si...

Page 37: ...e instrument s rear panel The main power switches are on the instrument s rear panel see the figure on page B 2 Main power switches ON OFF AUTO 200 240V 50 60Hz 2kW EPC RESET OVERRIDE PUMP ON OFF AUXI...

Page 38: ...equirement The electronics and EPC switches must be switched on Auxiliary This switch provides for future needs by operating a spare power source EPC This switch controls the power supply to the embed...

Page 39: ...r This chapter describes how to start up shut down and reboot the mass spectrometer Contents Topic Page Starting the mass spectrometer 2 2 Preparing the IntelliStart Fluidics system 2 4 Shutting down...

Page 40: ...er 1 Ensure that all the mass spectrometer s external connections are in place see Appendix B External Connections 2 Power on the MassLynx PC and log in before powering on the other instruments 3 On t...

Page 41: ...calibrate the mass spectrometer prior to use You can perform this task using IntelliStart software See also The mass spectrometer s online Help Flow rates for the ACQUITY UPLC SYNAPT G2 MS UPLC MS MS...

Page 42: ...ation To infuse relatively small volumes use the Low volume Adaptor Kit included The volume of the low volume vials is 1 5 mL Required materials Chemical resistant powder free gloves To install the vi...

Page 43: ...that you are going to use next See the mass spectrometer s online Help for details Tip Depending on the solutions used the system can require more than one purge cycle to minimize carryover Warning T...

Page 44: ...s spectrometer unused for a long period To put the system in Standby mode In the Tune window click to put the mass spectrometer in Standby mode Result Doing so turns off the source voltages gas flows...

Page 45: ...applies The MassLynx software fails to initialize Immediately following a software upgrade To reboot the embedded PC 1 In the MassLynx software close the Tune window 2 On the instrument s rear panel s...

Page 46: ...2 8 Starting Up and Shutting Down the Mass Spectrometer...

Page 47: ...re the Electrospray source for the following ionization modes ESI APCI ESCi Contents Topic Page Configuring the LockSpray source 3 2 Configuring for ESI mode 3 2 Installing the ESI small bore capillar...

Page 48: ...ESI mode see the SYNAPT G2 MS system online Help Installing the ESI probe Required materials Chemical resistant powder free gloves PEEK tubing To install the ESI probe Configuring the LockSpray sourc...

Page 49: ...e tip 3 Carefully slide the ESI probe into the hole in the probe adjuster assembly ensuring that the probe location dowel aligns with the location hole in the probe adjuster assembly Warning The ESI p...

Page 50: ...robe in place 5 Connect the ESI probe s cable to the high voltage connector 6 Slide open the instrument s source interface door Caution To avoid nitrogen leakage fully tighten the probe locking ring T...

Page 51: ...or sample flow rates 1 2 mL min use 0 005 inch ID tubing for sample flow rates 1 2 mL min Requirement When replacing tubing supplied with the instrument minimize the length connecting the diverter val...

Page 52: ...on Tubing connection between the diverter valve and the ESI probe The other connections are omitted for clarity 8 Slide closed the instrument s source interface door Caution Ensure that the tubing doe...

Page 53: ...cking ring 5 Carefully remove the ESI probe from the probe adjuster assembly 6 If available fit the protective sleeve to the ESI probe tip Warning The LC system connections ESI probe and source can be...

Page 54: ...ombined 2 5 mm Allen wrench and cone extraction tool 10 mm wrench 8 mm wrench 2 7 mm wrenches LC pump HPLC grade or better 1 1 acetonitrile water Sharp knife or PEEK tubing cutter From the Small Bore...

Page 55: ...s horizontal axis 3 Insert one end of the red PEEK tubing in the probe inlet connector and finger tighten the connector in the PEEK union Rationale Doing so ensures a minimum dead volume when fitting...

Page 56: ...Using the 7 mm wrench for the locknut and the 8 mm wrench for the PEEK union tighten the locknut against the PEEK union until the union can no longer be twisted 9 Using the needle nose pliers slide a...

Page 57: ...rom the LC pump 14 Remove the probe inlet connector and red PEEK tubing from the PEEK union 15 Carefully thread the capillary through the probe assembly 16 Carefully push the PEEK union UNF coupling a...

Page 58: ...p 22 Using the nebulizer adjuster knob adjust the capillary so that it protrudes by approximately 0 5 mm from the end of the probe tip Tip During normal operation the adjuster knob relies on gas press...

Page 59: ...lary option 3 13 23 Fit the end cover and gasket to the probe assembly 24 Using the combined 2 5 mm Allen wrench fit and tighten the 3 screws that retain the end cover End cover Nebulizer adjuster kno...

Page 60: ...closure For more information on using APCI mode see the SYNAPT G2 MS system online Help Installing the APCI probe Required materials Chemical resistant powder free gloves PEEK tubing To install the AP...

Page 61: ...ts source see page 5 7 2 Carefully slide the APCI probe into the hole in the probe adjuster assembly ensuring that the probe location dowel aligns with the location hole in the probe adjuster assembly...

Page 62: ...04 inch ID tubing for sample flow rates 1 2 mL min use 0 005 inch ID tubing for sample flow rates 1 2 mL min Requirement If you are replacing the tubing supplied with the instrument minimize the lengt...

Page 63: ...ng connection between the diverter valve and the APCI probe The other tubing connections are omitted for clarity 6 Slide closed the instrument s source interface door Caution Ensure that the tubing do...

Page 64: ...e 1 Prepare the instrument for work performed on its source see page 5 7 2 Disconnect the diverter valve tubing from the APCI probe 3 Unscrew the probe locking ring 4 Carefully remove the probe from t...

Page 65: ...more information on using dual ESI and ESCi modes see the SYNAPT G2 MS system online Help When fitting the ESI probe to the LockSpray source enclosure follow the procedure on page 3 2 Optimizing the...

Page 66: ...3 20 Configuring the LockSpray Source...

Page 67: ...the ion source At low flow rates this feature provides authenticated exact mass measurement in both MS and MS MS modes Contents Topic Page Overview of the NanoLockSpray source 4 2 Selecting and Confi...

Page 68: ...lows through one sprayer and the lock mass reference solution through the other A motorized baffle rotates to admit spray from either sprayer to the sampling cone TP03199 Sprayer platform adjuster ass...

Page 69: ...data providing exact mass information Sample sprayer You can use the NanoLockSpray source with different NanoFlow sprayers For instructions on how to set up these sprayers see page 4 4 LockSpray spray...

Page 70: ...ise X Y and Z positioning of the sprayer tip You can also withdraw the sprayer from the source to allow access to the sprayer tip Using the two thumbscrews on the base of the adjuster assembly you can...

Page 71: ...noLockSpray source configuration Sprayer type Used for Universal NanoFlow nebulizer sprayer Flow injection or for coupling to nanoACQUITY UPLC with regulated flow rates down to 100 nL min Borosilicate...

Page 72: ...se to the sampling cone and baffle 2 Adjust the height of the sprayer so that its tip is level with the center of the baffle 3 Adjust the horizontal position of the sprayer so that the tip points towa...

Page 73: ...the Tune window click Source Nanoflow 2 Click to open the Camera Control dialog box Camera Control view of sprayers and sample cone 3 Rotate the camera s focusing ring to focus on the sample sprayer...

Page 74: ...wder free gloves To install the glass capillary sprayer 1 Prepare the instrument for work performed on its source see page 5 7 2 In the Tune window click Source Standby and confirm that the adjacent s...

Page 75: ...remove the sprayer s front section f Warning The source components can be contaminated with biohazardous and or toxic materials Always wear chemical resistant powder free gloves while performing this...

Page 76: ...urled nut as measured from the end of the nut to the shoulder of the glass capillary and then full tighten the nut onto the union 6 Load sample into the capillary using either a fused silica syringe n...

Page 77: ...roplet in the MassLynx Tune window ensure the Capillary parameter is set to 0 V and follow step 4 through step 8 4 Move the sprayer back and to the left hand side until the tip aligns with the groove...

Page 78: ...the procedure at step 9 Requirement If you do not observe a droplet repeat step 4 through step 8 If after you repeat step 4 through step 8 you still cannot observe a droplet discard the glass capilla...

Page 79: ...ing of the source enclosure 5 8 Installing and removing the corona pin 5 12 Operating the source isolation valve 5 15 Removing O rings and seals 5 17 Cleaning the mass spectrometer case 5 18 Emptying...

Page 80: ...g or replacing the corona pin 5 83 Replacing the APCI probe heater 5 84 Replacing the ion block source heater 5 87 Replacing the LockSpray source assembly seals 5 91 Replacing the mass spectrometer s...

Page 81: ...A730 01 880 Clean the source components When sensitivity decreases to unacceptable levels See page 5 21 Replace the ESI probe tip When sensitivity decreases to unacceptable levels See page 5 55 Repla...

Page 82: ...s See page 5 83 Replace the APCI probe heater If the heater fails to heat the probe See page 5 84 Replace the ion block heater cartridge If the heater fails to heat the ion block See page 5 87 Replace...

Page 83: ...quest to Waters customer support As an option Remote Desktop is a real time collaboration tool a service that controls two way connection with the ACQUITY UPLC system by enabling the Connections INSIG...

Page 84: ...ng the instrument Know the physical and chemical properties of the solvents used see the Material Safety Data Sheets for the solvents in use Warning To avoid electric shock do not remove the instrumen...

Page 85: ...Detector Interactive Fluidics b Click Control c Select Waste as the flow state 2 In the Instrument Console click Standby 3 Set the source temperature to 30 C 4 Wait 30 minutes to allow the desolvation...

Page 86: ...pare the instrument for work performed on its source see page 5 7 2 Remove the probe from the source If you are removing an ESI probe see page 3 7 If you are removing an APCI probe see page 3 18 3 Sli...

Page 87: ...source enclosure and lift it vertically off the two supporting studs on the source adaptor housing Warning The corona pin tip is sharp To avoid puncture wounds take great care while working with the...

Page 88: ...5 10 Maintenance Procedures 7 Store the cables neatly by plugging them into the cable storage positions on the rear of the source enclosure Cable storage positions...

Page 89: ...blue sleeved cable connects to the blue connector and the yellow sleeved cable to the yellow connector 4 Slide closed the instrument s source interface door Warning The source components can be conta...

Page 90: ...e the blanking plug from the corona pin mounting contact Tip Store the blanking plug in a safe location Warning The LC system connections ESI probe and source can be contaminated with biohazardous and...

Page 91: ...t 4 Fit the corona pin to the corona pin mounting contact Requirement Ensure that the corona pin is securely mounted and that its tip aligns with the sample cone orifice Corona pin TP03130 Corona pin...

Page 92: ...emove the corona pin from its mounting contact see the figure on page 5 13 Tip Store the corona pin in a safe location 4 Fit the blanking plug to the corona pin mounting contact 5 Close the source enc...

Page 93: ...de outwards and swing open the enclosure Warning The source components can be contaminated with biohazardous and or toxic materials Always wear chemical resistant powder free gloves while performing t...

Page 94: ...onents can be contaminated with biohazardous and or toxic materials Always wear chemical resistant powder free gloves while performing this procedure Warning To avoid puncture wounds take great care w...

Page 95: ...zontal position 2 Close the source enclosure Removing O rings and seals When performing certain maintenance procedures you must remove O rings or seals from instrument components An O ring removal kit...

Page 96: ...ked end of tool 1 to impale the O ring or seal and aid its removal Cleaning the mass spectrometer case Using a soft cloth dampened with water clean the outside surfaces of the mass spectrometer Cautio...

Page 97: ...bottle in the instrument exhaust line daily and empty it before it is more than approximately 10 full Nitrogen exhaust trap bottle Required materials Chemical resistant powder free gloves TP03164 From...

Page 98: ...ntal regulations 5 Fit and tighten the nitrogen exhaust trap bottle to the cap 6 Secure the nitrogen exhaust trap bottle in the upright position 7 Close the source enclosure Tip An automatic pressure...

Page 99: ...e extraction cone see page 5 31 If cleaning the extraction cone fails to increase signal sensitivity clean the ion block and isolation valve see page 5 38 If cleaning the ion block and isolation valve...

Page 100: ...ys wear chemical resistant powder free gloves while performing this procedure Warning To avoid electric shock ensure that the instrument is in Standby mode before commencing this procedure Warning To...

Page 101: ...traction tool To disassemble the sampling cone assembly Caution Do not open the isolation valve at any time when the sampling cone assembly has been removed from the ion block assembly Warning The sam...

Page 102: ...2 5 mm Allen wrench and cone extraction tool from its storage location on the source adaptor housing 2 On the combined 2 5 mm Allen wrench and cone extraction tool slide the collar to the end of the...

Page 103: ...len wrench and cone extraction tool 6 Replace the combined 2 5 mm Allen wrench and cone extraction tool in its storage location on the source adaptor housing 7 Remove the O ring from the sample cone C...

Page 104: ...Appropriately sized glass vessels in which to completely immerse components when cleaning Use only glassware not previously cleaned with surfactants HPLC grade or better methanol HPLC grade or better...

Page 105: ...asonic bath for 20 minutes Remove any residual water from the components by immersing them in separate glass vessels containing methanol and then placing the vessels in the ultrasonic bath for 10 minu...

Page 106: ...present dispose of the component and obtain a new one before reassembling the sampling cone assembly Assembling the sampling cone assembly Required materials Chemical resistant powder free gloves To...

Page 107: ...e assembly to the source Warning The source components can be contaminated with biohazardous and or toxic materials Always wear chemical resistant powder free gloves while performing this procedure Wa...

Page 108: ...horizontally and at the top and then slide the sampling cone assembly into the ion block assembly 3 Grasp the cone gas nozzle handle and use it to rotate the sampling cone assembly 90 degrees moving t...

Page 109: ...eter See the mass spectrometer s online Help for details 2 Open the source enclosure 3 Retrieve the combined 2 5 mm Allen wrench and cone extraction tool from its storage location on the source adapto...

Page 110: ...llen wrench and cone extraction tool unscrew the 4 captive screws that secure the ion block assembly 5 Remove the ion block assembly from the PEEK ion block support TP03130 Ion block assembly securing...

Page 111: ...ombined 2 5 mm Allen wrench and cone extraction tool loosen the captive screws securing the 2 PEEK extraction cone retainer clips and then rotate the retainer clips clear of the extraction cone Warnin...

Page 112: ...y sized glass vessel in which to completely immerse the extraction cone when cleaning Use only glassware not previously cleaned with surfactants HPLC grade or better methanol HPLC grade or better wate...

Page 113: ...do as follows Rinse the extraction cone by immersing it in a glass vessel containing water and then placing the vessel in the ultrasonic bath for 20 minutes Remove any residual water from the extract...

Page 114: ...nation is still present dispose of the extraction cone and obtain a new one Fitting the extraction cone to the ion block Required materials Chemical resistant powder free gloves Combined 2 5 mm Allen...

Page 115: ...cone extraction tool fit and then slowly tighten the 4 screws that secure the ion block assembly sequentially and in small increments 3 Replace the combined 2 5 mm Allen wrench and cone extraction too...

Page 116: ...mbling the source ion block assembly Required materials Chemical resistant powder free gloves Combined 2 5 mm Allen wrench and cone extraction tool O ring removal kit Needle nose pliers To disassemble...

Page 117: ...g cone assembly through 90 degrees 4 Slide the sampling cone assembly out of the ion block assembly Caution To ensure correct operation of the ion block assembly after reassembly do not remove the sam...

Page 118: ...and cone extraction tool loosen the 2 captive screws that secure the ion block cover plate 6 Remove the ion block cover plate 7 Grasp the isolation valve and pull it out of the ion block Ion block cov...

Page 119: ...ne extraction tool loosen the captive screw that secures the PEEK terminal block 11 Using the needle nose pliers grasp the PEEK terminal block and partially lift it out of the ion block Warning The is...

Page 120: ...e heat shrink tubing on the heater cartridge assembly and carefully slide it and the PEEK terminal block out of the ion block 13 Using the O ring removal kit carefully remove the cover seal from the i...

Page 121: ...en unscrew and remove the ion block blanking plug and associated O ring 17 If the blanking plug O ring shows signs of deterioration or damage dispose of it in accordance with local environmental regul...

Page 122: ...cone retainer clips 19 Remove the extraction cone from the ion block Caution Take great care not to damage the extraction cone aperture when removing the extraction cone from the ion block The extract...

Page 123: ...stant powder free gloves Appropriately sized glass vessels in which to completely immerse components when cleaning Use only glassware not previously cleaned with surfactants HPLC grade or better metha...

Page 124: ...and then placing the vessels in the ultrasonic bath for 10 minutes 3 Carefully remove the components from the vessels and blow dry them using inert oil free gas 4 Inspect each component for persistin...

Page 125: ...assembly 1 Fit the extraction cone seal to the ion block 2 Fit the extraction cone handle insulator to the extraction cone handle 3 Fit the extraction cone to the ion block 4 Fit the 2 PEEK extractio...

Page 126: ...at secure the PEEK terminal block 11 Ensure that the grooves for the cover seal cone gas O ring and isolation valve O ring are free from dirt and debris Tip If contamination is present use 1 1 methano...

Page 127: ...e assembly through 90 degrees 20 Fit the ion block assembly to the source assembly see page 5 37 Cleaning the source T Wave ion guide assembly Clean the source T Wave ion guide assembly if cleaning th...

Page 128: ...5 If any of the O rings show signs of deterioration or damage dispose of them in accordance with local environmental regulations 6 Carefully grasp the T Wave ion guide assembly and remove it from the...

Page 129: ...ized O ring shows signs of deterioration or damage dispose of it in accordance with local environmental regulations 3 Remove the locating ring from the assembly Warning The T Wave ion guide components...

Page 130: ...iber pen gently remove ion burn marks from the aperture plate Requirement Pay particular attention to the inner surfaces of the aperture plate 2 Visually inspect the aperture plate to ensure that no f...

Page 131: ...immersed completely 4 Place the glass vessel in the ultrasonic bath for 30 minutes 5 Carefully remove the T Wave ion guide from the glass vessel 6 Blow dry the T Wave ion guide with inert oil free ga...

Page 132: ...Fit the metallized O ring to the T Wave ion guide assembly Requirement Fit a new metallized O ring if necessary 5 Using the jeweler s screwdriver fit and tighten the 3 screws securing the locating ri...

Page 133: ...notch in the groove and then progressively work the ring into the groove in either direction from the notch 4 Fit the PEEK ion block support to the instrument s housing 5 Using the 3 mm Allen wrench...

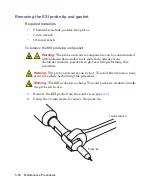
Page 134: ...ng the 10 mm wrench remove the probe tip Warning The probe and source components can be contaminated with biohazardous and or toxic materials Always wear chemical resistant powder free gloves while pe...

Page 135: ...ip 4 Dispose of the metal gasket in accordance with local environmental regulations 5 If the probe tip is damaged dispose of it in accordance with local environmental regulations Warning The probe tip...

Page 136: ...embly 3 Using the 10 mm wrench tighten the probe tip 4 Using the nebulizer adjuster knob adjust the capillary so that it protrudes by approximately 0 5 mm from the end of the probe 5 Fit the ESI probe...

Page 137: ...nch Needle nose pliers To remove the existing capillary 1 Remove the probe from the source see page 3 7 2 Retrieve the combined 2 5 mm Allen wrench and cone extraction tool from its storage location o...

Page 138: ...llen wrench and cone extraction tool remove the 3 probe end cover retaining screws 4 Remove the end cover and gasket from the probe assembly 5 Unscrew and remove the nebulizer adjuster knob End cover...

Page 139: ...ample capillary 5 61 6 Using the 10 mm wrench remove the probe tip Tip If the probe tip is difficult to remove use the 7 mm wrench in conjunction with the 10 mm wrench Probe tip 10 mm wrench Probe tip...

Page 140: ...e with local environmental regulations 9 Remove the PEEK union UNF coupling assembly and capillary from the probe Warning The metal gasket can be contaminated with biohazardous and or toxic materials...

Page 141: ...e UNF coupling this connection is finger tight only 14 Remove the ferrule and PTFE liner sleeve from the capillary 15 Remove the capillary from the UNF coupling 16 Dispose of the capillary PTFE liner...

Page 142: ...apillary Ferrule Seal PTFE liner tubing Conductive sleeve Red PEEK tubing Sharp knife or PEEK tubing cutter Metal gasket for the probe tip Safety goggles To install the new capillary Warning The probe...

Page 143: ...Fit the UNF coupling to the new capillary 4 Using the needle nose pliers slide a new liner sleeve and ferrule onto the capillary 5 Insert the capillary in the PEEK union and ensure that it is fully se...

Page 144: ...inlet connector and PEEK tubing from the PEEK union 14 Carefully thread the capillary through the probe assembly 15 Carefully push the PEEK union UNF coupling assembly and capillary into the probe as...

Page 145: ...llen wrench and cone extraction tool in its storage location on the source adaptor housing 25 Fit the ESI probe to the source see page 3 2 Cleaning the APCI probe tip Clean the APCI probe tip when a b...

Page 146: ...s Chemical resistant powder free gloves 7 mm wrench Combined 2 5 mm Allen wrench and cone extraction tool To remove the existing capillary 1 Remove the probe from the source see page 3 18 2 Retrieve t...

Page 147: ...the combined 2 5 mm Allen wrench and cone extraction tool remove the 3 probe end cover retaining screws 4 Remove the end cover and gasket 5 Unscrew and remove the nebulizer adjuster knob End cover ret...

Page 148: ...finger tight only 9 Remove the ferrule from the capillary 10 Remove the capillary from the UNF coupling 11 Dispose of the capillary and ferrule in accordance with local environmental regulations Warn...

Page 149: ...m Allen wrench and cone extraction tool Red PEEK tubing LC pump HPLC grade or better 1 1 acetonitrile water Capillary Sharp knife or PEEK tubing cutter Safety goggles To install the new capillary Warn...

Page 150: ...ume when fitting the capillary 3 Fit the UNF coupling to the new capillary 4 Using the needle nose pliers slide a new ferrule onto the capillary 5 Insert the capillary in the PEEK union and ensure tha...

Page 151: ...he probe heater see page 5 84 13 Fit the PEEK union UNF coupling assembly to the nebulizer adjuster knob 14 Carefully thread the capillary through the probe assembly 15 Carefully push the PEEK union U...

Page 152: ...e LockSpray probe capillary Replace the LockSpray probe capillary if it becomes blocked and you cannot clear it or if it becomes contaminated or damaged Removing the existing capillary Required materi...

Page 153: ...and side outwards and swing open the enclosure 4 Wait 10 minutes for the source ion block to cool 5 Disconnect the finger tight nut on the inside of the source enclosure Warning The probe and source c...

Page 154: ...rew the compression fitting on the rear of the LockSpray sprayer assembly 9 Remove the liner tubing and capillary from the LockSpray sprayer assembly 10 Remove the capillary from the liner tubing 11 D...

Page 155: ...e 4 mm wrench fit and tighten the LockSpray probe tip to the LockSpray sprayer assembly 4 Ensure that the end of the capillary protrudes 0 5 mm from the probe tip 5 Using the 7 mm wrench tighten the c...

Page 156: ...robe 1 Prepare the instrument for work performed on its source see page 5 7 2 Disconnect the reference probe s cable from the instrument s high voltage connector 3 Disconnect the fused silica capillar...

Page 157: ...ce probe from the probe adjuster assembly 8 Unscrew the TaperTip PEEK coupler and remove the TaperTip from the union Warning The NanoLockSpray reference probe tip consists of 5 cm of exposed fused sil...

Page 158: ...ttle containing 1 1 methanol water rinse the union over the large beaker b Blow dry the union with inert oil free gas Installing the new TaperTip and capillary Required materials Chemical resistant po...

Page 159: ...reference probe 3 Slide a PEEK coupler over the end of the fused silica capillary 4 Locate the PEEK coupler in the union and carefully slide the fused silica capillary into the union until it butts ag...

Page 160: ...the NanoLockSpray source enclosure to the instrument see page 5 11 13 Using an F 130 finger tight nut connect the fused silica capillary to the grounded union in the instrument s IntelliStart Fluidic...

Page 161: ...d pin in accordance with local environmental regulations 4 Install the corona pin in the source see page 5 12 Warning The probe and source components can be contaminated with biohazardous and or toxic...

Page 162: ...heater Required materials Chemical resistant powder free gloves To remove the APCI probe heater 1 Remove the probe from the source see page 3 18 Warning The probe and source components can be contamin...

Page 163: ...heater in accordance with local environmental regulations Caution To avoid damaging the probe heater s electrical connections do not twist the heater when removing it from the probe assembly Warning...

Page 164: ...he probe assembly ensuring that the heater is fully seated on the probe assembly 4 Fit the probe heater cover to the probe assembly 5 Fit the probe to the instrument see page 3 14 6 In the Instrument...

Page 165: ...2 5 mm Allen wrench and cone extraction tool Ion block source heater To replace the ion block source heater 1 Remove the ion block assembly from the instrument see page 5 31 2 Ensure that the isolati...

Page 166: ...curing the ion block cover plate 4 Remove the ion block cover plate 5 Using the combined 2 5 mm Allen wrench and cone extraction tool remove the 2 screws securing the heater wires to the PEEK terminal...

Page 167: ...carefully swing the ring terminal tags out of the terminal block 7 Using the needle nose pliers gently grasp the heat shrink tubing on the heater cartridge assembly and slide the assembly out of the...

Page 168: ...EK terminal block 12 Fit the ion block cover plate to the ion block assembly and then using the combined 2 5 mm Allen wrench and cone extraction tool tighten the 2 captive screws securing ion block co...

Page 169: ...f these seals failing Probe adjuster assembly probe seal Probe adjuster assembly nebulization gas seal Source enclosure seal Source enclosure nebulizer gas seal Source enclosure desolvation gas seal R...

Page 170: ...arefully remove the following seals from the probe adjuster assembly Probe seal Nebulizer gas seal 3 Using the O ring removal kit carefully remove the following seals from the source enclosure Source...

Page 171: ...e enclosure seals Required materials Chemical resistant powder free gloves Wash bottle containing HPLC grade or better 1 1 methanol water New seals Warning The seals can be contaminated with biohazard...

Page 172: ...it into the groove 3 Fit the following new seals to the source enclosure Nebulizer gas seal Desolvation gas seal Requirement These seals have a special cross section fit them in the groove as shown 4...

Page 173: ...ass spectrometer s air filter An air filter is located on the left hand side of the instrument retained by a panel which you must remove to access the filter Replacing the air filter Required material...

Page 174: ...2 Remove the air filter panel from the instrument enclosure 3 Remove the filter assembly from the instrument Air filter assembly Air filter assembly components 4 Use the 2 5 mm Allen wrench to remove...

Page 175: ...it the new air filter to the filter assembly 9 Fit the expanded metal mesh to the filter assembly 10 Fit the filter retainer to the filter assembly Requirement Ensure that the filter retainer lugs eng...

Page 176: ...ctions which vary according to your application For probe connection instructions see page 3 2 or page 3 14 for the relevant procedure For the ESI probe see Installing the ESI probe on page 3 2 For th...

Page 177: ...mbscrews and tubes from between the flow sensor and the grounded union 4 Close the access doors to the IntelliStart Fluidics system 5 Dispose of the tubes and fittings in accordance with local environ...

Page 178: ...sensor 0 005 1 32 Red 200 5 Waste reservoir 0 040 1 16 Natural 1000 6 Wash reservoir 0 020 1 16 Orange 1000 7 LockSpray selector pump 0 010 1 16 Blue 300 Flow sensor to grounded union 0 005 1 32 Red 6...

Page 179: ...silica capillary supplied in 1 m lengths Protective sleeve consisting of 0 015 inch ID PEEK tubing F 130 finger tight nut To plumb the LockSpray system 1 Open the access doors to the IntelliStart Flu...

Page 180: ...edures PEEK nut Super Flangeless ferrule and stainless steel SS ring Long finger tight fitting A B C A B C A B C Waters A B C Lock spray selector valve Lock spray pump Super Flangeless ferrule Stainle...

Page 181: ...f you find threading the tubes through the guides difficult Thread the tubes upward from the bottom hole Using needle nose pliers make a 20 bend 10 mm from the end of the tubing Then rotate the tubing...

Page 182: ...bottom of the vial and finger tighten the fitting 6 Using a long finger tight fitting connect orange 1 16 inch 1000 mm PEEK tubing from port 6 of the LockSpray selector valve to the wash bottle Requir...

Page 183: ...e left hand side of the flow sensor where you use the 1 32 inch 6 40 Valco compression fitting assembly Long finger tight PEEK nut and 1 32 inch PEEK ferrule 1 32 inch 6 40 Valco compression fitting a...

Page 184: ...nt fitting assembly connect the red 1 32 inch 60 mm PEEK tubing between the flow sensor and the grounded union where you use a short finger tight nut and 1 32 inch ferrule Short finger tight nut and 1...

Page 185: ...ce reference probe connection use the PEEK finger tight nut and ferrule For the NanoLockSpray source see Installing the new TaperTip and capillary on page 5 89 11 Close the access doors to the Intelli...

Page 186: ...on between the pump and sample selector valve which is stainless steel Tubing dimensions sample delivery system Valve Port Connection ID inch OD inch Color Length mm Sample 1 Waste reservoir 0 040 1 1...

Page 187: ...tart Fluidics system 2 Using the stainless steel tubing connect the sample pump to port 7 of the sample selector valve Warning The IntelliStart Fluidics tubing and fittings can be contaminated with bi...

Page 188: ...PEEK female to male adaptor into port 7 d Slide the transparent 1 16 inch flangeless nut and blue 1 16 inch flangeless ferrule over the tubing Rationale These components provide fail safe pressure rel...

Page 189: ...cts waste without requiring a fitted connection Waste drains through the connector on the left hand side of the instrument and into the waste bottle see page B 13 4 Using a long finger tight fitting c...

Page 190: ...ush the tubing through the right hand hole to the bottom of the vial and tighten the fitting Tips Follow these suggestions if you find threading the tubes through the guides difficult Thread the tubes...

Page 191: ...ng from port 3 of the sample selector valve to port 3 of the divert valve 8 Using a long finger tight fitting connect 1 16 inch 1000 mm natural colored PEEK tubing to port 4 of the divert valve and th...

Page 192: ...relevant procedure For the ESI probe see page 3 2 For the APCI probe see page 3 14 10 Close the access doors to the IntelliStart Fluidics system Caution Ensure that the tubing does not become trapped...

Page 193: ...des also include the hazard symbols with accompanying text statements describing the hazards and telling you how to avoid them This appendix presents all the safety symbols and statements that apply t...

Page 194: ...ectric shocks ultraviolet radiation exposures and others When the following symbols appear in a manual s narratives or procedures their accompanying text identifies the specific risk and explains how...

Page 195: ...guish all nearby flames Do not use tubing that is or has been stressed or kinked Do not expose nonmetallic tubing to incompatible compounds like tetrahydrofuran THF and nitric or sulfuric acids Be awa...

Page 196: ...al surfaces of the mass spectrometer when the instrument is in Operate mode To avoid non lethal electric shock make sure the instrument is in Standby mode before touching areas marked with this high v...

Page 197: ...damaging the instrument or sample Warning Waters instruments can be used to analyze or process potentially hazardous substances To avoid injury with any of these materials familiarize yourself with t...

Page 198: ...ler le droit de l utilisateur exploiter l quipement Achtung Jedwede nderungen oder Modifikationen an dem Ger t ohne die ausdr ckliche Genehmigung der f r die ordnungsgem e Funktionst chtigkeit verantw...

Page 199: ...e trouvant proximit de l instrument Evitez d utiliser des tubes s v rement d form s ou endommag s Evitez d utiliser des tubes non m talliques avec du t trahydrofurane THF ou de l acide sulfurique ou n...

Page 200: ...iamenti nei tubi non metallici riducendo notevolmente la pressione di rottura dei tubi stessi Advertencia se recomienda precauci n cuando se trabaje con tubos de pol mero sometidos a presi n El usuari...

Page 201: ...Warnings that apply to all Waters instruments A 9 Nonmetallic Tetrahydrofuran THF Methylene chloride Dimethyl sulfoxide THF...

Page 202: ...tueuses Vorsicht Der Benutzer wird darauf aufmerksam gemacht dass bei unsachgem er Verwenddung des Ger tes die eingebauten Sicherheitseinrichtungen unter Umst nden nicht ordnungsgem funktionieren Atte...

Page 203: ...ls These can appear in instrument user manuals and on the instrument s front or rear panels Electrical power on Electrical power off Standby Direct current Alternating current Protective conductor ter...

Page 204: ...visories Handling symbols These handling symbols and their associated text can appear on labels affixed to the outer packaging of Waters instrument and component shipments Keep upright Keep dry Fragil...

Page 205: ...ackaging procedures See Troubleshooting using Connections Insight on page 5 5 Contents Topic Page Mass spectrometer external wiring and vacuum connections B 2 Connecting the Edwards oil free roughing...

Page 206: ...s spectrometer rear panel connectors and switches Externa l Connec tions 2 10 1 Externa l Connec tions 1 10 1 Instrum ent LA N EPC Com Port Video Output System Activity Service Bus ON OFF AUTO 200 240...

Page 207: ...ncluded in the SYNAPT G2 installation kit NW25 clamps included in the SYNAPT G2 installation kit NW40 center rings included in the SYNAPT G2 installation kit NW40 clamps included in the SYNAPT G2 inst...

Page 208: ...hen performing this procedure Caution To ensure correct operation of the roughing pump install it within 1 degree of horizontal Locate the roughing pump is located in an area where the ambient tempera...

Page 209: ...open port on the Speedivalve using an NW25 center ring and then secure the connection with an NW25 clamp 6 Attach the flanged end of a vacuum hose to the open port on the NW25 elbow using an NW25 cent...

Page 210: ...t tubing to a suitable exhaust vent See also The Waters SYNAPT G2 MS HDMS Site Preparation Guide part number 715002097 13 Make the electrical connections to the roughing pump see page B 7 Caution To a...

Page 211: ...roughing pump s dc connector to the pump connector on the mass spectrometer s rear panel Connecting to the nitrogen gas supply Required materials Chemical resistant powder free gloves 6 mm in PTFE tub...

Page 212: ...t be dry and oil free with a purity of at least 95 3 Connect the free end of the 6 mm PTFE tubing to the nitrogen regulator Warning The 6 mm in PTFE tubing must not be cut to size use the complete 5 m...

Page 213: ...regulator not supplied To connect the collision cell gas supply 1 Use the 1 8 inch Swagelok nut and ferrule to connect the 1 8 inch stainless steel tubing to the collision cell gas inlet on the rear...

Page 214: ...must provide a minimum vacuum of 0 20 kPa 2 mbar 0 03 psi below atmospheric pressure negative pressure The exhaust connections can be contaminated with biohazardous and or toxic materials Always wear...

Page 215: ...nect one end of the tubing to the pilot valve port on the instrument s rear panel 4 Connect the free end of the tubing to the pilot valve port on the nitrogen exhaust trap bottle see the figure on pag...

Page 216: ...let port on the nitrogen exhaust trap bottle 10 Route the free end of the tubing to the exhaust vent 11 Use snoop or equivalent leak detector liquid to ensure that there are no leaks at the instrument...

Page 217: ...line 1 Place a suitable waste container below the mass spectrometer 2 Slide a drain line over the barbed fitting of the drain located at the left hand side of the mass spectrometer Warning The waste...

Page 218: ...e the surface of the waste solvent Positioning of drain tubing Warning To prevent leakage of biologically hazardous materials do not crimp or bend drain line A crimp or bend can impede flow to the was...

Page 219: ...be separated from hazardous voltages by double or reinforced insulation Circuits of this type are classified as safety extra low voltage SELV Examples of circuits that are typically SELV include cont...

Page 220: ...ections Input output signal connector configuration External Connections 2 10 1 External Connections 1 10 1 Instrument LA N EPC Com Port Video Output System Activity Service Bus External connections 1...

Page 221: ...ed 8 CE Interlock Out common 30 V dc 100 mA 9 CE Interlock Out normally closed N C 30 V dc 100 mA 10 CE Interlock Out normally open N O 30 V dc 100 mA External connections 2 Pin Function Rating 1 Anal...

Page 222: ...nnections Description Analog Out Used for analog chart output functionality The output voltage range is 0 to 2 V The resolution of the voltage output is 12 bits Gas Fail Interlock Out Used to stop the...

Page 223: ...e small flat bladed screwdriver to attach the positive and negative leads of the signal cable to the connector 3 Slide the clamp with the bend facing down into the protective shield 4 Insert the clamp...

Page 224: ...over the cable leads and insert and finger tighten the clamp into place with the second self tapping screw 6 Use the screwdriver to fully tighten the self tapping screws 7 Place the second connector c...

Page 225: ...se a shielded network cable with the mass spectrometer to ensure compliance with FCC limits 1 Connect the monitor to the PC 2 Connect one end of the shielded network cable to the port labeled instrume...

Page 226: ...common and connected near the system Required materials Power cord appropriate to your country To connect to the electricity source Recommendation Use a line conditioner or an uninterruptible power su...

Page 227: ...software The MassLynx workstation will be supplied with the camera driver software ready installed However if you reinstall MassLynx you will need to reinstall the camera driver software using the Fo...

Page 228: ...B 24 External Connections 7 Click Next Result The software installs 8 Click Finish...

Page 229: ...arning To confirm the integrity of the source exhaust system you must address any safety issues raised by the contents of this Appendix Contents Topic Page Preventing contamination C 2 Items exposed t...

Page 230: ...e C 3 for details about the most common ingredients used to prepare mobile phases Items exposed to solvent Item Material Corona discharge pin mounting contact PEEK a Gas exhaust port Aluminium Gas tub...

Page 231: ...l Acetonitrile Formic acid 0 1 Acetic acid 0 1 Trifluoroacetic acid 0 1 Ammonium acetate 10 mM Ammonium formate 10 mM These solvents are not expected to cause any problems with the materials appearing...

Page 232: ...C 4 Materials of construction and compliant solvents...

Page 233: ...guration 1 17 SYNAPT G2 1 17 connecting Edwards roughing pump B 3 electricity source B 22 Ethernet cables B 21 liquid waste line B 13 NanoLockSpray source camera B 23 nitrogen exhaust line B 10 nitrog...

Page 234: ...installing vials 2 4 preparing 2 4 pump purging 2 5 IntelliStart Fluidics tubing replacing 5 98 IntelliStart technology 1 3 intended use viii ion block assembly cleaning 5 38 ion block source heater...

Page 235: ...illary 5 74 NanoLockSpray reference replacing capillary 5 78 Q quadrupole 1 13 quality control ix R rear panel connectors B 2 removing APCI probe 3 18 ESI probe 3 7 5 78 source corona pin 5 14 replaci...

Page 236: ...2 air filter replacing 5 95 calibrating ix calibration 2 3 case cleaning 5 18 external connections B 1 fitting source enclosure 5 11 ion optics 1 12 leak sensors 1 18 quadrupole 1 13 rear panel contro...

Reviews: