background image


Planning and installation 

Basic Line Ai1 Air 

Air to water heat pump 


WATERKOTTE GmbH, Gewerkenstraße 15, D-44628 Herne 

Tel.: 0049/(0)2323/9376-0, Fax: 0049/(0)2323/9376-99, E-Mail[email protected] 

Internet: http://www.waterkotte.de 

21.10.2015 / Z21437 

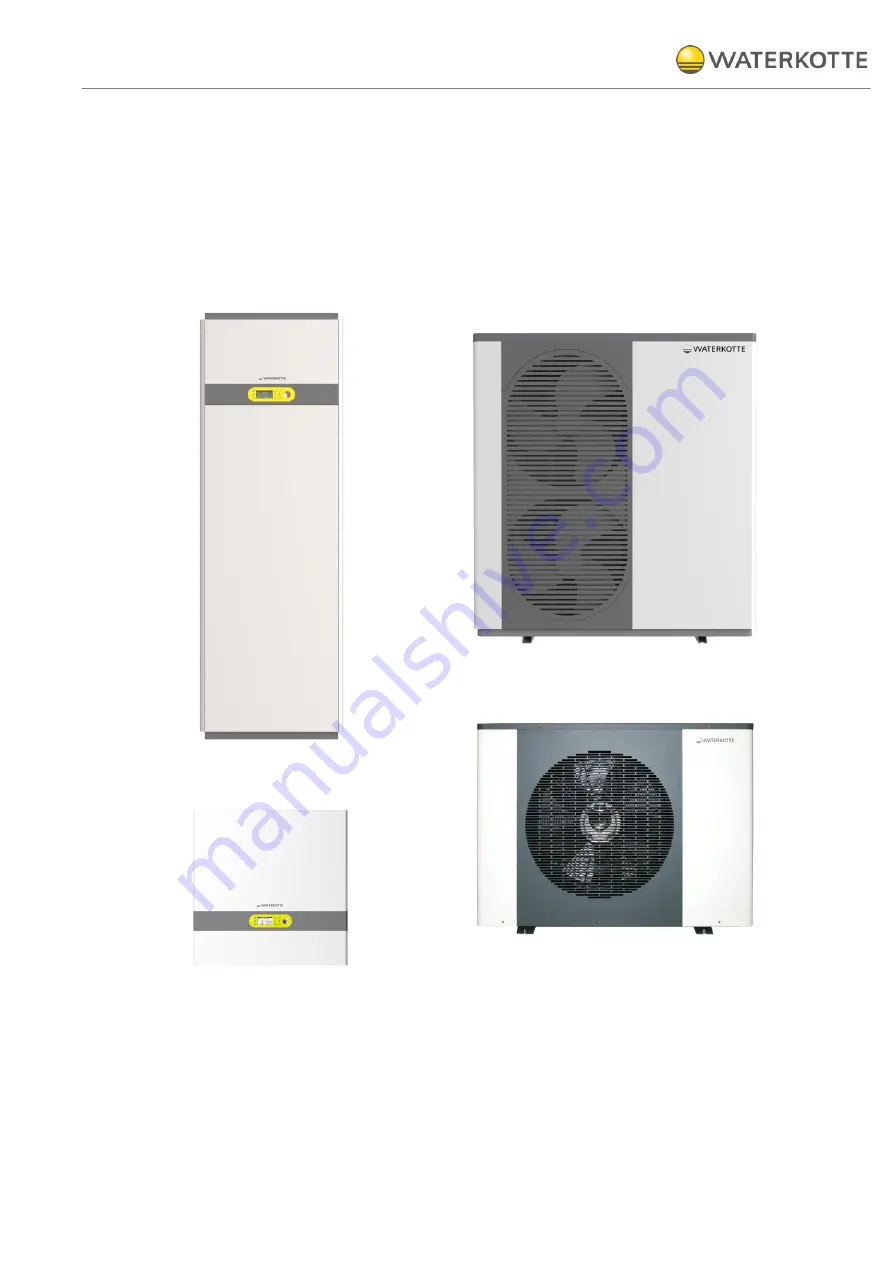
Basic Line Ai1 Air – Indoor unit 

Basic Line BS7010 – Hydraulikstation 

- Indoor unit 

Basic Line Ai1 Air /Basic Line BS 7010  

- Outdoor unit 

Basic Line Ai1 Air /Basic Line BS 7006  

- Outdoor unit 

Summary of Contents for Basic Line BS 7006

Page 1: ...8 Herne Tel 0049 0 2323 9376 0 Fax 0049 0 2323 9376 99 E Mail info waterkotte de Internet http www waterkotte de 21 10 2015 Z21437 Basic Line Ai1 Air Indoor unit Basic Line BS7010 Hydraulikstation Indoor unit Basic Line Ai1 Air Basic Line BS 7010 Outdoor unit Basic Line Ai1 Air Basic Line BS 7006 Outdoor unit ...

Page 2: ...ability for remaining errors or omissions or for possible damages Note This symbol applies only to countries within the European Union EU This symbol is in compliance with Directive 2002 96 EC Article 10 The product has been designed and manufactured with high quality materials and components which are suitable for recycling This symbol means that electrical and electronic equipment at the end of ...

Page 3: ... Installation and connection of indoor unit 13 5 2 Environmental conditions for installation 13 5 3 Dimensions and connections outdoor module BS 7010 5010 5 14 5 4 Dimensions and connections outdoor module BS 7006 5006 5 15 5 5 Dimensions and connections indoor module Basic Line Ai1 Air 16 5 6 Dimensions and connections indoor module BS Hyd 5010 hydraulic station 17 5 7 Installation of cover and c...

Page 4: ...Line Ai1 Air BS 7010 outdoor module 36 9 8 Electrical wiring diagram Basic Line Ai1 Air indoor module 37 9 9 Electrical wiring diagram Basic Line BS Hyd 5010 hydraulic station indoor module 38 9 10 WWPR2 Controler connections 39 9 11 Electrical connections 40 10 Commissioning 41 10 1 Pre startup checks 41 10 2 Initial start of heat pump 43 10 3 Control of entire operation 44 10 4 Turning heat pump...

Page 5: ... also furnish operating instructions in terms of Labour Protection Law and Work Equipment ordinance Keep all safety and operating signs on the heat pump in fully legible condition at all times Replace damaged or illegible signs immediately 1 2 2 Before initial use Before initial use of your WATERKOTTE heat pump familiarise yourself with Operating and control elements of your WATERKOTTE heat pump E...

Page 6: ...ty reasons no unauthorised modifications shall be performed on the heat pump Thus all intended modifications are subject to written approval by WATERKOTTE Use only original WATERKOTTE spare parts Original parts are specifically designed for your heat pump Externally pro cured parts provide no guarantee that they are designed and manufactured in compliance with relevant usage and safety requirement...

Page 7: ... when performing maintenance work on the heat pump Do not put your fingers or others into the fan or evaporator The inside parts of the heat pump may run at high speed or high tempera ture they could cause serious injury Do not remove the grills on the fan outlet and top cover The hot water probable need to mix with cold water for terminal usage too hot water over 50 C in the heating module may ca...

Page 8: ...se measures and oversee their implementation You must ensure that The heat pump is only used as intended see also chapter 1 1 Intended use The heat pump is only operated in perfect fully functional condition and safety devices are checked regularly to ensure that they are working properly The operating manual is available in perfect condition at the heat pump at all times The heat pump is operated...

Page 9: ...WATERKOTTE GmbH Subject to changes 2 Product description and scope of delivery 2 1Overview 1 Basic Line Ai1 Air BS 7010 outdoor module 2 Basic Line Ai1 Air BS 7006 outdoor module 3 Basic Line Ai1 Air indoor module 4 Basic Line BS Hyd 5010 hydraulic station indoor module 4 3 1 2 ...

Page 10: ...nt 6 kW Combination fitting with safety valve Air vent 3 way motor ball valve membrane expansion tank 2 1 3 Basic Line BS Hyd 5010 hydraulic station The hydraulik station contains Monochrome semi graphic 8 line display Central power switch Outdoor temperature sensor 6 convenient buttons and 3 indicator LEDs Intuitive control software BasicPro Speed controlled circulation pump efficiency class A In...

Page 11: ...e hot water heating system with integrated central hot water supply option consisting of heat generator heat pump regulation and electrical control complete electrics and control system semi graphic display 3 2 1 Electronic heat pump control The heat pump control is included in the delivery scope of the WATERKOTTE heat pump Use in other than WATERKOTTE heat pumps will void any warranty claim Info ...

Page 12: ...lift truck transport rollers handcart It is crucial that the heat pump is transported upright Transport in tilted position 45 is permitted only temporarily during inser tion Horizontal transport results in oil displacement in compressor and can cause damage to the heat pump during start up After carton is removed or opened it is not permitted to tilt the module by applying pressure to the pipeline...

Page 13: ...ctions on the rear of the unit the mounting distance to the wall rear right side left side must be selected in such a way that access is ensured in case of repairs Recommendation for good service accessibility Wall clearance free space left right 400 mm Wall clearance rear at least 300 mm Figure 1 Recommendation wall clearance for installation 5 2Environmental conditions for installation When sele...

Page 14: ...pyright 2014 by WATERKOTTE GmbH Subject to changes 5 3Dimensions and connections outdoor module BS 7010 5010 5 Figure 2 Dimensions outdoor module BS 7010 all dimensions mm A Cable entries electrical connection B Cover connection refrigerant line A B ...

Page 15: ...Copyright 2014 by WATERKOTTE GmbH Subject to changes 5 4Dimensions and connections outdoor module BS 7006 5006 5 Figure 3 Dimensions outdoor module BS 7006 all dimensions mm A Cable entries electrical connection B Cover connection refrigerant line ...

Page 16: ...d connection 21 10 2015 16 60 Copyright 2014 by WATERKOTTE GmbH Subject to changes 5 5Dimensions and connections indoor module Basic Line Ai1 Air Figure 4 Dimensions indoor module Basic Line Ai1 Air all dimensions mm ...

Page 17: ...llation and connection 21 10 2015 17 60 Copyright 2014 by WATERKOTTE GmbH Subject to changes 5 6Dimensions and connections indoor module BS Hyd 5010 hydraulic station Figure 5 Dimensions indoor module buttom ...

Page 18: ...ng panels The heat pump is provided with a disassembly tool Use this tool to remove the cladding panels to prevent damage Procedure Keep enough distance with the disassembly tool to the upper lower panel edge so as not to damage the retaining bolt see figure The disassembly tool is manually driven into the gap between the front and side panel with moderate force 5 9Disassembly of cover and claddin...

Page 19: ...ere the module could be covered by snow To pre vent snow from blocking blowing against the air intake in regions sub ject to heavy snowfall special precautions are required selecting a higher installation location installing a protective cover in front of the air intake This can reduce airflow and cause malfunctions Avoid locations exposed to oil steam or sulphuric gas To ensure stability we recom...

Page 20: ...proper base plate screws and nuts are not included in delivery Please note Connection directions The connection piping and wiring is performed from below Ensure that water can drain off during defrosting This can be accom plished by excavating the ground The installation height depends on the climate conditions at the site In stall the module at a height that takes possible flooding or heavy snow ...

Page 21: ...acle in rear 2 In front of wall with roof air outlet clear in front flow obstacles in rear and top 3 In recess Flow obstacle in rear and on both sides 4 In front of wall air outlet toward wall flow obstacle in front 5 Between two walls air outlet toward wall sides clear Flow obsta cle in front and rear 6 In recess with roof air outlet clear in front flow obstacle at rear on both sides and above Fi...

Page 22: ... not be drained However to optimise the module we recommend individual ad justment of refrigerant quantity to total volume refer to table The outdoor module shall not exceed 3 m higher or 7 m deep stand out as the indoor module If line length exceeds 5 m charge module with additional R410A re frigerant Series Factory pre charge kg 0 5 m 5 m 20 m 5010 5 3 0 kg Additional charge 0 Additional charge ...

Page 23: ...th of more than 1 5 m Oil traps have to be installed cen trally every 1 5 m If the 16 mm line running in the direction of flow with constant slope and a length of more than 6 m oil traps have to be installed every 6 m 7 3Insulation For refrigerant line we recommend the use of pre insulated original WATERKOTTE double copper tube rings 10 16 x 1 0 mm Z16956 and matching screw clamps Z16957 Recommend...

Page 24: ...e minutes and make sure that pressure does not drop 2 Pressurise to 1 5 MPa 15 bar wait five minutes and make sure that pressure does not drop 3 Pressurise to 4 2 MPa 42 bar max working pressure and meas ure ambient temperature and refrigerant pressure 4 If specified pressure is maintained for one day and does not drop the tubes have passed the test and there are no leaks 5 If the ambient temperat...

Page 25: ... on the rear panel choose a installation dis tance from the wall rear right side left side which is also ensures access in case of repair Pos Description Thread A Cable entries 1 Domestic Hot water OUT G int 2 Cold water IN G int 3 Refrigerant line IN heat pump IN copper pipe 16 mm 4 Refrigerant line OUT heat pump OUT copper pipe 10 mm 5 Heating flow G1 flat sealing 6 Heating Return G1 flat sealin...

Page 26: ...res the appropriate clearence in any case of repair Figure 8 Connections indoor module buttom Heating BS7010CH Pos Heating Hot water BS7010CHW Pos Electrical connections X X Sensor connections calorimeter 6 6 Drain safety valve 7 7 Heating flow 3 G1 a flachdichtend 3 G1 a flat sealing Heating Return 4 G1 a flachdichtend 4 G1 a flat sealing Refrigerant gas side 2 16 mm 2 16 mm Refrigerant liquid si...

Page 27: ...on are located on the right side of the module To connect the refrigerant lines the cover must be re moved 4 screws Figure 9 Cover refrigerant lines connections outdoor module Figure 10 refrigerant lines connections flare connection outdoor module 1 10 mm liquide side 2 16 mm gas side Note If metric tubes are used as refrigerant line you can use the adapter from the indoor modules ...

Page 28: ...quid re frigerant evaporates so rapidly that it may cause tissue freezing risk of going blind in case of skin eye contact Should the refrigerant contact the skin flush the affected area repeated ly with plenty of cold water Do not rub the eyes Visit a doctor immedia tely Ensure proper ventilation of workplace when working on refrigerant cir cuit Inhaling high concentrations of gaseous refrigerants...

Page 29: ...utdoor module is fully charged with R410A refrigerant in factory Procedure 1 Connect vacuum pump to indoor module Schrader valve opens automatically 2 Start vacuum pump 3 When using a high performance vacuum pump the required vacuum is generated after 70 minutes 101 kPa 5 torr 4 Close the valve of the connection tube of the vacuum pump 5 Open the two valves 1 a 2 on the indoor module The refrigera...

Page 30: ...ps again and tighten 20 25 Nm Note Refrigerant could escape if protective caps are left off Also make sure that the corresponding washers are screwed into the pro tective caps again 8 4Mounting heating domestic water side The installation of the heating system flow return and hot cold water is to be performed on the basis of the connection diagrams The specifications of current drinking water regu...

Page 31: ... to the cables Loosen ing connections pose a risk of cables slipping from terminals breaking this can result in overheating fire Master switch on module beside touch screen If master switch is acti vated switch is lit the indoor and outdoor module are ready for opera tion The exterior temperature sensor is connected to terminals 5o 5u The external disconnection is optionally connected to terminals...

Page 32: ...ven if tempo rary with cable entry pointing downward Next screw connection must be tightened enough to allow sealing insertion of cable and to prevent water from entering the housing When performing temporary installation sensor might have to be mounted on board which is fastened to wall using a steel nail To prevent transport damages front and side panels of heat distribution station are separate...

Page 33: ...2015 33 60 Copyright 2014 by WATERKOTTE GmbH Subject to changes 9 3Electrical and BUS connection outdoor module BS 7010 5 Pos Description 1 BUS connection use screened line Terminals A B GND GND 2 Electrical connection 230 V ...

Page 34: ...yright 2014 by WATERKOTTE GmbH Subject to changes 9 4Electrical and BUS connection outdoor module BS 7006 5 Pos Description 1 BUS connection use screened line Terminals GND GND B A 12 V not connected Fan Fan 2 Electrical connection 230 V ...

Page 35: ...Line Ai1 Air 5010 5 indoor module 9 6Electrical and BUS connection Basic Line BS Hyd 5010 hydraulic station 9 6 1 DIP Switch outdoor module In case of replacing or repairing Check the position of the DIP switches on the main board outdoor module The correct switch position is shown on the wiring diagram outdoor module ...

Page 36: ...Electrical work 21 10 2015 36 60 Copyright 2014 by WATERKOTTE GmbH Subject to changes 9 7Electrical wiring diagram Basic Line Ai1 Air BS 7010 outdoor module ...

Page 37: ...Electrical work 21 10 2015 37 60 Copyright 2014 by WATERKOTTE GmbH Subject to changes 9 8Electrical wiring diagram Basic Line Ai1 Air indoor module ...

Page 38: ...Electrical work 21 10 2015 38 60 Copyright 2014 by WATERKOTTE GmbH Subject to changes 9 9Electrical wiring diagram Basic Line BS Hyd 5010 hydraulic station indoor module ...

Page 39: ...hauf fage DI4 Frei DI4 Free DI4 Libre DI5 Frei DI5 Free DI5 Libre DI6 Frei DI6 Free DI6 Libre Di7 Frei Di7 Free Di7 Libre Y1 Y1 Y1 Y2 Y2 Y2 Y3 Pumpe Heizung PWM Y3 Pump heating PWM Y3 Pompe chauffage PWM J6 BMS Card J6 BMS Card J6 BMS Card J7 Displayport J7 Displayport J7 Displayport J8 Erweiterungsbus J8 Bus extensions J8 Bus d extension J9 tLan J9 tLan J9 tLan J10 AEH Bus J10 Bus outside unit J1...

Page 40: ...Electrical work 21 10 2015 40 60 Copyright 2014 by WATERKOTTE GmbH Subject to changes 9 11 Electrical connections ...

Page 41: ...check first the requirements according to the fol lowing checklist All electrical feed lines in the corresponding cross sections are wired to the terminals as per connection plan The BUS cable is shielded The main switch is in OFF position The fuses in the fuse box are in compliance with the specifications in the wiring diagram circuit breaker switch type C for compressor feed line The hydraulic c...

Page 42: ...lt in total loss In case of heat pump failure an inspection by qualified and authorised personnel must be performed before restart Info Controller settings must initially only be performed during the first start of the machine During restart this is not necessary since the settings are stored the set tings remain stored even in case of power failure Info During initial commissioning the specified ...

Page 43: ...due to refrigerant accumulation in the compressor Resistance will rise above 1 MΩ after compressor has warmed up for 4 hours The required compressor warm up time varies according to at mospheric conditions and refrigerant accumulation To operate the compressor with refrigerant accumulation it must be warmed up at least 12 hours to prevent failure 4 If insulation resistance rises above 1 MΩ the com...

Page 44: ...of the controller saves money Particularly the correct settings of flow temperature hot water temperature heating curve and heating times can result in substantial cost savings 10 4 Turning heat pump off After finishing operation wait at least five minutes before turning main pow er switch off Otherwise there is a risk of water leak module failure Procedure Switch off main switch of heat pump Swit...

Page 45: ...Hz Electrical power supply Electrical resistance heating Power supply selectable 220 240V 1 50 Hz 380 415 V 3 50 Hz 220 240V 1 50 Hz 380 415 V 3 50 Hz Max operating current A 18 5 18 5 Customer supplied main fuse C 25 A C 25 A Customer supplied control fuse A 10 10 Current consumpt max electr resistance heating 230 V A 26 1 26 1 Current consumpt max electr resistance heating 400 V A 8 7 8 7 Electr...

Page 46: ...Connection diagram 21 10 2015 46 60 Copyright 2014 by WATERKOTTE GmbH Subject to changes 12 Connection diagram 12 1 Basic Line Ai1 Air with underfloor heating without single room control ...

Page 47: ...Connection diagram 21 10 2015 47 60 Copyright 2014 by WATERKOTTE GmbH Subject to changes 12 2 Basic Line Ai1 Air with underfloor heating with single room control ...

Page 48: ...Connection diagram 21 10 2015 48 60 Copyright 2014 by WATERKOTTE GmbH Subject to changes 12 3 Basic Line Ai1 Air with radiators fan convectors ...

Page 49: ...Connection diagram 21 10 2015 49 60 Copyright 2014 by WATERKOTTE GmbH Subject to changes 12 4 Basic Line Ai1 Air with hydraulic compensator ...

Page 50: ...Connection diagram 21 10 2015 50 60 Copyright 2014 by WATERKOTTE GmbH Subject to changes 12 5 Basic Line Ai1 Air hydraulic compensator and additional heater ...

Page 51: ...Connection diagram 21 10 2015 51 60 Copyright 2014 by WATERKOTTE GmbH Subject to changes 12 6 Basic Line BS 7010 with underfloor heating without single room control ...

Page 52: ...nnection diagram 21 10 2015 52 60 Copyright 2014 by WATERKOTTE GmbH Subject to changes 12 7 Basic Line BS 7010 with underfloor heating without single room control decen tral domestic hot water preparation ...

Page 53: ...6 Domestic water heater 27 250 l domestic hot water tank 28 Air separator with air diverter 29 Differential pressure overflow valve 30 Pressure controlled circulation pump 31 Charging and draining valve 32 Circulating pump 33 Air separator with vent gauge and safety valve 34 Safety group 35 Safety valve with vent and gauge 36 Tacosetter for hydraulic compensation 37 Supply compact condensing boile...

Page 54: ...tems 71 215 l plastic tank 72 Funnel 73 Copper immersion tube with suction strainer non return valve and pump connection 74 Self priming pump WJ 301 EM with 2m connecting cable 230V rated input 1100 W connections suc tion side and pressure side Rp1 75 1500 mm flow line hose with 1 1 4 union nut with 2 gaskets and reducing nipple 1 1 4 a x 1 a 76 1500 mm return flow hose with 1 1 4 union nut with 2...

Page 55: ...0 21 10 2015 55 60 Copyright 2014 by WATERKOTTE GmbH Subject to changes 13 Refrigeration circuit Basic Line Ai1 Air BS 7010 Figure 12 Refrigeration circuit Basic Line Ai1 Air Figure 13 Refrigeration circuit Basic Line Ai1 Air with hot water tank lgb ...

Page 56: ...ure switch HP PZ 7 Safety pressure relief valve low pressure TIC 8 Measurement of temperature readout in the controller display and control in the electrical switchboard NTC 10K gauge pressure gas TIC 9 Measurement of temperature readout in the controller display and control in the electrical switchboard Temperature sensor Gauge heating flow indoor module TIC 10 Measurement of temperature readout ...

Page 57: ...maintained at an optimum level Note In the event of severe contamination it is recommended to clean the mod ule between maintenance cycles At the same time also remove residues such as leaves and the like from the defrosting tray and check the conden sation drain blockages of the outdoor module Additional inspection points are Check heating circuit System pressure function of expansion tank ventin...

Page 58: ...Maintenance and inspection 21 10 2015 58 60 Copyright 2014 by WATERKOTTE GmbH Subject to changes ...

Page 59: ...Maintenance and inspection 21 10 2015 59 60 Copyright 2014 by WATERKOTTE GmbH Subject to changes ...

Page 60: ...60 60 Copyright 2014 by WATERKOTTE GmbH Subject to changes WATERKOTTE GmbH Gewerkenstraße 15 D 44628 Herne Tel 0049 0 2323 9376 0 Fax 0049 0 2323 9376 99 Service 0049 0 2323 9376 350 E Mail info waterkotte de Internet http www waterkotte de ...

Reviews: