


Configuring the Transfer Station
The configuration page opens showing the information you just entered.
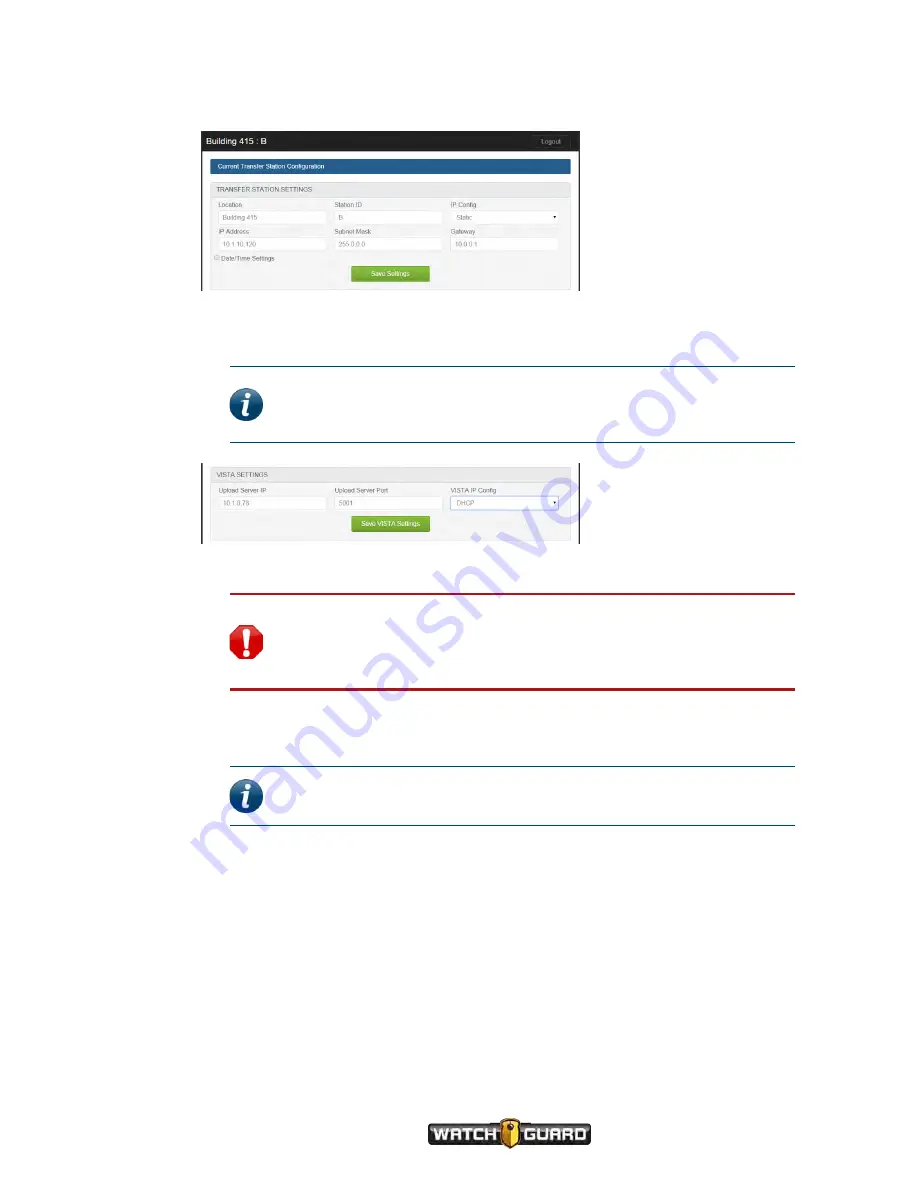
12. In the
VISTA Settings
section, enter the
Upload Server IP
address.
For more information about the
VISTA Settings
section, see
.
Note:
The upload server is the Evidence Library location where the
VISTA Body Cameras will upload their video evidence. The upload server
for Evidence Library can also be called the Wireless Import Service.
13. Verify that the
Upload Server Port
is set to
5001
.
Warning!
Changing the
Upload Server Port
to something other than
5001
can cause the VISTA Transfer Station to stop working. If you have
questions about the assigned port, contact WatchGuard Technical
Services.
14. Select the
VISTA IP Config
type you want to assign to the camera slots, either
Static
or
DHCP
.
Note:
WatchGuard recommends that you let your DHCP server assign
the slot IP addresses.
15. If you selected the
DHCP VISTA IP Config
type, go to the next step.
If you selected the
Static VISTA IP Config
type, enter the camera slot
Subnet Mask
and
Gateway
, then an individual static
IP Address
for each of the eight slots.
16. Click
Save VISTA Settings
.
When the Transfer Station has made a successful connection with the upload server, the
amber (center) LED lights up.
Repeat this procedure to set up each VISTA Transfer Station you want to use in your
WatchGuard system.
VISTA Body Camera
WGD00120 Revision
ReviewDraft_111518
127


