INSTALLATION & USER MANUAL
7
Solar Smart Operator
Installation and User Manual
Revision 8.12.2015
8
PAIRING the REMOTE to the OPERATOR
•
Pairing sets up communication between the remote and the operator.
•
The remote will be able to control all operators assigned within a single zone simultaneously, or control all zones at once.
•
There are 9 zones (
1
thru
9
), with each zone containing 9 ID numbers (
1
thru
9
). Each operator will need to be assigned
to a zone and ID number. Each zone and ID number combination can only be assigned one operator.
•
The following instructions are applicable to pairing the first and additional operators to a single remote.
•
Each operator can only be paired with one main remote, however multiple secondary remotes may be used once setup and
configured.
The Operator
•
The remote will need to be paired within 2 minutes, or the operator will default back to the previous settings.
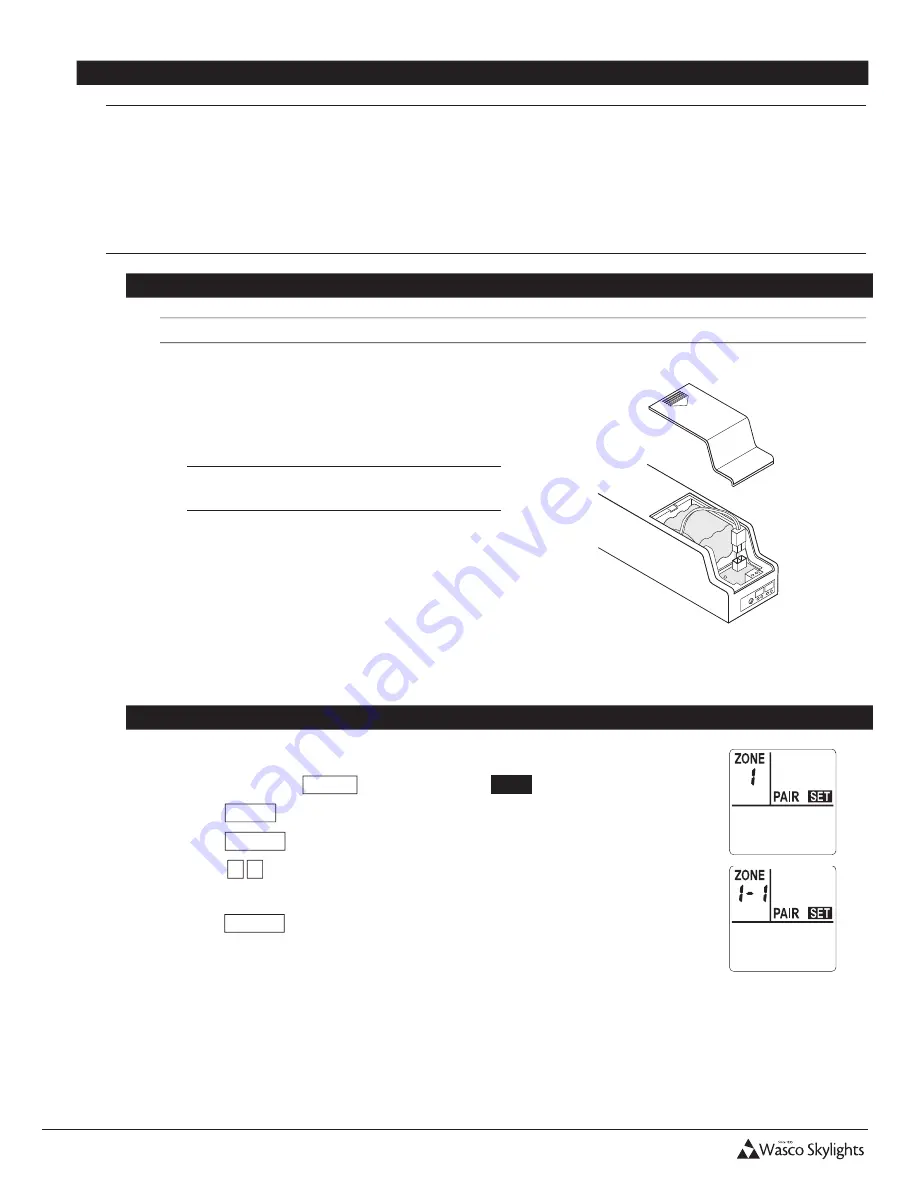
1. Remove the battery cover from the operator. If
connected, disconnect the battery connector from
the operator circuit board, for at least 30 seconds.
NOTE: The Solar Panel must also be
disconnected at this time.
2. Connect the battery connector to the operator circuit
board, pressing firmly until the plug is locked into
place.
3. The red light on the circuit board will continually
blink while it is in pairing mode.
The Remote
1. Press any key to wake up the remote, if the display has powered off.
2. Press and hold the
MODE
, release when
PAIR
SET
is displayed.
3. Press
ZONE
as necessary to choose the appropriate zone (
1
thru
9
).
4. Press
ENTER
to save your selection.
5. Press
▲ ▼
to choose the ID number (
1
thru
9
) within the zone. ID numbers
already in use will not be displayed.
6. Press
ENTER
to save your selection. The remote will attempt to pair to the
operator.
(continues on next page)


