Customizing
Page 37
The basic process for working with the OSD is as follows:
•
Press the M
ENU
button to open the OSD main menu.
•
Use the up or down buttons to select an option. When the option you want to adjust is highlighted,
press the E
NTER
button. The current settings and adjustment sub-menu for that option will appear.
•
Use the up or down buttons to adjust the option settings.
•
When you have made your changes, press the E
NTER
button to save. To exit, press the M
ENU
button.
Note:
All settings are automatically saved when the OSD menu closes and will be used the next
time the unit receives a similar video signal. This is applicable to all display modes. If you make
changes to the display appearance and cannot return to the original settings, use the R
ESET
R
ECALL
option to return Cintiq to its original factory defaults.
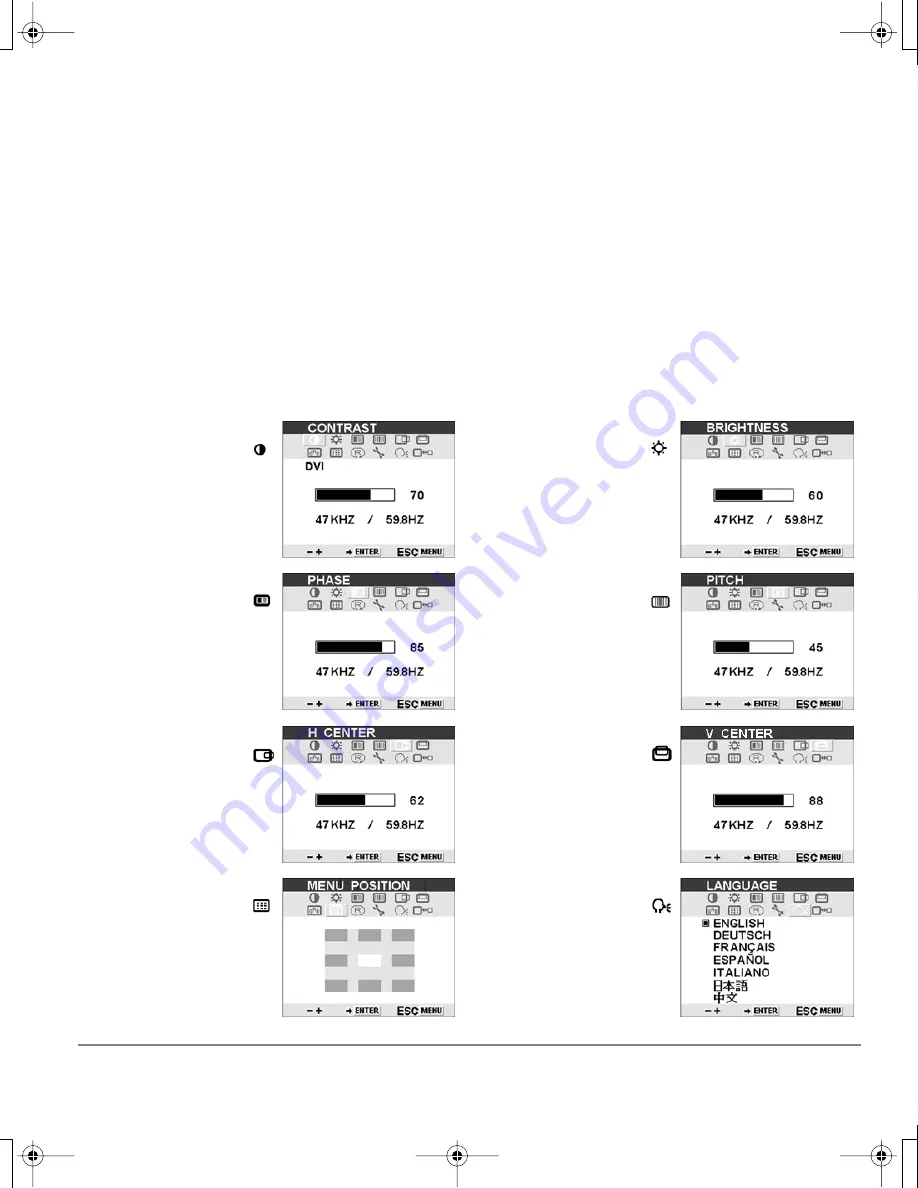
When you open the On Screen Display (OSD), the following menu options are displayed as icons:
C
ONTRAST
.
Select to
increase or decrease
image contrast.
B
RIGHTNESS
.
Select to
increase or decrease
image brightness.
P
HASE
.
(VGA only)
Select to reduce or
eliminate horizontal
distortion lines.
To automatically
adjust, use the R
ESET
option.
P
ITCH
.
(VGA only)
Select to reduce or
eliminate vertical
distortion lines.
To automatically
adjust, use the R
ESET
option.
H
ORIZONTAL
C
ENTER
.
(VGA only) Select to
move the screen image
left or right.
To automatically
adjust, use the R
ESET
option.
V
ERTICAL
C
ENTER
.
(VGA only) Select to
move the screen image
up or down.
To automatically
adjust, use the R
ESET
option.
M
ENU
P
OSITION
.
Select to move the
OSD menu around the
display screen.
L
ANGUAGE
.
Select to
choose a language
option for the OSD.
Cintiq20WSX_Manual.fm Page 37 Monday, January 15, 2007 9:23 AM


