27
28
OIMM – VENTUS PRO
BELT TENSION AND ALIGNMENT CONTROL
CHANGE OF PULLEYS
3.10.6
3.10.7
BELT TENSION AND ALIGNMENT CONTROL
•
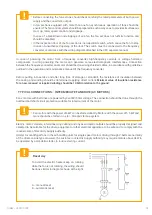
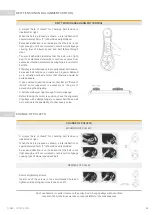
A simple “Rule of thumb” for checking belt tension is
illustrated at right.
•
When the belt is grasped as shown, a total deflection of
approximately 25mm (1”) should be easily attained.
•
Excessive deflection is an indication that the belt is not
tight enough, and if not corrected, could result in slippage
causing loss of blower speed and belt failure through
wear.
•
Too small deflection indicates that the belt is too tight,
and if not slackened somewhat could cause noise from
excessive vibration, premature bearing failure and shorter
belt life.
•
Efficiency is another reason to properly adjust belt tension.
Excessive belt tension can create such a power demand
as to actually overload a motor that otherwise would be
quite adequate.
•
It goes without question however, that like all “Rules of
thumb” some judgement is necessary on the part of
person doing the adjusting.
•
A belt should be just tight enough to avoid slippage.
•
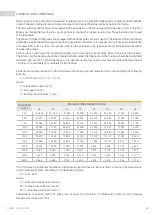
Before locking the motor is position, check the alignment
of pulleys with a straight edge to conserve belt life as well
as to eliminate the possibility of unnecessary noise.
CHANGE OF PULLEYS
MOUNTING OF PULLEYS
•
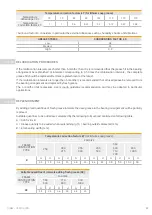
A simple “Rule of thumb” for checking belt tension is
illustrated at right.
•
When the belt is grasped as shown, a total deflection of
approximately 25mm (1”) should be easily attained.
•
Excessive deflection is an indication that the belt is not
tight enough, and if not corrected, could result in slippage
causing loss of blower speed and belt.
REMOVAL OF PULLEY
•
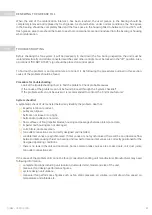
Remove tightening screws.
•
Insert one of the screws in the semi-threaded hole and
tighten until bushing becomes loose on shaft.
Don’t use hammer or puller to remove the pulley. Don’t change pulleys without written
consent of KLS; otherwise we take no responsibility for the consequences


