20
Using the Type-MX Reel
For best results from the distance counter, follow these instructions starting with the control module
turned off.
1.
Turn the cage to approximately the
9-
o’clock
position using the sonde cup as
the guide. Now use the brake to lock the
cage.
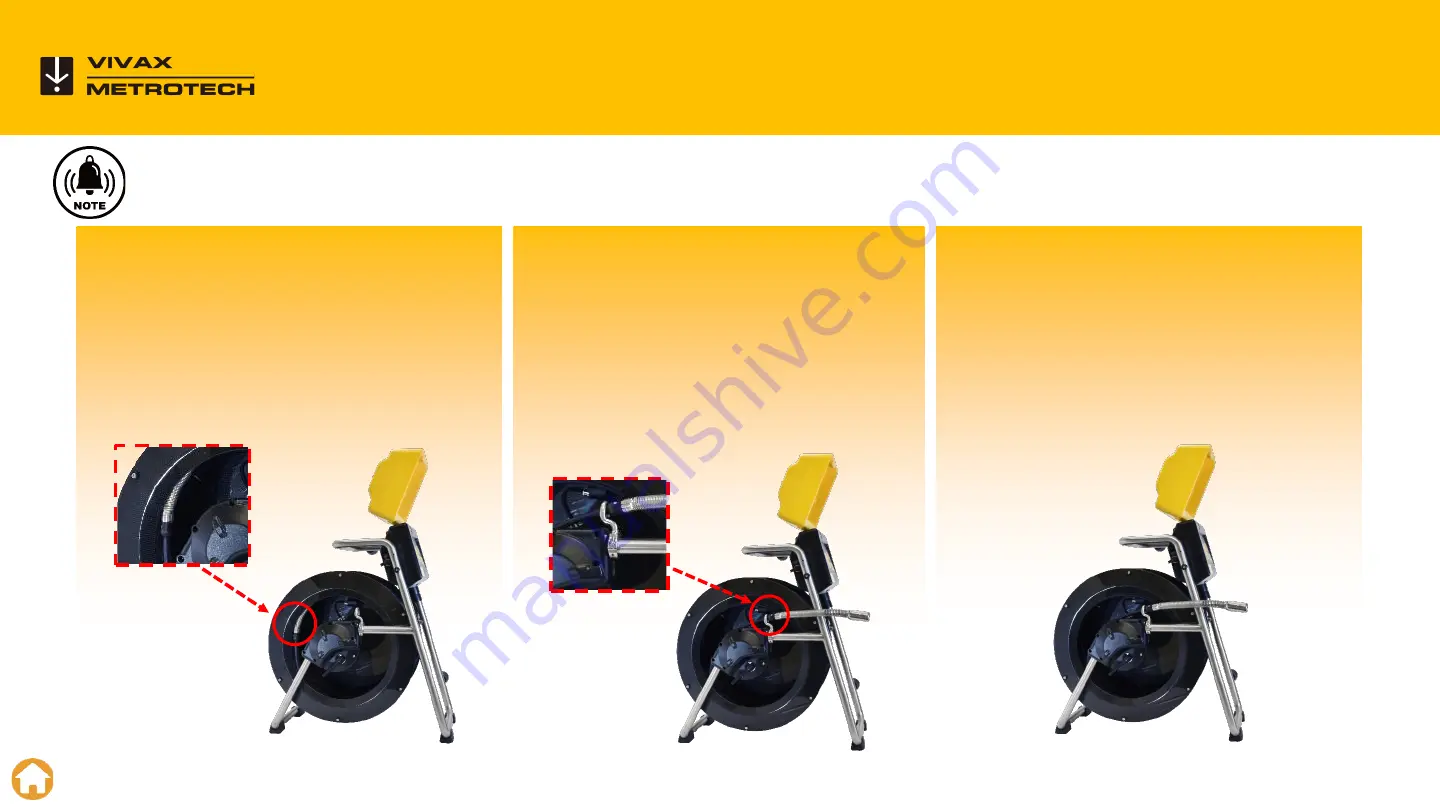
2. Reach into the cage and
grab the
spring assembly and thread the pushrod
through the cable guide.
3.
Position the base of the sonde cup into
the cable guide as shown below.
The sonde cup
(a)
is now in the cable
guide at a 12
o’clock
position, and the
pushrod section from the cage to the
sonde cup is bent from the cage to the
cable guide.
4.
Power on the control module.
When the control module starts it will
see the position of the sonde cup as
“zero
.
”
a
Summary of Contents for vCam-6
Page 1: ...vCam 6 Control Module with Standard Type CP Reel and Type MX Mini Reel vCam 6 Training...
Page 3: ...3 Introduction...
Page 6: ...6 vCam 6 Control Module 6...
Page 8: ...Slide the latch to the right to release the keyboard 8 Latch Assembly...
Page 14: ...14 Type CP Standard Reel 14...
Page 18: ...18 Type MX Mini Reel 18...
Page 24: ...24 vCam 6 Menu Structure 24...
Page 30: ...30 Video Recording 30...
Page 38: ...38 Text Overlay 38...
Page 46: ...46 Sonde Locating and Pushrod Tracing 46...
Page 51: ...51 Changing Camera Heads and Spring Assemblies...
Page 57: ...57 Removing the Type CP Reel Camera Heads This video is available on our YouTube Channel...
Page 69: ...69 Software Updates...
Page 77: ...77 Add a Start Screen...
Page 80: ...80 Compatibility Camera Specifications and Popular Accessories...
Page 87: ...87 LACP WRC Integration 87...
Page 92: ...vCam 6 Control Module LACP WRC Integration 92...


