C
ONFIGURING
THE
S
CANNER
AND
S
CREEN
B
UTTONS
21
C
ONFIGURING
THE
S
CANNER
AND
S
CREEN
B
UTTONS
When you first connect your scanner to a computer, the scanner’s
software configures each button with appropriate settings. Using the
Configuration dialog box, you can create new configurations with
settings that meet your specific scanning requirements.
A
BOUT
THE
C
ONFIGURATION
D
IALOG
B
OX
The Configuration dialog box shows the current settings for each
button on the scanner and screen panel.
The tabs across the top of the dialog box correspond to the buttons.
Clicking a tab shows the current settings for the corresponding button
on the scanner.
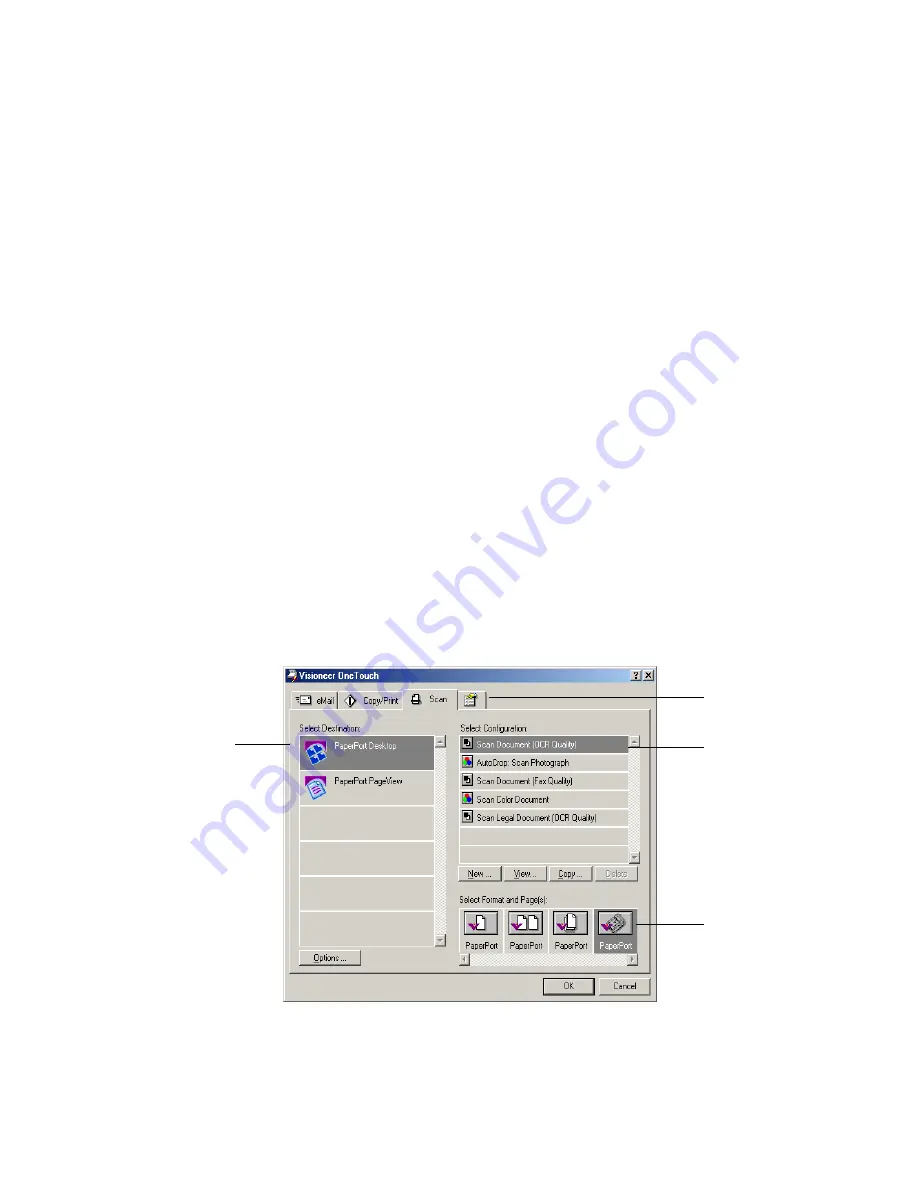
For example, the following figure shows the current settings for the
Scan button because the Scan tab is selected. The Scan button will scan
the item with the configuration named Scan Document (OCR
Quality), and then open PaperPort to display the scanned image. The
Format and Page(s) option is set to scan in the PaperPort file format
using the automatic document feeder.
See “Setting Preferences” on page 30 for settings on the Preferences tab.
Select a software
application where
to send the
scanned image.
Select a setting
for scanning
the item.
Click to set
preferences.
Select format
and page(s)
options for the
button


