VIP Residential IP Intercom Installation Guide - Issued January 2017
19
3 Additional Configuration
3.1
How to change the Indoor Monitor's IP Address
3.2
How to set up an Indoor Monitor as an Extension Monitor
When you have more than one Indoor Monitor, you must setup one Indoor Monitor as the “Master” and all the
additional monitors as “Extension” monitors. All the Door Station details will be entered into the Master monitor
and the Extension monitors will retrieve the settings from the Master monitor. You must enter in each Extension
monitor, the “Master IP” which is the IP address of the Master monitor.
1. Power on the Indoor Monitor.
2. On the Indoor Monitor go to “Settings” >
“Project Settings” > then enter the password
888888
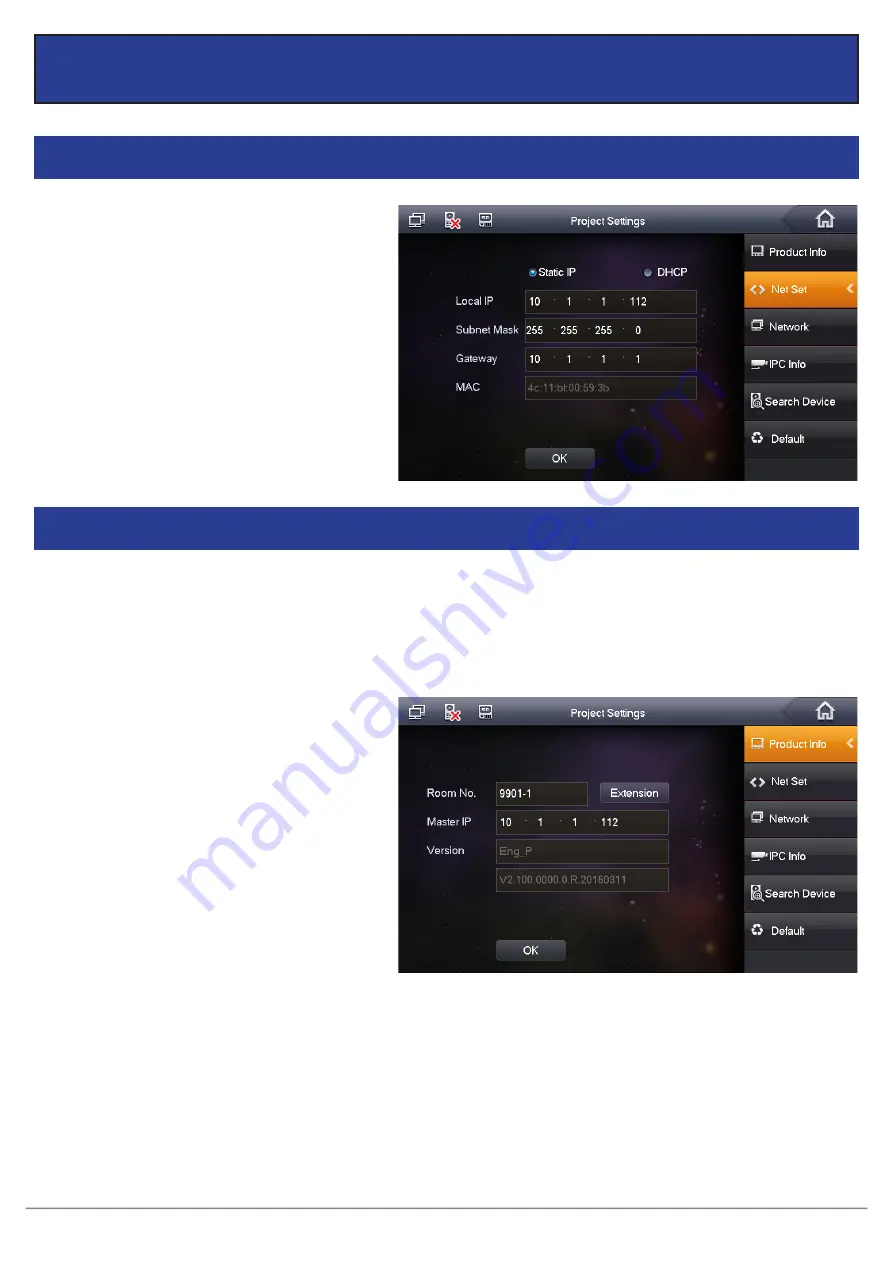
3. Select “Net Set” and change the IP address,
Subnet Mask and Gateway of the Indoor
Monitor, to the details you have chosen.
Press “OK” to save.
1. Change the Indoor Monitors IP Address (see
Section 3.1), to match your network range.
2. On the Indoor Monitor go to “Settings” >
“Project Settings” > then enter the password
888888.
3. Choose “Product Info” and change the Mode
from “Master” to “Extension”.
5. Enter the IP Address of your Master monitor
e.g.
10.1.1.112
. Press “OK” to save.
4. Input the room number you wish to use.
This should be the same number as your
Master monitor with a “-“ to indicate it is
an extension. e.g.
9901-1
for your first
Extension monitor, and
9901-2
for the
second.


