VIP Residential IP Intercom Installation Guide - Issued January 2017
13
10.
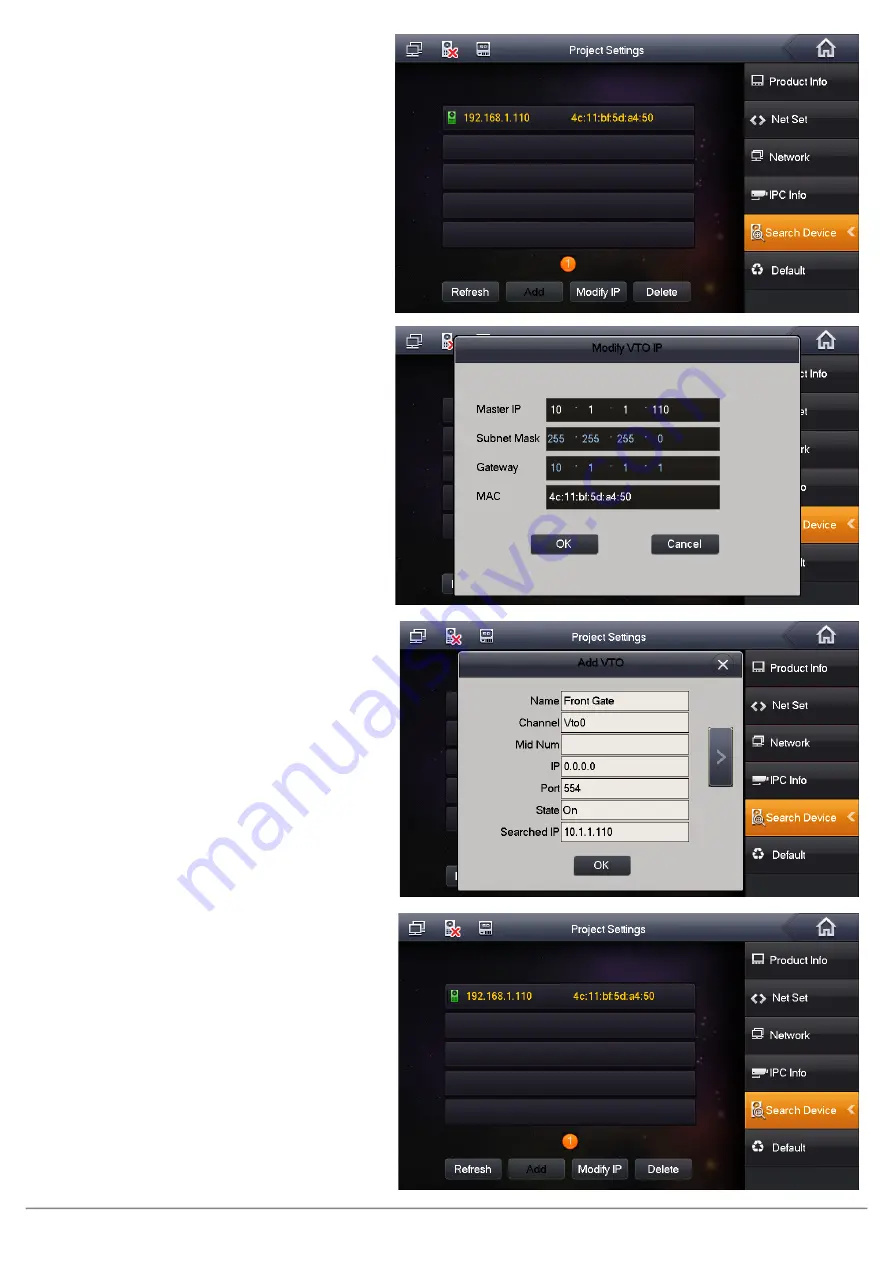
On the “Master” Indoor Monitor, go to
“Settings” > “Project Settings” > then enter
the password
888888.
11.
Select “Search Device”. You will see the Door
Station’s IP address listed.
12.
Select the Door Station, then select “Modify
IP” and change the IP address, subnet mask
and default gateway of this Door Station
from
192.168.1.110
to the new IP address
10.1.1.110
. Press “OK” to save.
13.
Once you have set the Door Stations IP
address, select the Door Station, then select
“Add”
14.
Enter a name for the Door Station for
example “Front Gate”. Press the “OK” button.
15.
A green icon will now appear next to the
IP address indicating the Door Station is
connected.
16.
Turn off power to the Door Station and
Indoor Monitors, after 10 seconds, turn the
power back on.
17.
You have now successfully connected your
VIP Residential IP Intercom.


