background image

Seeker X User’s Guide

22137808, Rev. 001

Feb 2020

50

Chapter 

2  Using Your Seeker X

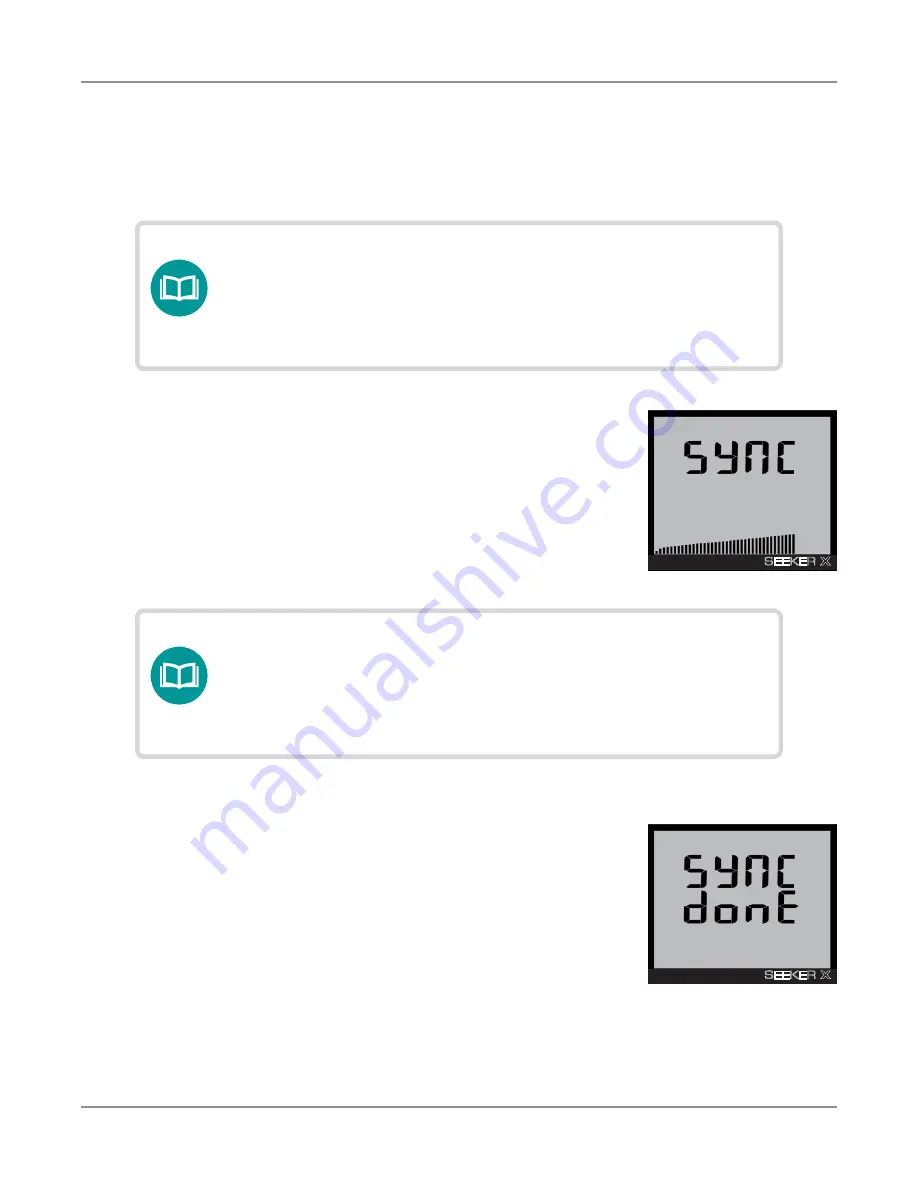
To synchronize the data between the Seeker MCA III and the 

Seeker X, press and hold the 

SNAPSHOT

 button until SYNC 

appears. While the Seeker MCA III is transferring data to the 

Seeker X, the screen shown in the image to the right will be 

displayed.

Data synchronization with Seeker MCA III (optional)

If you do not have a network connection for LAW uploads when using the Seeker X with 

the Seeker MCA III, the data recorded in the Seeker MCA III can be synchronized with the 

internal memory of the Seeker X for later upload through a PC.

When the Seeker MCA III is done transferring data to the 

Seeker X, the screen shown in the image to the right will 

be displayed. Press any button to return to the RF Signal 

Measurement display.

NOTE:
Data synchronization will only work when the Seeker X is in 

the Mobile Mount. The SNAPSHOT button is used to record 

leakage information recorded by the Seeker X when it is 

not in the Mobile Mount.

IMPORTANT:
The bar graph will show the progress of the data 

synchronization, do not remove the Seeker X from the 

Mobile Mount until the data synchronization is completed, 

otherwise data corruption (although unlikely) may occur.

Syncronization progress

SEEKER X

μV

m

dB

NOISE

FREQ

PK

DIST

GPS

Synchronization done

SEEKER X

μV

m

dB

NOISE

FREQ

PK

DIST

GPS

Summary of Contents for Seeker X

Page 1: ...Seeker X Digital Leakage Detection System User s Guide ...

Page 2: ...the VIAVI logo are trademarks of VIAVI Solutions Inc Viavi All other trademarks and registered trademarks are the property of their respective owners Copyright release Reproduction and distribution of this guide is authorized for US Government purposes only Ordering information This guide is a product of the VIAVI Technical Publications Department issued as part of the product The catalog number f...

Page 3: ...quipment CAUTION y This equipment complies with FCC radiation exposure limits set forth for an uncontrolled environment The End user must follow the specific operating instructions for satisfying RF exposure compliance y This transmitter must not be co located or operating in conjunction with any other antenna or transmitter Industry Canada Requirements This device complies with Industry Canada li...

Page 4: ...e VIAVI Standards and Policies web page If you have questions concerning disposal of your equipment or batteries contact the VIAVI WEEE Program Management team at WEEE EMEA ViaviSolutions com EU REACH Article 33 of EU REACH regulation EC No 1907 2006 requires article suppliers to provide information if a listed Substance of Very High Concern SVHC is present in an article above a certain threshold ...

Page 5: ...use cancer birth defects or other reproductive harm For the VIAVI position statement on the use of Proposition 65 chemicals in VIAVI products see the Hazardous Substance Control section of the VIAVI Standards and Policies web page Compliance with 2014 53 EU Radio Equipment Directive RED In accordance with Article 10 8 a and 10 8 b of the RED the instruments for sale in the EU operate in the 5 205 ...

Page 6: ...Seeker X User s Guide 22137808 Rev 001 Feb 2020 6 ...

Page 7: ...u conventions 13 Symbol conventions 13 Safety definitions 14 Precautions 15 What ships with the Seeker X 17 Optional kits 17 Preparation for use 17 Chapter 1 Quick Tour 19 About the Seeker X 20 Features 21 Easy configuration 21 Multiple frequency plan 21 Signal compatibility 21 Squelch operation 22 Source localization 22 Optional software 22 A guided tour of your Seeker X 23 Front view 23 Back vie...

Page 8: ...ent mode 35 Using the display 37 In the Mobile Mount 37 Outside the Mobile Mount 37 Using your Seeker X 38 Viewing the battery charge level 38 Low battery 39 Firmware version 39 Checking the battery charging status 40 Enable Disable peak hold 41 Selecting a frequency 42 Preset frequency toggle 43 Antenna selection 44 Ambient noise level measurement 44 Distance correction adjustment 45 Selecting a ...

Page 9: ...sting 53 Before you begin leakage testing 54 Testing for leaks 54 Chapter 4 Appendix 57 Specifications 58 Ordering information 59 Feature matrix 59 Display messages 61 Messages and warnings 61 Error messages 62 Limited warranty 65 Technical assistance 65 Additional information 65 ...

Page 10: ...Seeker X User s Guide 22137808 Rev 001 Feb 2020 10 Contents ...

Page 11: ...of the VIAVI warranty services and repair information Assumptions This guide is intended for novice intermediate and experienced users who want to use the product effectively and efficiently We are assuming that you have basic computer and mouse track ball experience and are familiar with basic telecommunication concepts and terminology Technical Assistance If you require technical assistance call...

Page 12: ...ns as described in the following tables Description Example User interface actions On the Status bar click Start Buttons or switches that you press on a unit Press the ON switch Code and output messages All results okay Text you must type exactly as shown Type a set exe in the dialog box Variables Type the new hostname Book references Refer to Newton s Telecom Dictionary A vertical bar means or on...

Page 13: ... See the Safety definitions on page 14 for more information This symbol represents an alert It indicates that there is an action that must be performed in order to protect equipment and data or to avoid software damage and service interruption This symbol represents hazardous voltages It may be associated with either a DANGER WARNING CAUTION or ALERT message See the Safety definitions on page 14 f...

Page 14: ...ll result in death or serious injury It may be associated with either a general hazard high voltage or other symbol WARNING Indicates a potentially hazardous situation that if not avoided could result in death or serious injury It may be associated with either a general hazard high voltage or other symbol CAUTION Indicates a potentially hazardous situation that if not avoided could result in minor...

Page 15: ...ment in any manner not specified by the manufacturer the protection provided by the equipment may be impaired CAUTION A strong electromagnetic field may affect the measurement accuracy of the meter CAUTION Use only the battery charger supplied with the meter Use of any other charger may damage the battery CAUTION Avoid using the antenna during adverse weather conditions when lightning could occur ...

Page 16: ...Seeker X User s Guide 22137808 Rev 001 Feb 2020 16 About this Guide NOTE This hand held instrument is not intended to be body worn or operated while held against the body ...

Page 17: ... for use This section explains how to start using the Seeker X When you unpack your instrument do the following y Inspect the unit for damage If the instrument is damaged put it back in the box and contact VIAVI customer service see Technical Assistance on page 11 y If undamaged save the box and packing materials in case you need to ship the instrument in the future y Remove the protective film fr...

Page 18: ...Seeker X User s Guide 22137808 Rev 001 Feb 2020 18 About this Guide ...

Page 19: ...he unit status indicators connectors and user interface including the following y About the Seeker X on page 20 y Features on page 21 y Optional software on page 22 y A guided tour of your Seeker X on page 23 y A guided tour of your Mobile Mount on page 28 y About the battery of your Seeker X on page 30 ...

Page 20: ...our plant in driveout testing and much more efficient find and fix processes for techs in the field Transition to distributed access architectures is simplified by virtualized tagging capabilities supported by most major R PHY R MACPHY and R CCAP vendors With this approach no specialized hardware is required in the hub and technicians use the same Seeker leakage detectors and work processes regard...

Page 21: ...e plans define the leakage monitoring frequencies and if desired the tag detection frequency as well You have the option of setting up only one frequency plan for simple operation or multiple leakage plans for maintaining multiple cable systems Frequency settings range from 130 150 and 250 1220 MHz NOTE While in monitoring mode the Seeker X can toggle between all of the up to 4 frequencies in a pl...

Page 22: ... increasing as well Optional software y Seeker Setup is used to configure the Seeker meter family enabling the operator to assemble files containing channel frequencies squelch levels and other settings Users can efficiently download configurations to one or more leakage detectors y StrataSync and the Mobile Tech app are used together to easily control the deployment of configuration setups and fi...

Page 23: ... Activates the Snapshot mode or press and hold to synchronize data with the optional Seeker MCA III when the meter is in the Mobile Mount POWER button Press and hold to turn the meter on or off When the meter is on press to activate the display s backlight for approximately 60 seconds CHANGE button Toggles or alters the current display selection Also toggles frequency presets from the measurement ...

Page 24: ...Seeker X User s Guide 22137808 Rev 001 Feb 2020 24 Chapter 1 Quick Tour Back view Antenna connection Connects to the Mobile Mount antenna connection ...

Page 25: ... Tour Right side view Mini USB connection Connect a mini USB cable to charge the meter or connect to a computer Bottom view Mobile Mount interface When the meter is in the Mobile Mount charges the meter and allows communication between the Seeker MCA III and the meter ...

Page 26: ...t have a good position fix 2 DIST Indicates the number of the currently selected distance preset when the distance correction has been enabled using the Seeker Setup software Distance correction is used to adjust the level of the received signal based on the distance from the vehicle to the cable plant Up to eight preset distance correction values can be enabled for the meter 3 PK Shown when the P...

Page 27: ...urrent display mode selection 11 Battery Flashes when the battery mode is selected The icon will stay on when the battery needs to be recharged 12 Speaker Flashes when the VOLUME button is pressed 13 Charge Flashes when the battery is being charged or when the device is placed in the Mobile Mount and the Battery Charge Level screen is displayed Messages you might see on the display y PC The meter ...

Page 28: ... place the Seeker X into the Mobile Mount place the bottom of the Seeker X in the cradle and press down while pressing the top of the Seeker X back into the Mobile Mount to connect the Seeker X antenna input to the Mobile Mount antenna connection The spring return of the cradle will secure the top of the Seeker X upward into the recess in the top of the Mobile Mount Mobile Mount interface When the...

Page 29: ...ker MCA III MCA III serial connection Connects to the Seeker MCA III DC power cable input Connects to your vehicle s power Mounting arm Secures the Mobile Mount to the vehicle Use the knob to tighten and loosen the arm and then adjust the angle of the arm to achieve the proper mounting angle The arm should be securely fastened to the vehicle with four screws or bolts NOTE For detailed vehicle inst...

Page 30: ... following charging methods y Connecting the Mini USB cable and charger from an AC power source to the Seeker X The Mini USB charge data cable and charger must be connected to both the Seeker X and a working power outlet before AC charging can begin y Connecting the Mini USB vehicle cable and charger from the vehicle power jack to the Seeker X The Mini USB charge data cable must be connected to bo...

Page 31: ...display y When the Seeker X is on and it is placed in the Mobile Mount the display remains on the Measurement mode screen Charging with the optional Seeker MCA III When the Seeker X is used with the optional Seeker MCA III the following charging actions will occur y When the Seeker X is on and charging the display remains on the Measurement mode screen y If the Seeker X is turned off and is placed...

Page 32: ...Seeker X User s Guide 22137808 Rev 001 Feb 2020 32 Chapter 1 Quick Tour ...

Page 33: ...perate the unit including the following y Seeker X setup on page 34 y Basic operation on page 34 y Using the display on page 37 y Using your Seeker X on page 38 y Distance correction adjustment on page 45 y Speaker volume level on page 47 y Saving measurement snapshots on page 48 y Seeker MCA III display screens optional on page 51 ...

Page 34: ...you hear three descending tones as the meter turns off Low battery warning A very low battery may cause the Seeker X not to turn on When the battery is too low for your Seeker X to function LO BATT shows on the display The battery must be charged for a few minutes before using again Seeker MCA III communication successful optional After placing the Seeker X in the Mobile Mount and upon successful ...

Page 35: ... at the bottom of the display illuminates proportionally to the signal strength of the leak Additionally an audible tone will sound if the measured signal breaks squelch The signal breaks squelch when the RF leakage is greater than the squelch level and tag qualifiers are also met This tone can be used to help locate the source of the leak and perhaps more importantly the potential source of ingre...

Page 36: ...el of the detected signal Additionally the tag icon is displayed in the upper right corner of the display to indicate the leakage detector is receiving at least one tagged signal from the CT X If the tag icon is not displayed along with the signal level the show noise setting is turned on In this mode the signal levels that are displayed will also include non tagged noise that is received by the l...

Page 37: ...in the corresponding area of the screen If leaks are detected in alternate frequencies a tone will sound to alert you but the level won t be shown Outside the Mobile Mount When removed from the Mobile Mount the Seeker X no longer automatically scans through the frequency plan and only displays one frequency at a time as shown here y To show the current frequency setting press the CHANGE button The...

Page 38: ...Seeker X should be charged y The numerical display will continue to display the RF signal level Using your Seeker X While testing for leaks you will need to view the information shown by the Seeker s display modes y Use the SELECT button to toggle through its display modes As you toggle the display modes will appear in the same order in which they are discussed in this section y Use the CHANGE but...

Page 39: ...rge level display pressing the CHANGE button will display the following information y The Battery icon will continue to flash and the bar graph will continue to indicate the relative battery charge level y The screen first displays the application firmware version number y After 5 seconds the screen displays the FPGA firmware version number y Finally the screen displays the package information NOT...

Page 40: ...l y The bar graph will display the progress of the charging cycle If two or more bars are displayed then power is present and charging is in progress NOTE If the Seeker X is not completely seated in the Mobile Mount the charge screen will not be available NOTE If the Seeker X is not detecting any power to the Mobile Mount the bar graph will not be displayed NOTE The display will revert to the sign...

Page 41: ...play is selected the following will occur y If the Peak Hold function is currently disabled the PK icon flashes with the arrow below the icon y If the Peak Hold function is currently enabled only the arrow below the PK icon flashes y When the Peak Hold function is enabled the following will occur in the Signal Level display y The PK icon is constantly displayed at the top of the screen y The numer...

Page 42: ...ne 2 It only shows the first 3 digits of the frequency for each at first y After a few seconds the display shows the remaining 4 digits for both frequencies y The signal type is then displayed followed by the tags for those frequencies y The remaining information for the first two presets will be displayed on subsequent screens until complete and then repeat the steps above for the remaining frequ...

Page 43: ... few seconds the display will change to show the tag for both the first and second frequencies y The remaining information for the first two presets will be displayed on subsequent screen changes until complete and then repeat the steps above for the remaining frequencies in the plan if there are any up to 4 total frequencies y When the display has cycled through the information for all of the ena...

Page 44: ... the ambient noise y The RF signal level of the ambient noise is also displayed next to NOISE y Noise is not indicated when the Seeker X is in the Mobile Mount Antenna selection When the Seeker X is either removed from the Mobile Mount turned on or the selected preset frequency is changed to another frequency band High to Low Low to High the following will occur y An suggestion is displayed that t...

Page 45: ... the cable plant NOTE This feature is disabled by default at the factory In the Seeker Setup software the Enable Distance Correction checkbox must be selected and at least one distance has been configured and enabled before this feature will work NOTE The display will revert to the signal level display after a few seconds in the distance correction display without any action by the user Use the DI...

Page 46: ...are To select a preset distance turn your Seeker X on and press the DISTANCE button y When the DISTANCE button is selected the distance preset will toggle through the enabled presets 1 8 as indicated below y The distance correction for each preset is displayed NOTE For detailed instructions on how to set the distance correction values see the Seeker Setup Software User s Guide or the StrataSync Us...

Page 47: ...ill hear the volume change in the leakage tone y The display continues to show the RF signal level as you adjust y You can also press and hold the volume button to quickly increase the volume and lower it again Speaker volume level While testing for leaks you may need to adjust the volume of the leakage tone NOTE The display will revert to the signal level display after a few seconds in the speake...

Page 48: ...K DIST GPS Post fix snapshot SEEKER X μV m dB NOISE FREQ PK DIST GPS Pre Fix To record the pre fix leakage information recorded by the Seeker press the SNAPSHOT button when this screen is displayed Post Fix To record the post fix leakage information recorded by the Seeker press the SNAPSHOT button when this screen is displayed Use the SNAPSHOT button to display the Snapshot mode The Snapshot modes...

Page 49: ...e through the screens displayed above until you make a selection This enables you many opportunities to take a snapshot of the leakage signal No snapshot SEEKER X μV m dB NOISE FREQ PK DIST GPS No snapshot To cancel the snapshot of the information recorded by the Seeker press the SNAPSHOT button when this screen is displayed ...

Page 50: ...eeker X for later upload through a PC When the Seeker MCA III is done transferring data to the Seeker X the screen shown in the image to the right will be displayed Press any button to return to the RF Signal Measurement display NOTE Data synchronization will only work when the Seeker X is in the Mobile Mount The SNAPSHOT button is used to record leakage information recorded by the Seeker X when i...

Page 51: ...PS receiver is not receiving a satellite signal the GPS icon flashes NOTE When the Mobile Mount is not connected to a Seeker MCA III the GPS icon is not shown on the display NOTE When the GPS receiver has been off or has not been able to receive a satellite signal for more than five minutes the device will beep twice every few seconds until the condition is corrected NOTE When the GPS receiver IS ...

Page 52: ...Seeker X User s Guide 22137808 Rev 001 Feb 2020 52 Chapter 2 Using Your Seeker X ...

Page 53: ... 001 Feb 2020 53 3 Leakage Testing This chapter provides an overview of the steps needed to perform leakage testing using the Seeker X including the following y Before you begin leakage testing on page 54 y Testing for leaks on page 54 ...

Page 54: ...on is used the CT X Digital Channel Tagger must be installed and set up within the system before testing for leaks NOTE For more information about using the Preset Frequency or Channel Tag features see Chapter 2 Using Your Seeker X on page 33 1 Turn on the Seeker X Press the POWER button until you hear 3 ascending tones The Seeker X will power up in RF Level Measurement mode 2 Confirm the desired ...

Page 55: ...will alarm The frequency of the alarm tone will increase as the detected signal strength increases Continue to move the Seeker X in the direction producing the highest tone frequency to locate the source of the leak 5 Turn OFF the Seeker X When testing is complete turn off the Seeker X by holding down the POWER button until you hear 3 descending tones This step is not required if you leave the See...

Page 56: ...Seeker X User s Guide 22137808 Rev 001 Feb 2020 56 Chapter 3 Leakage Testing ...

Page 57: ...01 Feb 2020 57 4 Appendix This appendix includes troubleshooting and supplemental information including the following y Specifications on page 58 y Ordering information on page 59 y Feature matrix on page 59 y Display messages on page 61 ...

Page 58: ...Pitch is proportional to strength of leak Automatic Noise and Overbuild Discrimination Internal circuitry discriminates between leaks and noise Overbuild discrimination provided by CT X channel tagger installed in hub or head end Power Internal battery with 3 hours of operation per charge 2 hours charging time OR Vehicle power of 12 VDC while in Mobile Mount Configuration Methods y StrataSync with...

Page 59: ...n n n Seeker X Mobile Mount Wiring Kit TRI LKG SKR X MM WIRE KIT n n n AC Travel Charger and USB Cable n n n Wideband VHF UHF Antennas WFS 1 Low band adjustable dipole 130 MHz 450 MHz TRI LKG ANT WFS 1 n n n WFS 2 High frequency wideband directional antenna 450 MHz 1220 MHz TRI LKG ANT WFS 2 n n n WVM 2 magnetic base wideband vehicle antenna 250 1220 MHz TRI LKG ANT WVM 2 n n n UHF Band Antennas A...

Page 60: ...i antenna TRI LKG MCAIII WIFI ANT n n Shielded ethernet cable 10 ft TRI ACCY CAT5 10FT QUAD n n Optional Accessories GPS receiver for Seeker MCA II and Seeker MCA III TRI LKG GPS MCA n n CL 9 vehicle power adapter TRI ACCY USBPWR VEH WCBL n Carrying bag with strap for meter and accessories AC BAG METER MEDIUM n n n Digital Channel Tagger CT X Channel Tagger TRI LKG CTX Available Software Seeker Se...

Page 61: ... press Display messages Descriptions CA 0 The meter is connected to the MCA CA 1 The meter is syncing snapshots to the MCA LO BATT Displays when the battery is very low recharge the battery FS 1 Attach the WFS 1 low band antenna FS 2 Attach the WFS 2 high band antenna SYNC The MCA is syncing snapshots to the meter DB FULL Database is full on the meter Sync to the MCA or LAW SYNC DONE Sync from the...

Page 62: ...t fix return to the factory for repair RF 3 Reboot the unit and retry If it doesn t fix return to the factory for repair RF 1_8 Reboot the unit and retry If it doesn t fix return to the factory for repair RF 2 Reboot the unit and retry If it doesn t fix return to the factory for repair RF 5 Reboot the unit and retry If it doesn t fix return to the factory for repair CLOC SYN Reboot the unit and re...

Page 63: ... repair FLSH ID Reboot the unit and retry If it doesn t fix return to the factory for repair FL_T FAIL Reboot the unit and retry If it doesn t fix return to the factory for repair FL_E FAIL Reboot the unit and retry If it doesn t fix return to the factory for repair BAD TSEN Reboot the unit and retry If it doesn t fix return to the factory for repair NO CAL Calibration file is missing Try to recov...

Page 64: ...es Descriptions BAD APP File system is corrupted Contact VIAVI at 1 844 GO VIAVI 1 844 468 4284 for assistance FPGA DONE Reboot the unit and retry If it doesn t fix return to the factory for repair FPGA INT Reboot the unit and retry If it doesn t fix return to the factory for repair ...

Page 65: ...equire technical assistance call 1 844 GO VIAVI 1 844 468 4284 For the latest TAC information visit http www viavisolutions com en services andsupport support technical assistance Additional information For more detailed information contact us at Trilithic support viavisolutions com for these additional documents Seeker X Installation Guide Seeker MCA III User s Guide Seeker MCA III Installation G...

Page 66: ...rica 1 844 GO VIAVI 1 844 468 4284 Latin America 52 55 5543 6644 EMEA 49 7121 862273 APAC 1 512 201 6534 All Other Regions viavisolutions com contacts email Trilithic support viavisolutions com 22137808 Rev 001 Feb 2020 English ...

Reviews: