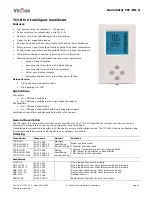
Humidistat TCY-BH-U
Doc:70-07-0102, V1.1, Date: 20100504
© Vector Controls GmbH, Switzerland
Page 7
Subject to alteration
Operation of the Terminal Unit
Switching ON
The unit is switched on by pressing the POWER button. It will start up in comfort mode.
Changing between COMFORT and ECONOMY
Pressing the POWER button for less than 2 seconds toggles between ECONOMY and COMFORT modes. Economy mode may be
disabled with UP-06.
Switching OFF
Pressing the POWER button for more than 2 seconds, will switch the unit off. OFF and current time will be displayed in the
LCD.
Standard display
This display mode is active if no UP/DOWN or OPTION button has been pressed during the previous 30 seconds. The contents
of the large and small digits may be chosen with parameters UP-10 and UP-11.
Pressing UP/DOWN button will show the humidity setpoint in the small digits and room humidity in the large digits.
Changing of set points
Press UP/DOWN buttons to change humidity setpoint. Changing of set points may be disabled with UP-01.
Showing the external temperature sensor
If temperature setback is enabled, the measured external temperature can be seen by pressing the OPTION button for less
than 3 seconds.
Accessing advanced settings
Pressing the option button for more than three seconds will start the advanced setup menu. The basic version will only show
heat/cool setup. The deluxe version will allow access to the time setting function.
The large LCD digits display SEL. The advanced setup menu accesses these settings: CALH, CAL t, Clock setup, Time schedule.
The menu may be left by pressing the POWER button or by not pressing a button for more than 5 minutes.
Clock Setup and Time Schedule (only available on Deluxe versions)
•
Calibration of inputs:
SEL is displayed in the large digits and CALH or CAL t in the small. Pressing OPTION will
reveal the current calibration value of the humidity sensor (CALH) or the temperature input (CAL t). Change the
value with the UP/DOWN keys and confirm with OPTION key.
•
Clock Setup:
The current time is displayed in the small digits. Pressing the OPTION button will enter the clock setup.
The minutes are blinking and may be changed with the UP/DOWN buttons. Pressing OPTION saves the minutes and
steps to the hours. The hours are blinking. Pressing the OPTION button again will step to the weekday. DAY1-7 is
displayed. Day 1 stands for the first working day (Monday) of a 5-day working week. (See schedule). Select the day
according to current weekday. Pressing Option again saves the settings and moves back to the SELECT menu.
•
Time Schedules:
press the option button while Pro is displayed in the small digits. Pro1 is now shown in the large
digits, while the number 1 is blinking. Select time program by using UP/DOWN buttons. There are a total of 4 time
programs with each 4 switching times available. Enter the time program by pressing the OPTION button.
1.
Activate or deactivate the time program. Choose ON or OFF with the UP/DOWN buttons
2.
Select weekday(s) = d1-7, d1-5, d6-7, day1, day2, day3, day4, day5, day6, day7
The next steps define the switching mode and time. The bar indicator on the right side shows programming progress.
There are four switch times for each program.
3.
Select desired operation mode. (no, OFF, ECO, ON, UNI), press OPTION to continue
no = disables this switching time
OFF = switches unit Off, enables reset timer
ECO = sets operation mode to On and Economy, disables reset timer
ON = sets operation mode to On and Comfort, disables reset timer
UNI = Does not change operation mode, only disables reset timer
4.
Select switching time 00:00 to 23:45 in 15-minute steps; press OPTION to continue.
5.
Repeat steps 3 and 4 for each switching time.
Access to time schedules may be disabled with UP-04


