OPERATION
22
5. Material: The Grinder is designed to shred hay,
straw, haylage, hay silage and paper
during operation. Bales containing rocks, stones,
pieces of metal, roots, wire, twine, plastic
wrapping or mesh must not be used.
These can damage the working components or
wrap in the moving parts. Remove all foreign
material before placing in the tub.
6. Loading tub: Use a loader or fork lift to place
material into the tub. It can be loaded from
above or from the side by opening the doors on
the tubs.
IMPORTANT! Never load the tub while the
machine is running! Always stop the PTO before
loading the machine.
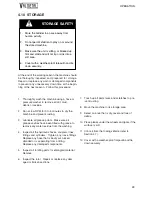
A. Side loading
a. Rotate the tub until doors are centered at
right angles to the machine.
b. Be sure power unit is shut off.
c. Use the winch to retract the baffles.
d. Open the tub doors.
e. Use a loader or fork lift to bring the new
bale up to the Grinder.
f.
Completely remove all plastic wrap,
twine or mesh from the bale. Dispose of
them away from the work site.
g. Place bale towards the back side of the
tub.
h. Close and latch tub doors.
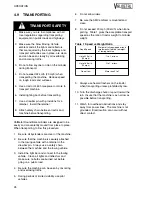
B. Top loading
a. Retract the baffles.
b. Bring the new bale up to the machine.
c. Remove the strings or mesh before
placing in the tub.
C. Release the tub baffles to allow them to
extend as required during operation.
IMPORTANT
Remove bale wrapping material prior to placing in tub.
It is easier to have access to all sides before it goes
into the tub. If any wrapping material remains, it prob-
ably will get caught in moving parts and could plug the
machine.
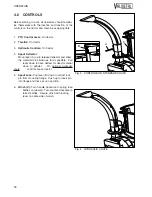
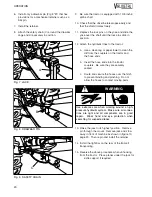
Fig. 11 LOADING FROM THE TOP
Fig. 12 LOADING FROM THE SIDE
Summary of Contents for H Series
Page 1: ...ROUND BALE GRINDER MODEL H OPERATOR S MANUAL AND PARTS BOOK INC FARM EQUIPMENT MANUFACTURER...
Page 6: ...2...
Page 31: ...Fig 23 MANGER FEEDING OPERATION 27...
Page 34: ...OPERATION 30...
Page 46: ...SERVICE MAINTENANCE 42...
Page 52: ...7 4 HYDRAULIC CIRCUIT SPECIFICATIONS 48 GRATE CYLINDERS TO TRACTOR...
Page 53: ......
Page 66: ...H C R PPE PPER CH 16 8 7 10 9 11 4 15 14 1 13 12 2 6 5 3 17 CUVE TUB D 9 10 17 18 19...
Page 69: ...1 5 9 2 3 4 6 8 17 CHUTE MANUELLE MANUAL CHUTE E 7 7 6 2...
Page 75: ...1 3 5 2 4 17 CHUTE MANUELLE D FLECTEUR MANUAL CHUTE DEFLECTOR H 6 6 4 2 8 10 12 9 7 9 11...
Page 78: ......
Page 79: ......
Page 80: ......
Page 81: ......
Page 82: ......
Page 83: ......
Page 84: ......
Page 85: ......


