19
5 KNOW HOW FÜR DEN BETREIBER
5.1 Service-Modul
(Betriebsstunden, Fehlermeldung)
5.1.1 Service-Modul
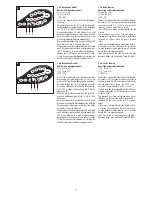
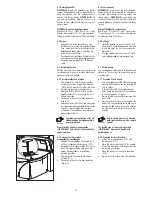
Die Bedien-Einheit (31/1) dient zur Anzeige von
verschiedenen Betriebszuständen, Fehlermel-
dungen und liefert Service-Informationen. Mit den
Tasten der Folientastatur wird das Gerät bedient.
Im Standby Modus zeigt das Display den Wert
Null (31/1).
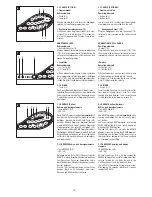
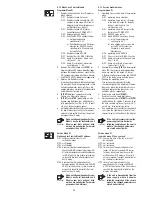
Das Service-Modul umfasst drei Menüs zum Ab-
rufen von Betriebszuständen und Ablesen von
Fehlermeldungen auf dem Display (31/1) und
(32/1):
•
Programm Menü Pr (32/2)
•
Service Menü
S1 (32/3)
•
Service Menü
S2 (32/4)
5.1.2 Bedienung des Service-Moduls
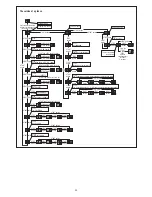
(siehe Service-Modul auf einen Blick Seite 22)
1.
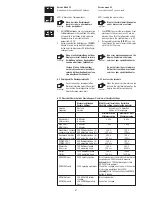
[START]
(33/1) und die
[STOP]
(33/2) ca.
4 Sekunden lang gleichzeitig betätigen:
Das Programm Menü
Pr
(32/2) erscheint
auf dem Display.
2.
[START]
betätigen zum Wechseln zwischen
den drei Menüs.
Programm Menü
Pr
, Service Menü
S1
oder
Service Menü
S2
erscheinen.
3.
Zum Programm-Eintritt im Programm Menü
Pr [STOP]
drücken:
Die oberste Menüebene
P1
(32/5) erscheint.
4.
Mit
[START]
zur nächsten Menüebene
wechseln
5.
[STOP]
betätigen zur Anzeige der Parameter,
z.B. Betriebsstunden:
Es werden alternierend zwei Werte angezeigt.
Die einzelne Ziffer, die angezeigt wird, ist die
Zehntausenderstelle, die zwei Ziffern, die
angezeigt werden, stellen die Tausenderstelle
und die Hunderterstelle dar.
6.
[START]
betätigen und gedrückt halten.
Zehner- und Einerstelle ablesen
7.
[START]
und
[STOP]
gleichzeitig ca. 4 Se-
kunden lang betätigen zum Setzen der bis
jetzt gezählten Zeit auf Null (32/1) (Reset),
z.B. nach einem Lampenwechsel.
8.
Auf der obersten Menüebene
Pr
erneut
gleichzeitig
[START]
und die [
STOP]
ca. 4
Sekunden lang betätigen.
Das Service-Menü wird verlassen, das
Display geht in den Standby-Modus.
Wenn nach Beendigung des Service-
Moduls das Gerät innerhalb von 5
Minuten vom Netz getrennt wird,
werden die geänderten Parameter
gespeichert und aktiviert.
Werden Parameter geändert, aber nach dem Aus-
tritt aus dem Service-Modul nicht durch Trennen
des Geräts bestätigt, bleiben sämtliche Ein-
stellungen bestehen, die vor dem Eintritt in das
Service-Moduls aktiv waren.
Weitere Informationen zum Service-Modul sind
im Diagramm auf Seite 22 zu finden.
5 KNOW HOW FOR THE OPERATOR
5.1 Service module
(Operating hours, error messages)
5.1.1 Service module
The operating unit (31/1) is used to display
various operating states and error messages and
provi-des service information.
The unit is operated with the buttons on the key
pad. In the standby mode, the display shows the
value zero (31/1).
The service module includes three menus for
calling up operating states and for reading error
messages on the display (31/1) and (32/1):
• Program menu Pr (32/2)
• Service menu
S1 (32/3)
• Service menu
S2 (32/4)
5.1.2 Operating the service module
(see Service module at a glance on page 23)
1.
Simultaneously actuate
[START]
(33/1) and
[STOP]
(33/2) for approx. 4 seconds:
The program menu
Pr
(32/2) appears on
the display.
2.
Actuate
[START]
to change between the three
menus.
The program menu
Pr
, service menu
S1
or
service menu
S2
appears.
3.
To enter the program, press
Pr [STOP]
in
the program menu.
The top menu level
P1
(32/5) appears.
4.
Use
[START]
to switch to the next menu level
5.
Actuate
[STOP]
to display the parameters,
e.g. operating hours
Two values are displayed alternately. The
single digit which is displayed is the ten-
thousands place; the two digits which are
displayed represent the thousands and
hundreds places, respectively.
6.
Actuate and hold down
[START]
.
Read the tens and single digit places
7.
Simultaneously actuate
[START]
and
[STOP]
and hold down for approx. 4 seconds to set
the time counted up to now to zero (32/1)
(reset), e.g. after replacing
a lamp.
8.
On the top menu level
Pr
, again actuate
[START]
and [
STOP]
simultaneously for
approx. 4 seconds.
The service menu is exited and the display
switches to the standby mode.
If the unit is disconnected from the
power supply within 5 minutes
following completion of the service
module,the changed parameters
are stored and activated.
If parameters are changed, but not confirmed
after exiting from the service module by
disconnecting from the power supply, all settings
remain as they were prior to entering the service
module.
For further information on the service module,
refer to the diagram on page 23.
32
Wichtig!
Important!
P
O
00
1
1
2
3
4
5
6
7
8
9
10
P
O
1
88
2
3
31
33

