31
1
2
3
4
5
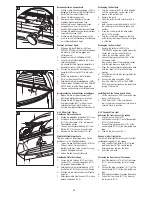
6.3.3 uwe Leucht Logo
in der Mitte des Fluters
Fronthaube Fluter abnehmen
1.
Drehen Sie die beiden Schrauben (48/2) aus.
2.
Schieben Sie die Fronthaube (48/1) aus den
Aussparungen (48/4) der grossen Abdeck-
haube heraus.
3.
Lösen Sie die Steckverbindung (48/5) der
Platine (48/7) für das uwe Leucht-Logo.
4.
Nehmen Sie die Fronthaube (48/1) ab.
Platine wechseln
1.
Schrauben Sie die alte Platine ab.
2.
Befestigen Sie die neue Platine (48/7) mit
den Schrauben (48/6).
Fronthaube Fluter befestigen
1.
Führen Sie die Laschen (48/3) der Front-
haube (48/1) in die Aussparungen (48/4)
der grossen Abdeckhaube ein.
2.
Verbinden Sie die Steckverbindung (48/5)
der Platine (48/7) für das uwe Leuchtlogo.
4.
Drücken Sie die Fronthaube zur Griffleiste
herunter.
3.
Befestigen Sie die Fronthaube (48/1) mit den
beiden Schrauben (48/2).
6.3.4 Auswechseln der ND-Lampen in
der Liege (optional)
Einbrennen der Lampen
Die Lampen weisen anfänglich leichte Farbunter-
schiede auf. Diese Erscheinung verliert sich nach
kurzer Zeit. Die Lampen brennen an den Enden
dunkler. Dies ist physikalisch bedingt und kein
Fehler an der Lampe.
Liegenscheibe hochklappen
1.
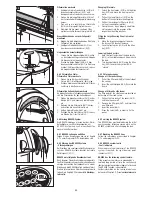
Entriegeln Sie die beiden Drehriegel (49/2)
in Richtung Symbol (49/3) offen
mit dem Innensechskantschlüssel (49/1).
2.
Bewegen Sie die Liegenscheibe (50/1)) nach
oben. Die Liegenscheibe wird durch die
beiden Gasdruckfedern (50/3) oben
gehalten.
3.
Die Klimascheibe (50/2) wird durch die
Halterung an der Liegenscheibe gehalten.
Auswechseln der ND-Lampen
1.
Drehen Sie die defekte ND-Lampe (50/5) bis
die Kontaktstifte in der Nut der Fassung
(50/4) sichtbar sind.
2.
Ziehen Sie die ND-Lampe heraus.
3.
Halten Sie die neue ND-Lampe waagerecht
und zwar so, dass die Kontaktstifte senkrecht
übereinander liegen.
4.
Drücken Sie die ND-Lampe in dieser Lage in
die Fassung. Drehen Sie die ND-Lampe um
90 Grad, sodass die Einkerbung im
Metallring am Lampenende oben liegt.
Liegenscheibe herunterklappen
1.
Fassen Sie die Liegenscheibe (49/5) mittig
an der vorderen Längsseite an und klappen
Sie diese auf die Liege herunter.
2.
Drehen Sie beide Riegel (49/2) mit dem
Innensechskantschlüssel (49/1) in Richtung
Symbol (49/4) geschlossen zurück , so dass
die Liegenscheibe fest verankert ist.
6.3.3 uwe Leucht Logo
in der Mitte des Fluters
Removing the front cover of the canopy
1.
Loosen the two bolts (48/2).
2.
Pull the front cover (48/1) out of the sparings
(48/4) of the big cover.
3.
Loosen the plug connection (48/5) of the
control board (48/7) for the illuminated uwe
logo.
4.
Take off the front cover (48/1).
Change of the control board
1.
Remove the old control board.
2.
Fasten the new control board (48/7) by
means of the bolts (48/6).
Fastening the front cover of the canopy
1.
Insert the brackets (48/3) of the front cover
(48/1) into the sparings (48/4) of the big
cover.
2.
Connect the plug connection (48/5) of the
control board
(48/7) for the illuminated uwe logo.
4.
Pull the front cover down towards the handle.
3.
Fasten the front cover (48/1) by means of
the two bolts (48/2).
6.3.4 Replacing the LP lamps
in the bed (optional)
Burning in the lamps
When first used, the lamps may have slight
variations in color. This phenomenon disappears
after a short time. The lamps illuminate darker at
the ends. This is a physical phenomenon and not
a defect of the lamp.
Lifting the bed acrylic
1.
Unlock the two spagnolets (49/2) towards
the symbol (49/3) “open” with the Allen key
(49/1).
2.
Move the bed acrylic (50/1) upwards. The
bed acrylic is held up by means of the two
gas springs (50/3).
3.
The lower bed acrylic is held on the upper
bed acrylic (50/2) by means of a holding
device.
Replacing the LP lamps
1.
Rotate the defective LP lamp (50/5) until
the contact pins are visible in the groove of
the base.
2.
Pull out the defective LP lamp.
3.
Hold the new LP lamp horizontally in such a
way that the contact pins are vertically
aligned.
4.
While in this position, press the LP lamp into
the base. Rotate the LP lamp 90 degrees so
that the notch in the metal ring at the end of
the map is at the top.
Lowering the bed acrylic
1.
Hold the front long side of the bed acrylic
(49/5) in the middle and push it down onto
the bed.
2.
Turn back both bolts (49/2) using the Allan
key (49/1) towards the symbol (49/4).
“closed”.
49
48
3
1
2
4
5
6
7
50
1
2
3
4
5

