33
P
88
3
2
1
1
2
3
4
5
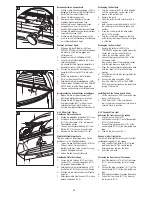
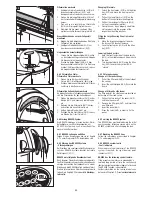
Filtermatten wechseln
1.
Entriegeln Sie die Frontschürze (53/2) mit
Innensechskantschlüssel (53/1) und
bewegen Sie die Frontschürze nach vorne.
2.
Ziehen Sie die lange Filtermatte (53/3) auf
der Unterseite der Montageplatte Steuerung
heraus.
3.
Ziehen Sie die rechteckige Filtermatte
(53/4) am Klimagerät (Option) heraus.
4.
Klemmen Sie die neuen sauberen Filter-
mattenzuschnitte formschlüssig in die Nut.
Grosse Abdeckhaube vor dem Fußgestell
montieren
4.
Kippen Sie die Abdeckhaube oben Richtung
Fußgestell, bis sie anliegt.
5.
Verriegeln Sie Abdeckhaube (53/2) mit
dem Innensechskantschlüssel (53/1).
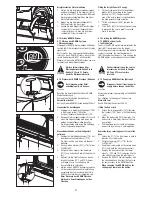
Liegenscheibe herunterklappen
1.
Fassen Sie die Liegenscheibe (54/5) mittig
an der vorderen Längsseite an und klappen
Sie diese auf die Liege herunter.
2.
Drehen Sie beide Riegel (54/2) mit dem
Innensechskantschlüssel (54/1) in Richtung
Symbol (54/4) geschlossen zurück , so dass
die Liegenscheibe fest verankert ist.
6.4.2 Filtermatten Fluter
Filtermatten Fluter wechseln
1.
Ziehen Sie an der Aussenfläche des
Fluters (56/1) die Filtermatte (56/2) weg.
2.
Drücken Sie die neue Filtermatte (56/2) form-
schlüssig in den Rahmen ein.
Filtermatten Seitenbräuner wechseln
An beiden Seiten der Stativabdeckungen befinden
sich die Filtermatten für den Seitenbräuner.
1.
Ziehen Sie beide Verschlüsse (56/2) an der
Blende (56/3) und nehmen Sie die Blende
ab.
2.
Nehmen Sie die Filtermatte (56/1) heraus
und setzen die neue Filtermatte ein.
3.
Setzen Sie die Blende (56/3) ein.
3.
Drücken Sie die Verschlüsse (56/2) so dass
die Blende (56/3) fest fixiert ist.
6.5 Wartung BREEZE-System
Die BREEZE-Leitungen müssen bei der Erstin-
betriebnahme, nach Wartungsarbeiten am
BREEZE-System und nach einem Behälter-
wechsel entlüftet werden.
6.5.1 BREEZE-Leitungen entlüften
Folgen Sie den Anweisungen,wie sie im Kapitel
5.1.3 unter Programm PrP5 beschrieben sind.
6.5.2 Störung des BREEZE-Systems
•
Störungsanzeigen
Bei Erreichen des voreingestellten Wartungsinter-
valls des BREEZE-Systems leuchtet der rechte
Dezimalpunkt (57/1).
BREEZE weist folgende Besonderheit auf:
Nach längerer Überschreitung des voreingestell-
ten Wartungsintervalls wechselt die Dauerleucht-
anzeige des rechten Dezimalpunktes zu einem
Blinken und die BREEZEFunktion wird deaktiviert.
Weitere Informationen über Wartungsintervalle
finden Sie in Kapitel 5.2 Voreingestellte
Wartungs-
intervalle.
Changing filter mats
1.
Unlock the front apron (53/2) with the Allen
key (53/1) and move the front apron for-
ward.
2.
Pull out the long filter mat (53/3) on the
bottom of the controller mounting plate.
3.
Pull out the rectangular filter mat (53/4)
on the air conditioner (option).
4.
Clamp the new, clean, properly sized filter
mats properly into the grooves of the
respective mounting locations.
Fitting the Large Covering Panel in Front of
the Base
4.
Move the large covering panel towards
the base until it touches the base.
5.
Lock the front apron (53/2) with the Allen
key (53/1).
Lowering the bed acrylic
1.
Hold the front long side of the bed acrylic
(54/5) in the middle and push it down onto
the bed.
2.
Turn back both bolts (54/2) using the Allan
key (54/1) towards the symbol (54/4)
“closed”.
6.4.2 Filter pads canopy
Change of filter pads canopy
1.
Pull off the filter pad (56/2) at the outside of
the canopy.
2.
Insert the new filter pad (56/2) flush into the
frame.
Change of filter pads side tanner
The filter pads for the side tanner are located on
both sides of the stand covers.
1.
Pull out the two locks of the cover (56/2)
and take the cover off.
2.
Remove the filter pad (56/1) and insert the
new filter pad.
3.
Insert the panel (56(3).
3.
Press the seals (56/2) in order to fix the
panel.
6.5 Servicing the BREEZE system
The BREEZE lines must be bled during the initial
commissioning, following service work on the
BREEZE system and after changing the tank.
6.5.1 Bleeding the BREEZE lines
Follow the instructions as described in Chapter
5.1.3 under program PrP5.
6.5.2 BREEZE-system faults
•
Fault indicators
When the preset service interval of the BREEZE
system is reached, the right decimal point
illuminates (57/1).
BREEZE has the following special feature:
If the preset service interval is exceeded by a
relatively long period of time, the continuously
illuminated right decimal point begins to flash and
the BREEZE function is deactivated.
Further information on the service intervals can
be found in Chapter 5.2, Preset
service intervals.
53
54
1
2
3
4
56
55
P
O
88
1
2
57
P
88
1


