ColonyDoc-It Imaging Station
26
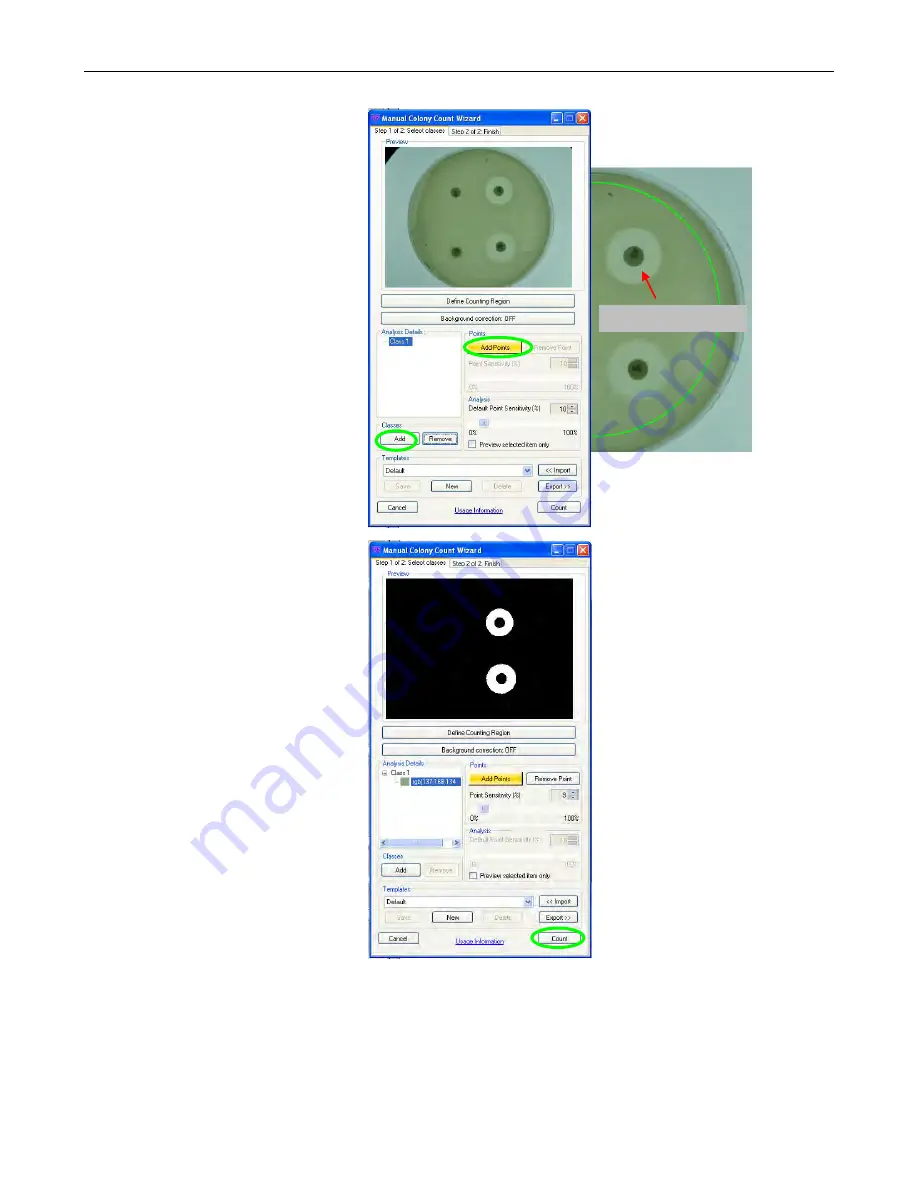
The Select Classes tab allows
users to select the number of
classes and zones in the Petri dish
sample.
To analyze the desired zones,
ensure that the
Add Points
button
is highlighted in yellow and
click
on a zone
to be counted in the
original image
of the Petri dish.
(A smaller duplicate image of the
original is present in the
Step 1 of
2: Select classes
tab
,
but a zone
cannot be selected from this
image)
Classes are defined as different
types of bacteria, yeast, or mold
present on the sample. The
software can detect various types
of classes in one dish. To add a
class, click onto the
Add
button in
the Classes section of the window.
Once the first zone is selected, the
new image in the
Step 1 of 2:
Select classes
window will show
a black background along with all
of the zones that contain the same
color as the point identified in the
Analysis Details
window.
Continue clicking on zones to add
points as necessary until the black
and white image shows all the
zones of interest identified in
white.
To remove points or classes from
the
Analysis Details
window,
highlight the point and select
Remove Point
or highlight the
class and select
Remove
.
The
Step 1 of 2: Select classes
tab allows the settings created in
this window to be saved in a user
defined template. If there are no
templates created, the drop down
menu will list Default as the only
template option. Go to the
Templates
section of this manual
for instructions on creating
templates.
Click the
Count
button to proceed
to the next step.
Click on a zone


