2GM
1-7-1
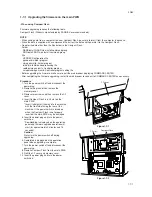
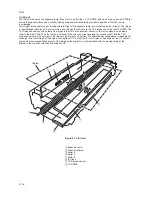
Figure 1-7-1
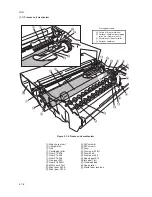
Figure 1-7-2
CF cover
Compact Flash
CF slot
1-7-1 Upgrading the firmware on the main PWB
• When using Compact Flash
Firmware upgrading requires the following tools:
Compact Flash (Products manufactured by SANDISK are recommended.)
NOTE
• When writing data from a computer to a new Compact Flash, be sure to format it from the computer in advance.
• Since the data is supplied with a compressed file, extract the data and then write it to the Compact Flash.
• Do not write data other than the files below to the Compact Flash.
Folder
NANDinstall: NAND side Install command group
NORinstall: NOR side Install command group
File
VERDEF: Configuration file
ppcboot.bin: Boot program
zImage.kmmfp: Kernel program
initrd.bin: Initialization processing file
rootdiskimage.cramfs: Controller program
setupdiskimage.cramfs: Controller program setting file
• Before upgrading the firmware, make sure to quit the web browser displaying COMMAND CENTER.
• After completing the firmware upgrading, restart the web browser to connect to COMMAND CENTER as necessary.
Procedure
1. Turn the power switch off and disconnect the
power plug.
2. Remove the pin and then remove the
memory cover.
3. Remove two screws and then remove the CF
cover.
4. Insert Compact Flash in a CF slot on the
main PWB.
* Insert it straight all the way into the machine
with the front side facing the rear of the
machine. If the power switch is turned on
when the Compact Flash is not properly
inserted, the main PWB may be damaged.
5. Insert the power plug and turn the power
switch on.
* Downloading is displayed on the operation
panel and firmware upgrade operation will
start (for approximately 2 minutes and 15
seconds).
Caution:
Never turn the power switch off during
upgrading.
6. Completed is displayed on the operation
panel when upgrading is complete.
7. Turn the power switch off and disconnect the
power plug.
8. Remove Compact Flash from the main PWB.
9. Refit the CF cover and memory cover.
10. Insert the power plug and turn the power
switch on.
Summary of Contents for CD 1018
Page 1: ...Service Manual MFP Copy CD 1018 Date 17 03 2005 ...
Page 2: ...Service Manual MFP Copy DC 2018 Date 17 03 2005 ...
Page 70: ...2GM 1 5 2 2 Paper misfeed detection conditions Registration sensor Exit sensor Figure 1 5 2 ...
Page 124: ...2GM 1 6 31 Eraser lamp 9 Remove the eraser lamp Figure 1 6 35 Removing the eraser lamp ...


