GO1 User Manual
Copyright © 2021 Unitree Robotics. All Rights Reserved
15
protection board will malfunction, causing the battery pack and the robot to malfunction.
3.
When the battery pack charge is less than two compartments, stop using the robot as soon as
possible, replace the new battery pack or charge the battery pack.
4.
Before inserting or removing the battery pack into the robot battery compartment, make sure that
the battery pack is closed, otherwise the battery pack or the robot may be damaged.
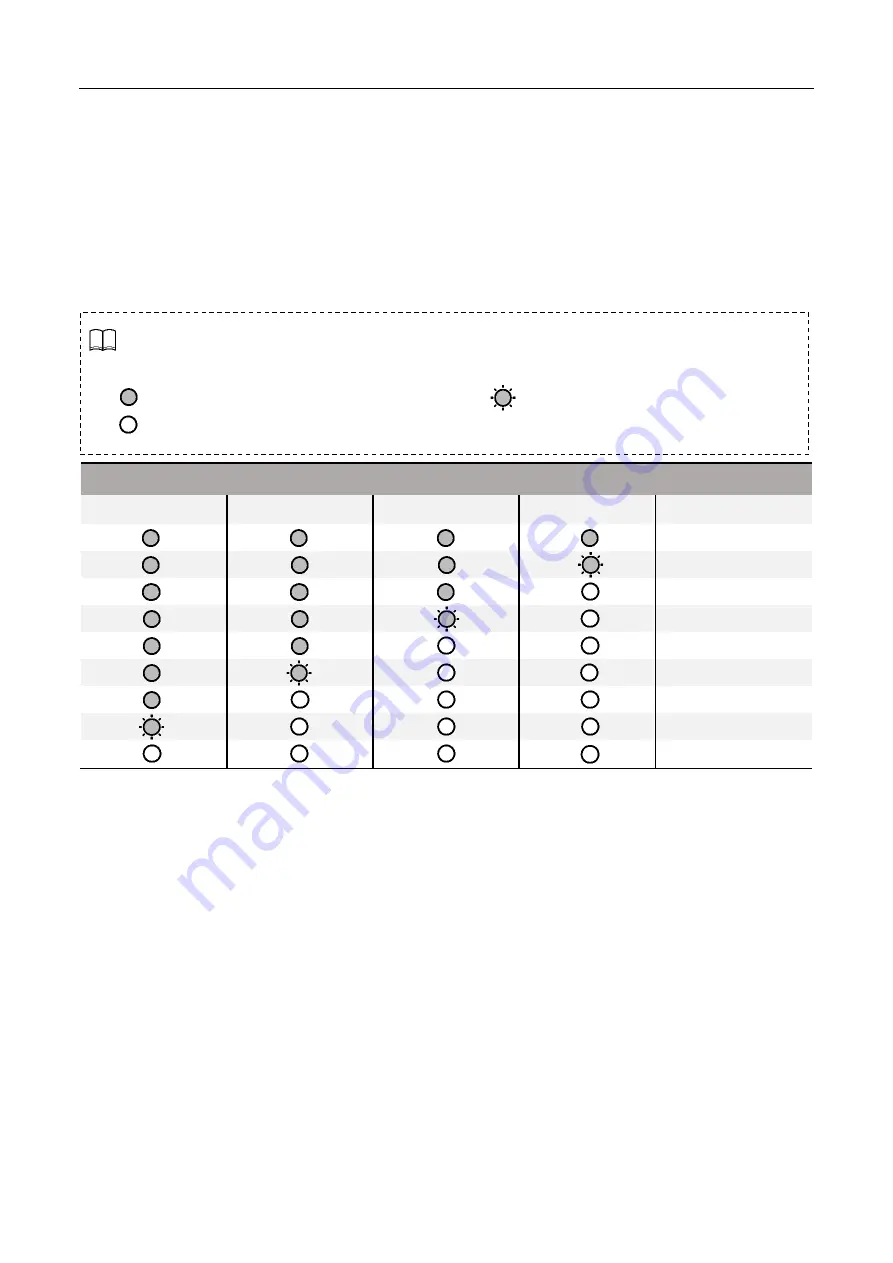
View Battery
When the battery pack is off, press the battery switch once to view the current battery level.
Battery Level LEDs
LED1
LED2
LED3
LED4
Remaining Battery
87.5%-100%
75%-87.5%
62.5%-75%
50%-62.5%
37.5%-50%
25%-37.5%
12.5%-25%
0%-12.5%
=0%
Charging
1.
Connect the charger to an AC power source (100-240V, 50/60Hz). Before connecting, you must
ensure that the external power supply voltage matches the rated input voltage of the charger,
otherwise the charger will be damaged(the rated input voltage of the charger is indicated on the
charger nameplate).
2.
Before charging the battery, the charger is connected to the AC power supply before the battery is
connected.
3.
Before charging the battery, please make sure the battery pack is off, otherwise it will damage the
battery and charger.
4.
Under the charging state, battery indicator will flash in a cycle and indicate the current battery level.
5.
When the battery indicator is off, the battery pack is full. Please remove the battery pack and charger
The battery indicator can be used to display the battery level during charging and discharging
of the battery pack. The indicators are defined as follows.
Indicates that the LED light is always on
Indicates that the LED light is flashing
Indicates that the LED light is off


