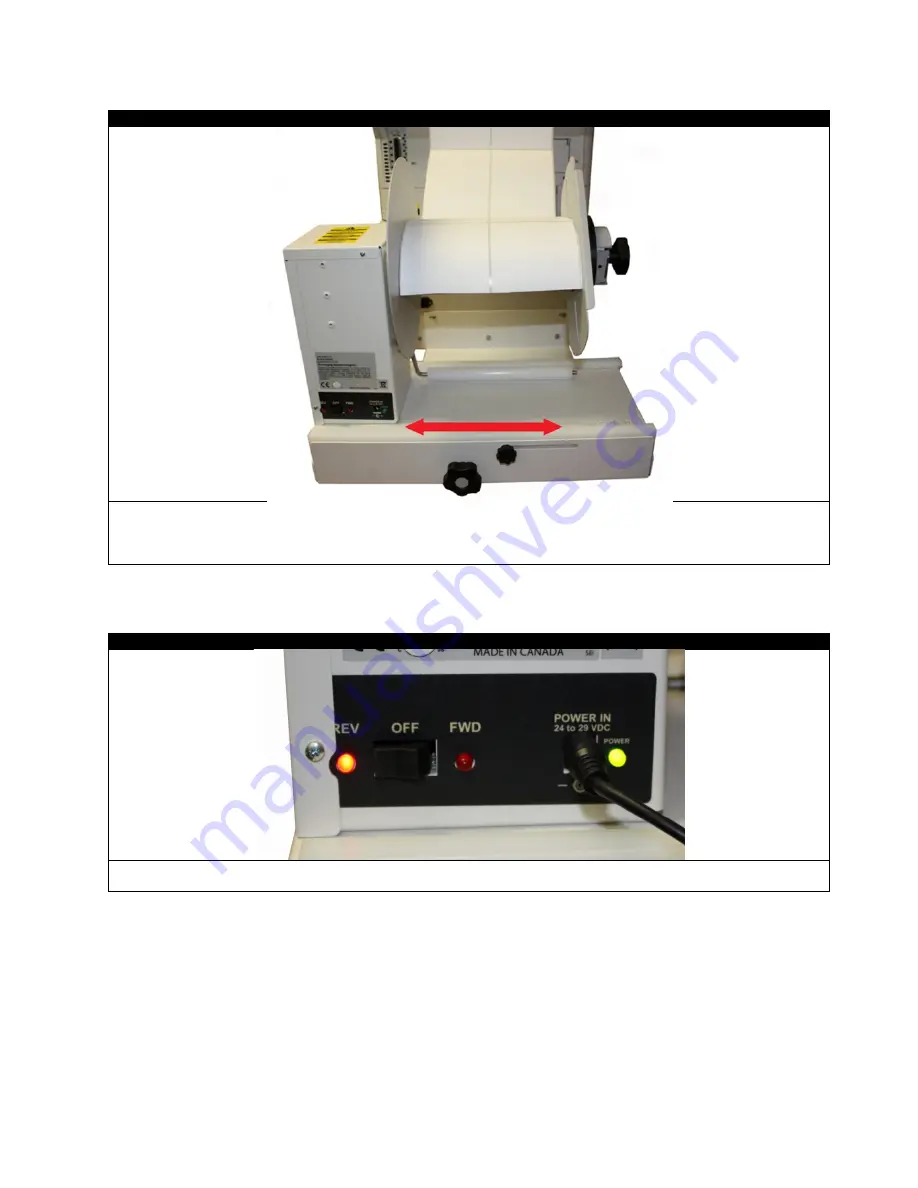
STEP 3 of 6
Loosen the
Lockdown Knob
for positioning. When you are ready to print, send a small section of labels to the printer.
While the section is printing, adjust the rewinder left/right using the
Width Adjustment Knob
, aligning the rewinder
with the paper path as the labels exit the machine. Once the paper path and rewinder are aligned, tighten the
Lockdown Knob.
STEP 4 of 6
Plug the
DC Power In
, and then plug the end of the power cord into a socket. Turn the rewinder on by turning the
switch to
REV.
49


