34
UBI EasyCoder 501 – Technical Manual
SETTING UP EASYCODER 501 E & 501 SA, cont'd.
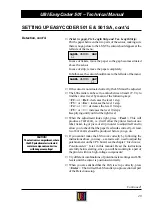
Entering the Setup Mode
at Installation
The method of entering the Setup Mode depends on whether the
printer is fitted with some kind of startup file, a subject that was
more thoroughly discussed in the chapter Starting Up earlier in this
manual, to which the alphabetic references below refer.
A. EasyCoder 501 E with EasyPak Startup:
• Turn on the power.
• Select either the UBI LabelShop or the Windows Driver option.
• Press the < Setup > key (in case of the Windows Driver, this must
be done before any data is received from the host).
• Set up the printer as described in this chapter. In case of UBI
LabelShop, do not change the communication setup on "uart1:".
• Return to the selected option by pressing the < Setup > key.
B. EasyCoder 501 E with UBI Shell:
• Turn on the power.
• When the display shows the message “Enter=UBI Shell; x sec.”,
press < Enter >.
• Press the < Setup > key (this facility can be used anywhere within
UBI Shell Enhanced).
• Set up the printer as described in this chapter.
• Return to UBI Shell Enhanced by pressing the < Setup > key.
C. EasyCoder 501 SA:
• Turn on the power.
• In the Set Mode of the UBI Stand-Alone program, select the
“Setup” option and then the “Printer” option.
• Set up the printer as described in this chapter.
• Exit to the UBI Stand-Alone program by pressing < Save >.
D. EasyCoder 501 E with no startup file installed:
• Turn on the power.
• In the immediate mode of UBI Fingerprint, press the < Setup >
key.
• Set up the printer as described in this chapter.
• Exit to the immediate mode of UBI Fingerprint by pressing the
< Setup > key.
E. EasyCoder 501 E with a custom-made application program:
• Normally, there will be no need to enter the Setup Mode for
custom-made application programs. Necessary provisions for
changing the setup, manually or automatically, should be provided
by the program.


