54
lead to premature failure of the glands and may knock out the plug of the sliding yoke.
To lubricate the hinges, use a special tip, worn on the grease gun.
Provided that the maintenance-free cardan shafts (without grease nozzles) are installed on the vehicle. It is necessary
to periodically check the state of the protective gaiters on the splined joint of the shaft. In case of the cover damages, one
shall visit the service center for a replacement.
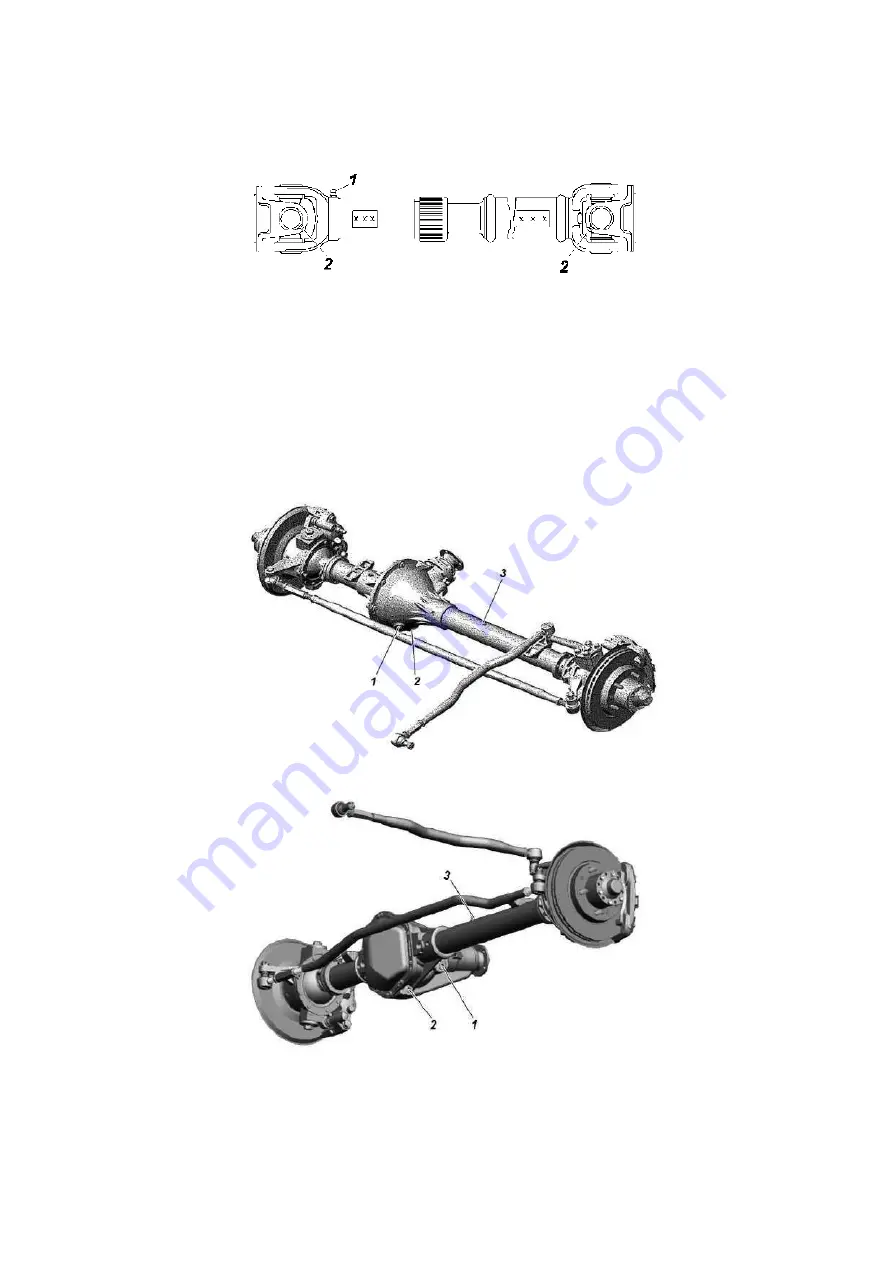
Fig. 9.15 Rear cardan shaft:
1 - lubrication nozzle for lubricating a spline joint; 2 - lubrication nozzle for lubricating needle bearings of the hinge
Driving axles
Drain the oil through the hole 2 (Fig. 9.16, 9.17), located in the lower part of the case, at the same time also unscrew
plug 1 of the inspection hole.
The axial clearance in the bearings of the main drive gear of more than 0.05 mm is not allowed, because, if it is
present, the gears teeth wear out quickly and the axle may be locked. Check for the presence of the axial clearance in the
bearings perform by swinging the pinion gear over the flange of the cardan shaft mounting.
Axial clearance in the bearings of the main gear differential is also not allowed. Check it through the oil filler holes
(axles shown in Fig. 9.16) or by rocking the driven wheel with the crankcase cover removed (axles shown in Fig. 9.17).
Fig. 9.16 Front axle with vertically split crankcase:
1 - level plug; 2 - drain plug; 3 - safety valve
Fig. 9.17 Front axle with a one-piece crankcase:
1 - filler plug; 2 - drain plug; 3 - safety valve
In case of gaps, the axle is subject to adjustment. Axle adjustment is a time-consuming operation that requires a
certain skill and the use of a special tool, therefore we make adjustments only at authorized service stations.
The front axle and downshift are engaged and disengaged with the transfer case lever.
When inspecting steering knuckles, pay attention to serviceability of adjusting bolts 1 (Fig. 9.18) and wheel turning


