


Starting the Diagnostic Utility
6–2
iSTAR eX Installation and Configuration Guide
Starting the Diagnostic Utility
Use the following procedure to start the Diagnostic Utility and connect to a
controller.
To start the Diagnostic Utility
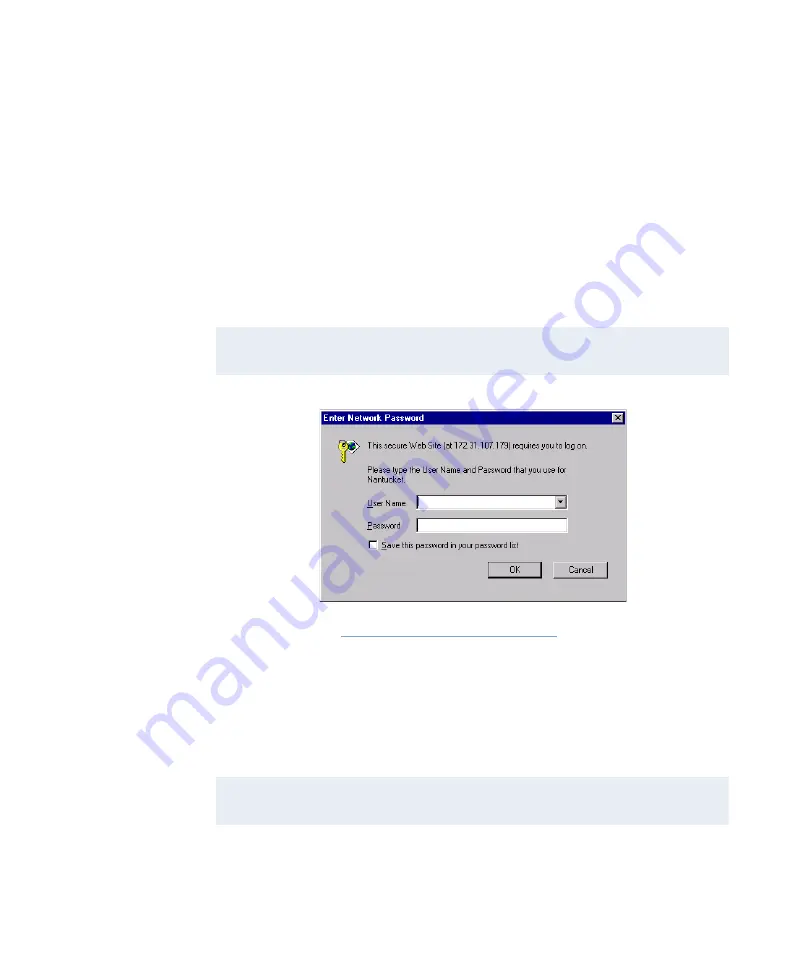
1. In an Internet Explorer browser window, enter the IP Address of the
iSTAR eX controller (for example, http://121.21.121.12) in the browser
Address
window and press
Enter
or click
Go
. The
Enter Network
Password
dialog box appears.
Figure 6.1: Enter Network Password Dialog Box
2. In both the
User Name
and
Password
fields, enter the password you
configured in the C•CURE 800/8000 or C•CURE 9000 Administration
application. (Configure in System Variables)
After the login information has been verified, the
Controller Status
window appears, as shown in Figure 6.2 on
NOTE
You can also start the Diagnostic Utility from the ICU. See
“Using the iSTAR Configuration Utility (ICU)”.
NOTE
The password that you enter for the Diagnostic Utility is different from the
one used for the ICU.
Summary of Contents for iSTAR eX
Page 12: ...Table of Contents xii iSTAR eX Installation and Configuration Guide...
Page 58: ...Backup and Restore 1 38 iSTAR eX Installation and Configuration Guide...
Page 146: ...Starting the ICU 5 12 iSTAR eX Installation and Configuration Guide Figure 5 4 ICU Main Window...
Page 200: ...STAR eX Diagnostic Tests 7 10 iSTAR eX Installation and Configuration Guide...
Page 212: ...A 12 iSTAR eX Installation and Configuration Guide...


