background image


TrojanTwo User Guide v3.8 

Page | 87 


16.3


Firmware update failure 

 
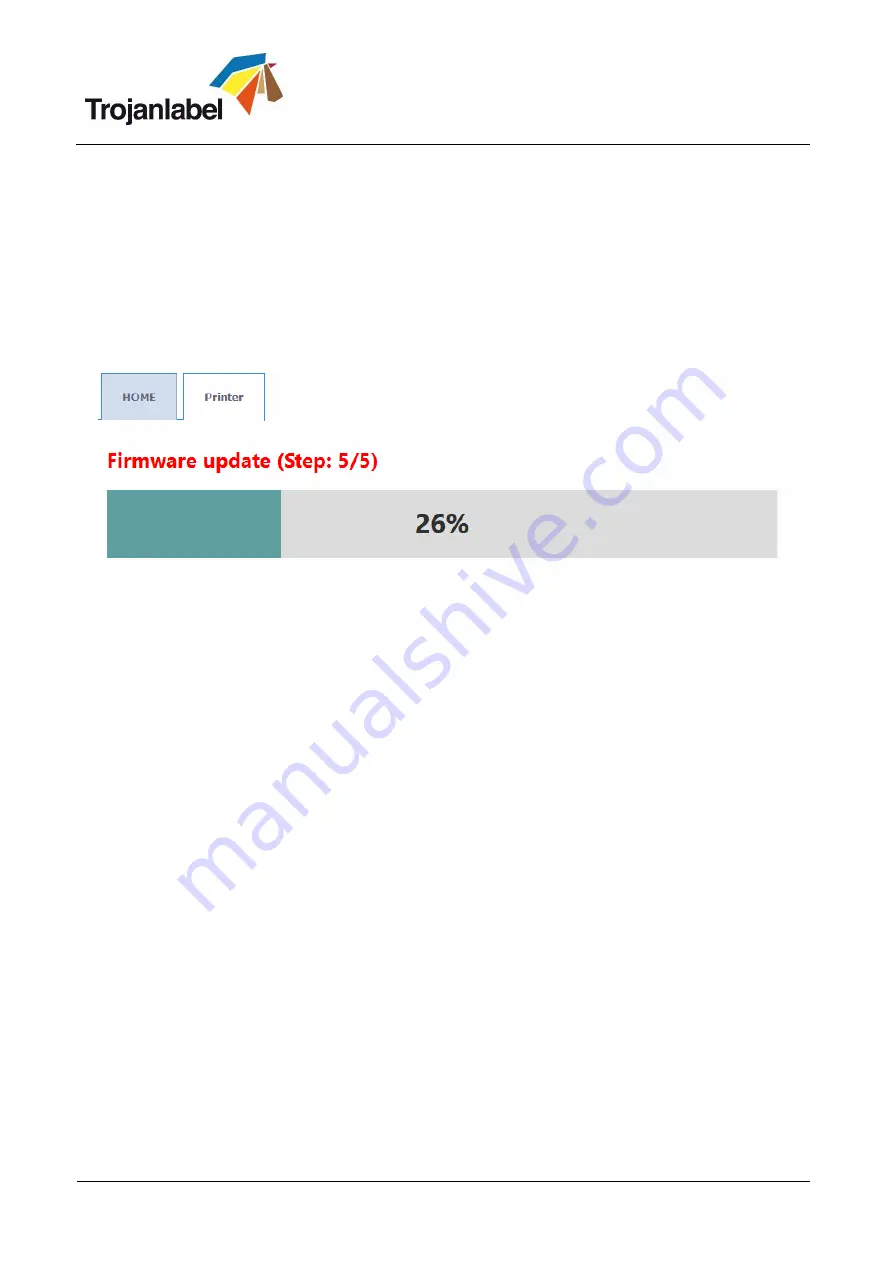
If an error happens during the FW update process, the text color changes to red to indicate error state. 
The progress bar might still show progress and counter but the update process will not be successful. 
To resolve the issue and finish the firmware update, please shutdown the full system and start again. 
After the reboot (power on), the emergency restore process will take over and try to finish the update 
(there is no visual feedback about this). When second update attempt is finished, it will automatically 
restart the system which should be up to date after the restart and printer (TrojanTwo) tab will appear on 
screen. 
If for some reason the second recovery attempt fails, please contact Trojanlabel support 


Firmware update text changed to red. 


Summary of Contents for Trojan 2

Page 1: ...User Guide Version 3 8...

Page 2: ...reements currently in effect with your organization Copies of this document any portion of this document or attachments may not be transmitted or disclosed to any third party without the prior written...

Page 3: ...ing direction unwinder Ink jet coating on the inside or outside 15 4 1 2 Rolling direction rewinder 16 4 2 Threading from scratch 16 4 3 Threading using the currently threaded material 19 4 4 Adjustin...

Page 4: ...ng software and firmware on TrojanTwo 69 14 1 Updating via online updater 69 14 2 Updating via offline updater 70 15 Maintenance 72 15 1 Regular cleaning checking tasks 72 15 1 1 Wipe down surfaces 72...

Page 5: ...TrojanTwo User Guide v3 8 Page 4 1 Certificate of compliance and Safety Information...

Page 6: ...e employer the owner of the machine to ensure that anyone who is to operate service maintain or repair the machine have read the instructions As a minimum they should have read the part s relevant for...

Page 7: ...s must be reflected in these instructions as necessary The machine s purpose and intended use Application The machine is only to be used to print labels The machine must not be used for any other purp...

Page 8: ...0 Celsius at RH 22 80 non condensing Storage 5 to 50 Celsius at RH up to 85 non condensing at 65 If transferring the machine from different temperature conditions ensure that the machine has time to a...

Page 9: ...ing the built in the stands using the red tooth wheel until the wheels move freely without touching the ground Confirm the machine is leveled using a spirit leveler 2 2 Cabling network and power The m...

Page 10: ...ll display Emergency stop 2 Press the physical green start button which can be found on the top of the machine near the screen to initialize power up the web path system a Web state will display Initi...

Page 11: ...r cable green arrow on picture above 3 Connect tube with connector red arrow on picture above When ink tank is connected the proper ink level and percentage is displayed at status bar on the touch scr...

Page 12: ...ging open at the notch Use scissors if your foil bag does not have a notch or you are finding it difficult to tear the bag 3 Remove the printhead from the foil bag 4 Remove the orange protective plast...

Page 13: ...ntacts or the printhead nozzles IMPORTANT Do not throw away the printhead packaging The white box has the serial number part number and manufacturing date of the printhead Also it is recommended to st...

Page 14: ...ine 2 Press Release Printhead button in TrojanTwo Maintenance menu to open printhead latch 3 Insert printhead by the handle into the cradle a Open printhead latch all the way up b Insert printhead int...

Page 15: ...p the printhead with ink NOTE When the system is primed up for the first time first installation when there has not been any ink in the ink delivery system and the reservoir ink tanks printhead primin...

Page 16: ...roll on the unwinder core according to the ink jet coated side coated side must be up for printing 1 Outside If the ink jet coating is on the outside of the material which is the most common place the...

Page 17: ...Place the chosen material on the unwinder roll according to chapter 4 1 1 4 Press Reset Sidesteer Position button at TrojanTwo Handling menu to set unwinder core horizontal position to the default po...

Page 18: ...v3 8 Page 17 Metric scale on magnet bar 6 Adjust position of label edge sensor to left edge of the label roll see section 4 4 for adjusting label edge sensor Label edge sensor in proper default positi...

Page 19: ...ss to the NIP roller When threading is completed use the Install Maintenance Module button in the same menu to move the maintenance module back into position 8 Place an empty roll core on the rewinder...

Page 20: ...station 3 Cut the material on the diagonal using a knife Use the carved cutting path on the splicing table to ensure a clean straight cut 4 Remove the current label roll core from the unwinder 5 Plac...

Page 21: ...Page 20 7 Fasten materials securely on the splicing table We recommend that you apply tape to both sides of the material end points Tape applied on upper side of label material Tape applied on back s...

Page 22: ...mm from the wall as Zero position Further adjustments can be done even during printing as if needed Adjusting method 1 Setting the unwinder core to default position When the TrojanTwo is starting up t...

Page 23: ...label roll is exactly 99 mm 3 9 inches away from the wall printhead left printing edge then tighten label roll on unwinder core with the unwinder spindle NOTE Use the magnet accessory which has a metr...

Page 24: ...el roll precisely 4 Adjust sensor beam to 99 mm 3 9 inches from the wall to ensure the left edge of the label web will stay in this position throughout the web path as the label web moves Led on senso...

Page 25: ...de v3 8 Page 24 5 Align label web left edge to be 99mm 3 9 inches away from the wall at splicing table 6 Checkpoints after loading splicing web and moving printing on label web Checkpoint after print...

Page 26: ...TrojanTwo User Guide v3 8 Page 25 Checkpoint at Rewinder core 99 mm...

Page 27: ...lect the TrojanTwo tab 3 Select Media settings menu 4 From the profile drop down select the correct Media Profile that fits the paper or create a profile that matches the material and print job 5 Pres...

Page 28: ...of Copies button or the Print from Page button printing job from a certain page number 4 Send print to queue by pressing the green print button 5 If the Print Queue is paused press the resume button...

Page 29: ...n progress in overview menu 7 Pause resume or stop print job Pause resume and stop of print job is done from the TrojanTwo tab Overview menu Pause Press the Pause Resume button Print state will change...

Page 30: ...paused job Press the Pause Resume button once more Print state will change to Printing Stop Press the button Print state will change to NA and current print job is canceled and removed from print que...

Page 31: ...uttons highlighted below When a directional button is pressed the four buttons are replaced with one single stop button Pressing the button will stop the web moving See section 13 3 2 for Handling men...

Page 32: ...Top of Form to describe the top of form algorithm how to detect the top of the next label Press Save Apply button to apply changes Continuous label material has no gaps or blackmarks between the label...

Page 33: ...UTOSET and Output LEDs will flash 3 times This may indicate a backing material that is too dense to penetrate UP DN Adjustments The Label Eye sensor has the ability to tweak the setup incrementally Si...

Page 34: ...sensor beam is to be able to teach the sensor to recognize the label gap If label gap is already recognized by the sensor then only the green LED will be lit Otherwise sensor needs to be calibrated t...

Page 35: ...he sensor beam the red LED will go on indicating that the sensor can differentiate between gap and label IMPORTANT Because of inter page actions the printed labels have to have Minimum 2 2 mm gap at 6...

Page 36: ...f the setup is not adequate the AUTOSET and Output LEDs will flash 3 times This may indicate a backing material that is too dense to penetrate UP DN Adjustments The Label Eye sensor has the ability to...

Page 37: ...nize the density of the registration mark If blackmark is already recognized by the sensor then only the green LED will be lit Otherwise sensor needs to be calibrated to recognize the certain blackmar...

Page 38: ...d the red LED will go off and green LED will stay lit constantly Note The picture is an illustration only the actual label material is diecut on the picture When moving a label not blackmark into the...

Page 39: ...may also influence this A very simple bar code image may allow for shorted gap sizes TrojanTwo will display an error in the Error field Missed TOF datapath underrun if this occurs 11 Shutting down the...

Page 40: ...the TrojanTwo package It is available for downloading on the Internet www trojanextranet com media 50938 win_driver_13 trojanlabel trojantwo sir_r13 1 18dec2014 zip Open TrojanTwo Driver installer on...

Page 41: ...work NOTE USB printing is not supported for the TrojanTwo press During the setup process the installer will detect the TrojanTwo press on the network Select the detected TrojanTwo and press Next butto...

Page 42: ...menu You might be asked a couple of times depending on Microsoft Windows OS version to give permission to proceed with setup Press Yes or Unblock each time and wait until the progress bar finishes th...

Page 43: ...TrojanTwo press can print from any software which is able to print from Microsoft Windows environment Handles ICM color profiles provided by Trojanlabel General driver settings Orientation Adopts sof...

Page 44: ...r exceeding the maximum printable label length which is 762mm TIPS TRICKS The maximum printable label length is 762mm If 762mm label height is not enough then stitching is the workaround option In pra...

Page 45: ...zes the image processing for the majority of the printing applications used by the end users However for some users particularly those using FlexMail printing artefacts appear in the output If this ha...

Page 46: ...s Maint state shows status of maintenance Maint Error shows error status TOF mode shows actual printing mode See section 10 for available printing modes Print Queue State Running or Paused Unwinder Re...

Page 47: ...janTwo press is printing Information from currently printed job including Preview image of the label which is being printed at the moment Label counter Name of print job in job library 13 2 2 Settings...

Page 48: ...cartridge price is the base of ink cost label calculation in statistics menu see section 13 2 3 The actual price of a 2 Liters ink tank should be typed here Print head price when filled up also includ...

Page 49: ...responsive to restart print engine and software Advanced tab enables usage of Auto configuration scripts or Proxy Server wherever the local network policy requires these for network internet connectio...

Page 50: ...Auto switch to Overview when printing from job library Enabled When printing from the job library the screen switches to overview mode Disabled When printing from the job library the screen remains i...

Page 51: ...ord for the admin user is 123 It is advised to change the admin password during installation WARNING Do not lock out yourself At least one user must have User Management right otherwise there is no wa...

Page 52: ...Default batch mode timeout seconds If batch mode is on the press is waiting for the print jobs to be sent until the timeout interval expires All print jobs sent during this timeout period will be merg...

Page 53: ...9 IPS Web fast movement speed in IPS defines the movement speed when using the Fast forward backward buttons in Handling menu see section 13 3 2 Speed can be 9 12 15 18 IPS Pre job maintenance enabled...

Page 54: ...price given at HOME Settings Consumables menu Cost label ink PH calculation is the cost 1 label in the actual print job based on ink tank price and print head price given at HOME Settings Consumables...

Page 55: ...stics and history for print engine s If there is a print engine replacement all serial numbers will be registered and statistics for each print engine can be compared Print head Total statistics and h...

Page 56: ...Always wait until shutdown process finishes before shutting down the power supply Otherwise the Maintenance Module inside the machine might end up in the wrong position and cannot protect the printhea...

Page 57: ...into a browser at a user PC Exporting statistics page Press Export to CSV button on page to save the statistics into a CSV file Closer view NOTE Ink consumption is more detailed in this view and displ...

Page 58: ...ting Information from currently printed job including Preview image of the label which is being printed at the moment Label counter Name of print job in job library Shows Print Queue state and Stop Cl...

Page 59: ...ces menu Fast Backward Forward Web button Moving label web fast backward forward movement speed is defined in HOME Settings User Preferences menu NOTE When either of the web moving buttons used in the...

Page 60: ...r core to align label edge and label edge sensor to the print head s left edge See section 4 4 for adjusting label roll on unwinder core NOTE This function is only active when the web state is Not Cal...

Page 61: ...Clean Advised to use when automatic maintenance routines ink circulations and Light Cleanings are not enough to recover print quality Usually when medium clean is needed it is the sign of the particul...

Page 62: ...into home position Maintenance module is sliding out from below the printhead When maintenance module is in home position it can be inspected and wiper roller cap module can be replaced Install Mainte...

Page 63: ...last visited page and job when returning to the Job Library menu Stored labels Print change number of copies print from a certain page number Information about each print job size number of labels sp...

Page 64: ...le 1 Copies of a page are printed one after the other within a print job 2 Copies of pages are printed in sequential order within a print job Print From button makes sense when job contains different...

Page 65: ...ue is paused the jobs are pending in the queue and printing only starts when the queue is resumed Information button Same as in job library see section 13 3 4 Batch Mode on off Batch mode means that a...

Page 66: ...sted to environmental temperature This field is filled up automatically based on the temperature sensor but can be overwritten by the user NOTE User defined temperature value remains active until next...

Page 67: ...ide of the label roll TOF offset mm Top Of From top of label can be depending on moving the top of the image up or down on label NOTE limits 160mm 160mm BOF offset mm Bottom of Form bottom of label ca...

Page 68: ...Minimum unwinder diameter mm When roll diameter reaches the minimum unwinder diameter value the printing will be paused and new label roll can be loaded and spliced This sensor setting is to avoid run...

Page 69: ...degree of KWS has effect on printhead life The higher KWS is set the more protection the printhead gets against dehydration of nozzles ALTHOUGH switching KWS off 0 does not result in loosing warranty...

Page 70: ...ine updater The updater section can be found in HOME Settings at Trojan Control Actual software version can also be checked at HOME Settings section Actual Trojan Control software version in HOME Sett...

Page 71: ...to the same network as the TrojanTwo press Double click on OfflineUpdaterGUI jar to start the update server The update server window will open up The window should be left open as long as the update i...

Page 72: ...tion TrojanTwo is being updated Check Trojan Control version number after installation NOTE The Trojan Control may restart several times during the update process After updating the Trojan Control int...

Page 73: ...vered roller and can collect a lot of paper dust Based on weekly visual checking it is recommended to clean the roller when it looks covered with dust Steps 1 Open top cover on TrojanTwo press to gain...

Page 74: ...Guide v3 8 Page 73 3 Wiping dust and debris off from NIP roller using lint free cloth and distilled water Use a wet lint free cloth and roll NIP roller to wipe off dust from all over the NIP roller Du...

Page 75: ...llers throughout the paper path and use a lint free cloth and distilled water to wipe the ink off from the rollers one by one Remove label web from paper path if necessary to gain access to all roller...

Page 76: ...frequently and emptying when it is almost full NOTE Keep a piece of cloth paper towel sponge nearby to avoid dropping of ink from tubing when removing the cap of the bottle Waste Ink Bottle WARNING T...

Page 77: ...and not fluffy anymore then wiper roller is worn down and needs replacement If printhead wiping routines like wipe printhead or light medium heavy clean do not improve print quality and fine streak s...

Page 78: ...Press Home Maintenance Module button in TrojanTwo Handling menu to gain access to the wiper module 3 Detach and remove the used micro fibre roller MFR Pull the micro fibre roller out from under the p...

Page 79: ...ft out the gear from the wiper motor gear house 4 Install new wiper roller Fit the gear on the right end of the micro fibre roller onto the proper place from above The gear has to fit to the gear of t...

Page 80: ...events dehydration of the printhead nozzles Forms a wet film layer on the printhead nozzle surface thus creates some vacuum and help to prevent air bubbles blocking some nozzles It is advised to perfo...

Page 81: ...ojanTwo Handling menu to gain access to printhead from below Maintenance module in home position The printhead is situated 40mm from the edge of the print engine 3 Use Distilled water and make a piece...

Page 82: ...TrojanTwo User Guide v3 8 Page 81 4 Wipe printhead surface Make a single move from one end to the other NOTE DO NOT MOVE THE CLOTH BACK AND FORTH Always wipe with a single move Wiping finished...

Page 83: ...tact support Possible reasons A Stepper motor NIP brake 2 and or stepper motor rewinder brake 3 and or stepper motor unwinder brake 4 fails to calibrate B Magnet position for stepper motor sensor s ne...

Page 84: ...rder of Y K C K and M The reason why a dark green line shown is because the printhead stops printing after Y K and C are printed Therefore the solution is to change the BOF and allow the PH to print u...

Page 85: ...e section 15 3 for manual printhead wipe B Reinsert the printhead C Check revolvers fluidic couplings which connect with the printhead couplings there might be a loose revolver cap contact support D C...

Page 86: ...not calibrated see section 10 for printing modes and sensor calibration Bag Out error One of the ink tanks run out of ink during printing The printing continues as reservoir ink tanks are full User ca...

Page 87: ...ervoir tank status bar Running out of disc space When new print job is sent to the machine but free disc space on hard drive reaches the 1 GB limit For example the amount of print jobs stored in the j...

Page 88: ...e firmware update please shutdown the full system and start again After the reboot power on the emergency restore process will take over and try to finish the update there is no visual feedback about...

Page 89: ...cessory for the TrojanTwo press and not included by default NOTE As the slitter was introduced at late 2015 the earlier batches of TrojanTwo presses do not contain the fitting holes for installing the...

Page 90: ...laced when sharpness decrease is detected CAUTION Never try to replace the slitter blades during operation a Press Emergency Stop button on top of the TrojanTwo press to power off slitter device b Mov...

Page 91: ...TrojanTwo User Guide v3 8 Page 90 c Loosen the screw which fixes the blade into the socket use Allen key size 3mm for loosening the screw d Replace the blade and tighten the screw again a b...

Page 92: ...TrojanTwo User Guide v3 8 Page 91 c e Move each blade to the left after finished with changing the blades one by one to have better access to the rest of the blades...

Page 93: ...TrojanTwo User Guide v3 8 Page 92...

Page 94: ...OF mode is set to Die cut in the Media Settings menu Die cut mode selected at TrojanTwo Media Settings Basic menu Select Slitter checkbox on the TrojanTwo Media Settings Advanced menu NOTE The slitter...

Reviews: