


© Copyright 2019 TRENDnet. All Rights Reserved.
50
TRENDnet User’s Guide
TWG-431BR
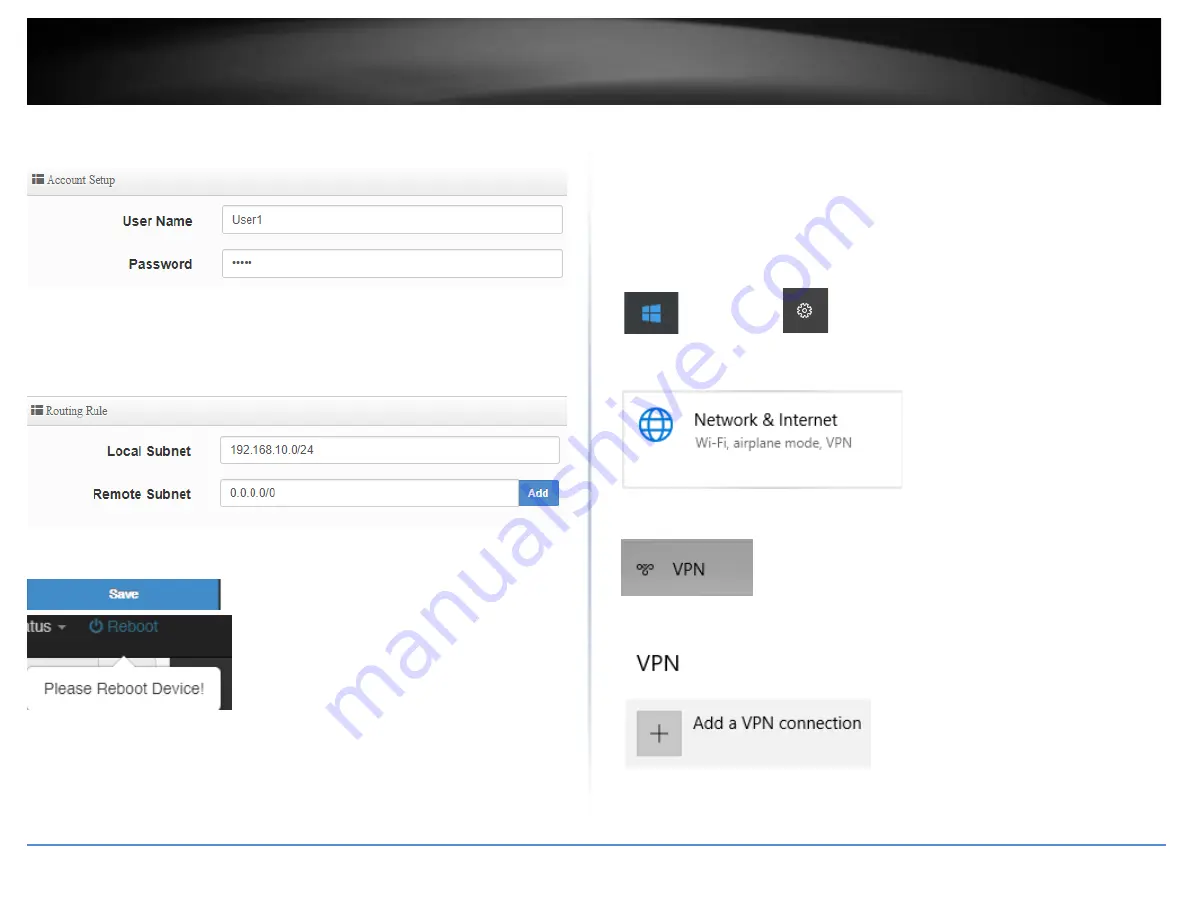
11. Under Account Setup, enter the
User Name
and
Password
for the L2TP account.
(
e.g. User1)
12. Under Routing Rule, enter the Local Subnet the remote L2TP VPN clients will be
allowed to access and click
Add
to add to the Routing Rule List. (e.g. 192.168.10.0/24)
Note:
If you want allow L2TP VPN clients to access any local subnet, you can leave the
Local Subnet settings as 0.0.0.0/0 and click Add.
13. Click
Save
at the bottom. Then click
Reboot
at the top right
to commit the changes.
Setting up the L2TP VPN client (Windows) with IPsec encryption (PSK)
Note:
This procedure provides a basic example how to setup L2TP with IPsec VPN and
establish connectivity using a Windows® 10 client computer. If you are using a different
operating system or mobile device, please refer to the user’s guide/manual of the third
party operating system or device on configuring L2TP with IPsec VPN. The L2TP with
IPsec VPN settings must match with the settings configured on the router.
1. Click the Start button and click the Settings icon.
Start Button
Settings icon
2. Click
Network & Internet
.
3. Click
VPN
in the left panel.
4. Under
VPN, click
Add a VPN connection
.
Summary of Contents for TWG-431BR
Page 1: ......
Page 8: ...Copyright 2019 TRENDnet All Rights Reserved TRENDnet User s Guide TWG 431BR 5 Applications...
Page 93: ......