


© Copyright 2019 TRENDnet. All Rights Reserved.
48
TRENDnet User’s Guide
TWG-431BR
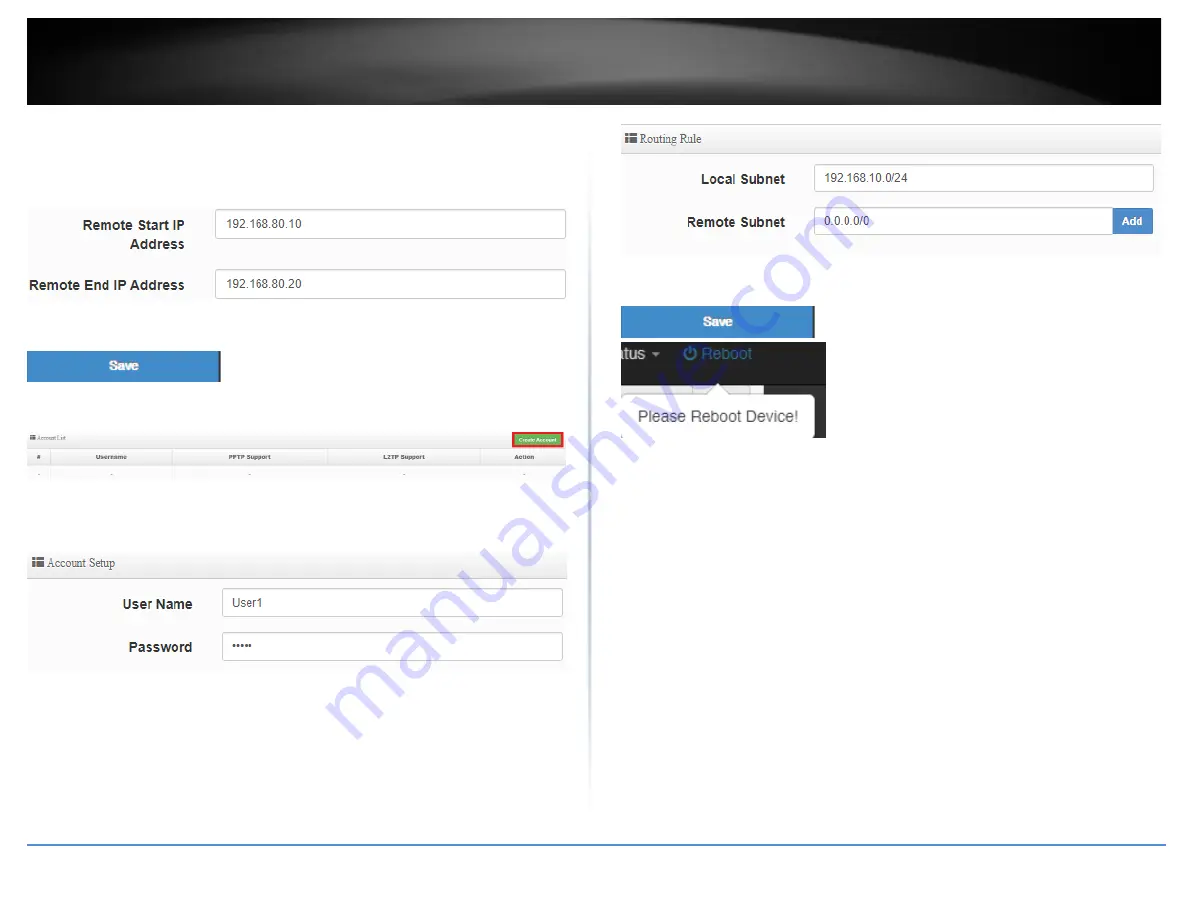
5. In the
Remote Start/End IP Address
fields, enter an IP address range (within the same
Local IP Address subnet range) to assign to L2TP VPN clients.
In this example, we assigned 192.168.80.1 as the Local IP Address for the L2TP server so
we will assign a range such as 192.168.80.10-192.168.80.20.
6. Click
Save
at the bottom.
7. Click on
System
, click on
PPTP/L2TP Account Setup
, and click
Create Account.
8. Under Account Setup, enter the
User Name
and
Password
for the L2TP account.
(
e.g. User1)
9. Under Routing Rule, enter the Local Subnet the remote L2TP VPN clients will be
allowed to access and click
Add
to add to the Routing Rule List. (e.g. 192.168.10.0/24)
Note:
If you want allow L2TP VPN clients to access any local subnet, you can leave the
Local Subnet settings as 0.0.0.0/0 and click Add.
10. Click
Save
at the bottom. Then click
Reboot
at the top right
to commit the changes.
Summary of Contents for TWG-431BR
Page 1: ......
Page 8: ...Copyright 2019 TRENDnet All Rights Reserved TRENDnet User s Guide TWG 431BR 5 Applications...
Page 93: ......