47
minute section, then key in the time value, or click the “
▲
” or “
▼
” to increase or
decrease the time value.
2. Drag time slice bar from time table: Move mouse cursor to the empty zone on time table
in which you want to add. Press and hold mouse left button, drag cursor to right until
touch the End time which you need, then release the left button of mouse.
3. After drag action, a new gray bar is show on the time table. The left end of the time bar
means this slice’s Begin time and right end means End time. Note that the mouse cursor
must drag on empty zone, or this action will be not successful.
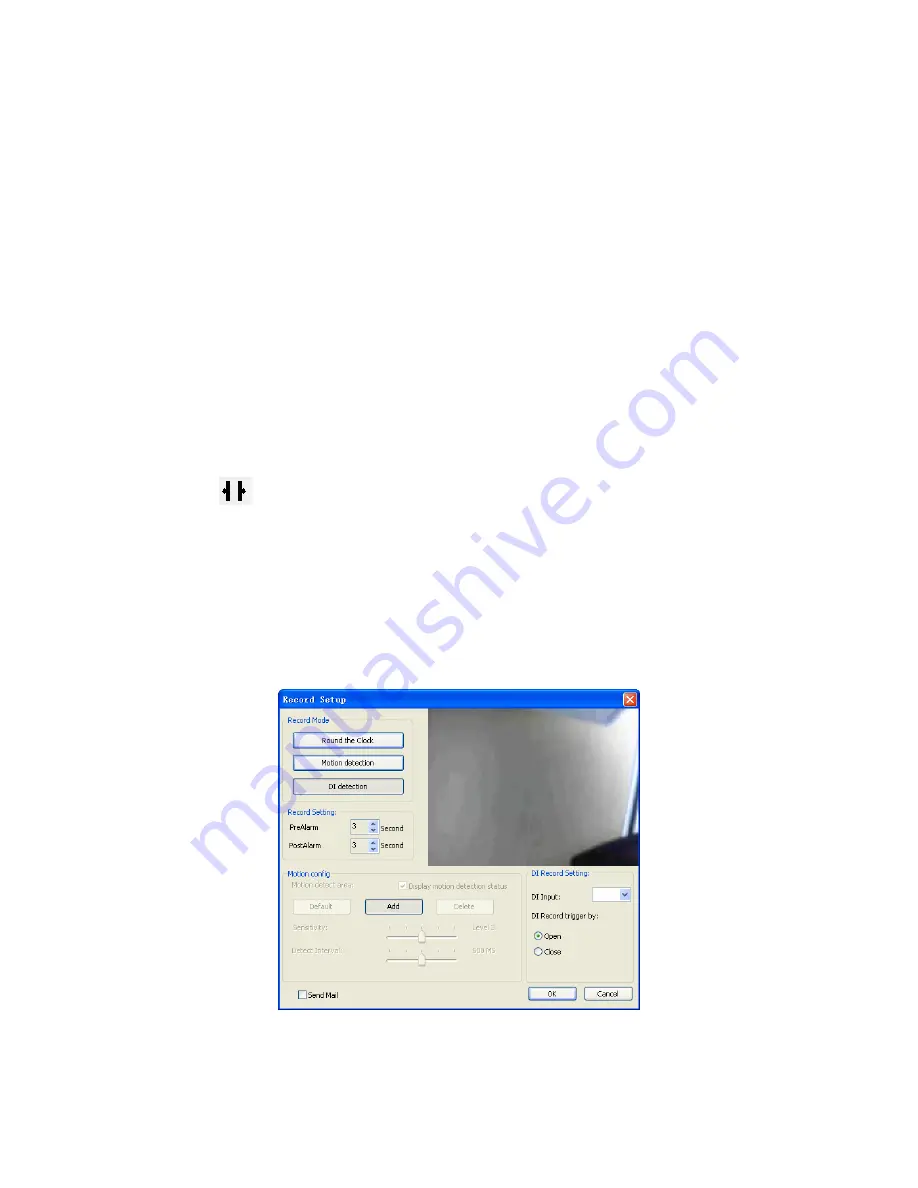
4. After time slice define is completed, the system will pop up the “Record Setup” dialog.
Please refer to “
Record Setup Page
” as below.
¾
Modify schedule time slice:
1. Selected the Camera’s name (daily mode) or weekday (weekly mode) from the tree
control at left of dialog.
2. Click on the slice in the list which you want to modify. The other way, you can click on the
slice bar on the time bar control.
3. Click on the hour section or minute section on the date-time picker control, then enter the
time value, or click the “
▲
” or “
▼
” to increase or decrease the time value. Or you can
move mouse cursor to edge of slice bar on time bar control, then the cursor will become
to “
” , and drag the edge to the position where you need.
4. After complete the time slice, click
Edit
to approach “Record Setup” dialog.
¾
Remove schedule time slice:
1. Select the Camera’s name (daily mode) or weekday (weekly mode) from the tree control
at left of dialog.
2. Click on the time slice in the list which you want to modify. The other way, you can click
on the time slice bar on the time bar control
3. Click the “Delete” button at right of dialog.
4.9.2 Record Setup
¾
Record Mode:
z
Round the Clock:
When system time reach the schedule begin time, system will start
recording work immediately and continually until the system time reach the end time.


