T2100 Series
3-1
3.1
The Diagnostic Test
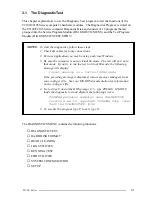
This chapter explains how to use the Diagnostic Test program to test the functions of the
T2100/T2105 Series computer’s hardware modules. The Diagnostics Program is stored on
the T2100/T2105 Series computer Diagnostic Disk and consists of 19 programs that are
grouped into the Service Program Module (DIAGNOSTIC MENU) and the Test Program
Module (DIAGNOSTICS TEST MENU).
NOTES
: To start the diagnostics, follow these steps:
1. Check all cables for loose connections.
2. Exit any application you may be using and close Windows.
3. Be sure the computer is not in virtual 86 mode. The test will not run in
that mode. If you try to run the test in virtual 86 mode, the following
message will display:
Cannot execute in a virtual 8086 mode.
If the preceding message is displayed, remove memory managers from
your config.sys file. See your MS-DOS documentation for information
on the config.sys file.
4. Go to drive C and at the DOS prompt C:\>, type TDIAGS. MS-DOS
loads the diagnostic test and displays the following screen:
TOSHIBA personal computer xxxx DIAGNOSTICS
version x.xx (c) copyright TOSHIBA Corp. 19xx
Test the DIAGNOSTICS (Y/N)
5. To execute the program type Y; to exit, type N.
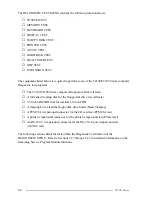
The DIAGNOSTICS MENU contains the following functions:
❑
DIAGNOSTIC TEST
❑
HARD DISK FORMAT
❑
HEAD CLEANING
❑
LOG UTILITIES
❑
RUNNING TEST
❑
FDD UTILITIES
❑
SYSTEM CONFIGURATION
❑
SETUP
Summary of Contents for T2100 Series
Page 5: ...T2100 Series 1 5 Figure 1 2 T2100 T2105 Series system unit configuration ...
Page 25: ...T2100 Series 2 3 Figure 2 1 Troubleshooting flowchart 1 2 ...
Page 114: ...3 64 T2100 Series ...
Page 168: ...B 2 T2100 Series Figure B 2 FHVSY system board back ...
Page 180: ...C 10 T2100 Series ...
Page 181: ...T2100 Series D 1 Appendix D USA Display Codes Table D 1 USA display codes ...
Page 182: ...D 2 T2100 Series ...
Page 196: ...H 2 T2100 Series ...
Page 198: ...I 2 T2100 Series ...

