16
Refrigerator Hook
-
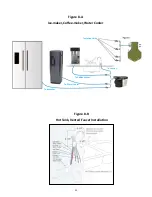
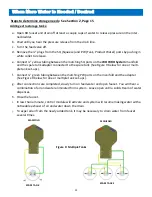
ups: (Figure 7, Page 17)
Adding a line from the
WOW RO System
to your refrigerator will provide
you with clean tasting water and clearer, harder ice cubes.
Adding a refrigerator hook
-
up from a new WOW (dry) installation:
a.
Remove the
3/8”
plug from the FA1 port by pushing on the white
collet, releasing the plug.
b.
Connect the
3/8”
plastic tubing to the FA1 port that goes to the ice-
maker.
c.
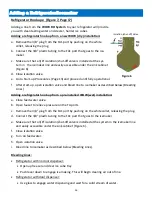
Make sure that a
3/8”
isolation/shut
-
off valve is installed at the sys-
tem in the icemaker line and easily accessible under the sink cabinet
(Figure 6).
d.
Close isolation valve.
e.
Go to Start
-
up Procedures (Page 13) and proceed until fully operational.
f.
After start
-
up, open isolation valve and bleed line to icemaker as described below (Bleeding
Lines).
Adding a refrigerator hook
-
up from a pre
-
installed WOW (wet) installation:
a.
Close feed water valve.
b.
Open faucet to relieve pressure on the FA ports.
c.
Remove the
3/8”
plug from the FA1 port by pushing on the white collet, releasing the plug.
d.
Connect the
3/8”
plastic tubing to the FA1 port that goes to the icemaker.
e.
Make sure that a
3/8”
isolation/shut
-
off valve is installed at the system in the icemaker line
and easily accessible under the sink cabinet (Figure 6).
f.
Close isolation valve.
g.
Turn on feed water.
h.
Open isolation valve.
i.
Bleed line to icemaker as described below (Bleeding Lines).
Bleeding Lines:
•
Refrigerator with no door dispenser:
•
Open up freezer and clear ice cube tray.
•
Push lever down to engage ice
-
making. This will begin clearing air out of line.
•
Refrigerator with door dispenser:
•
Use glass to engage water dispensing and wait for a solid stream of water.
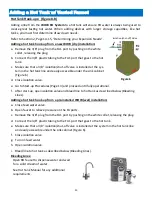
Adding a Refrigerator/Icemaker
Figure 6
Isolation (shut
-
off) Valve
Summary of Contents for WOW RO System
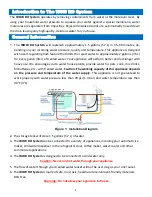
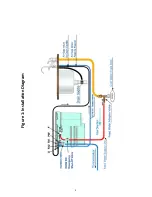
Page 4: ...4 Figure 1 Installation Diagram...
Page 5: ...5 Section 1 Installation Start up Procedures...
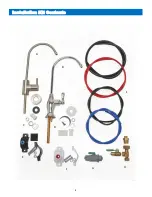
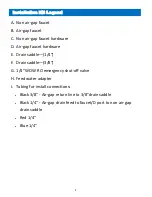
Page 8: ...8 Installation Kit Contents A B C D E F G H I G...
Page 17: ...17 Figure 7 Refrigerator Icemaker...
Page 24: ...24 Modular Expandability Parallel Processing...
Page 25: ...25 Section 4 Plumbing the Sink...
Page 29: ...29 Section 5 Maintenance...
Page 35: ...35 Section 6 Troubleshooting...

