background image

5-1

5  Instrument Settings

5

Instrument Settings

5.1 Settings by the Star Key

z

Items to be set by the star key

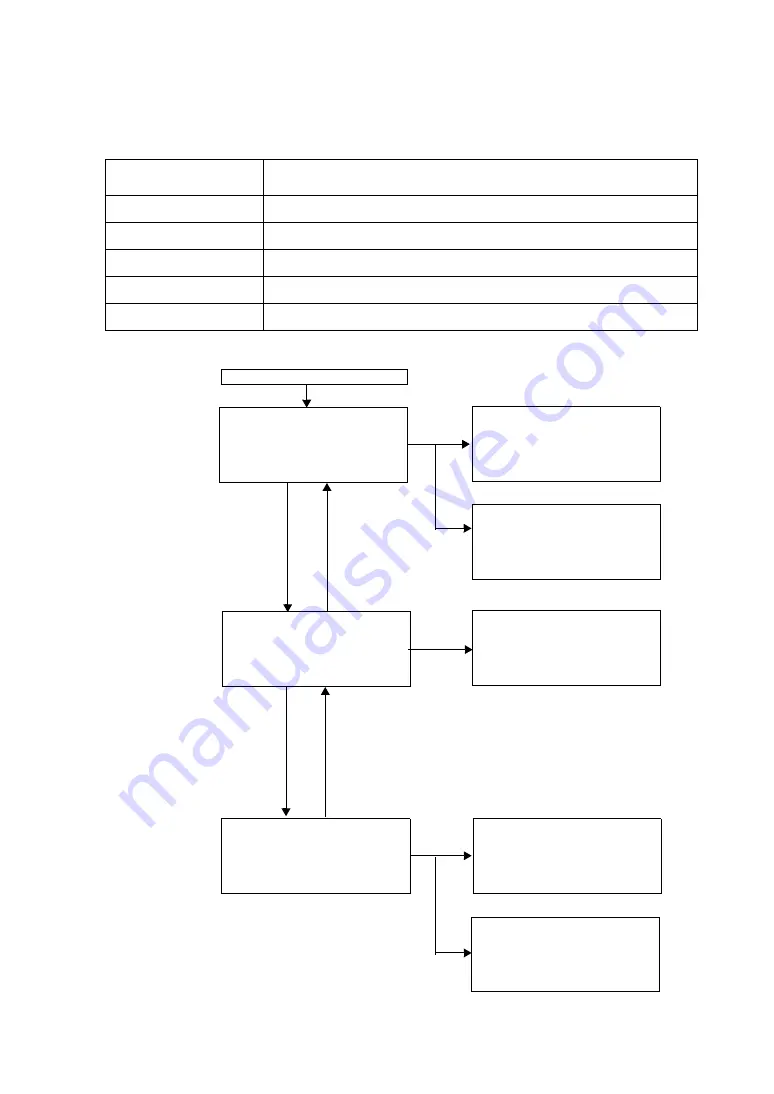
5.1.1 Star Key Screen Flowchart

Display

Function

TILT SETTING

Set the tilt sensor ON/OFF.

ZOOM CONTROL

Choose the best optical zoom system setting for the scanning.

CAMERA SETTING

Set the image quality mode of the camera.

CONTRAST ADJUST

Adjust the contrast of the display.

BACKLIGHT ADJ

Adjust the backlight of the display.

F1 TILT       [ON ]

F2 ZOOM COTROL 

P1/3         


 Press the star key


TILT SETTING [ON]   

 X :+0

°

01'02"

 Y :-0

°

04'05" 

 ON   OFF        

ZOOM CONTROL   

SELECT DISTANCE

F1 UNDER 50M  

F2 OVER 50M 

F1            

F2

F1 CAMERA     [HIGH]

2/3         


F3

F1 CONTRAST  [   5  ]

F2 BACKLIGHT [ON :5]

3/3              

CAMERA SETTING     

F1 HIGH MODE

F2 MIDDLE MODE  


F1            

CONTRAST ADJUST      

 LEVEL 6


BACKLIGHT ADJ      

F1 : ON   [OFF : 9]

F2 : OFF

F3 : LEVEL

F1            

F2

F4

First page

Second page

Third page

F3

F4

Summary of Contents for GLS-1000 SERIES

Page 1: ...GLS 1000 SERIES LASER SCANNER INSTRUCTION MANUAL 64650 90070 ...

Page 2: ......

Page 3: ... Thank you for purchasing the TOPCON Laser Scanner GLS 1000 series For the best performance of the instruments please carefully read these instructions and keep them in a convenient location for future reference ...

Page 4: ...the instrument to extreme heat Do not leave the instrument in extreme heat for longer than necessary It could adversely affect its performance Sudden changes of temperature Any sudden change of temperature to the instrument may result in a reduction of measuring distance range i e when taking the instrument out from a heated vehicle Let instrument acclimate itself to ambient temperature Battery le...

Page 5: ...High temperature may cause fire Do not cover the charger while it is charging Risk of fire or electric shock Do not use damaged power cable plug and socket Risk of fire or electric shock Do not use a wet battery or charger May ignite explosively Never use an instrument near flammable gas liquid matter and do not use in a coal mine Battery can cause explosion or injury Do not dispose in fire or hea...

Page 6: ...y for any damage and loss of profits caused by usage except for explained in the user manual 6 The manufacturer or its representatives assumes no responsibility for damage caused by wrong movement or action due to connecting with other products CAUTION Use of controls or adjustment or performance of procedures other than those specified herein may result in haz ardous radiation exposure Risk of in...

Page 7: ...s for laser products except for deviations pursuant to Laser Notice No 50 dated July 26 2001 As per the said standard the GLS 1000 series is classified as Class 1 Laser Products In case of any failure do not disassemble the instrument Contact TOPCON or your TOPCON dealer Labels Find the labels which describes the caution and safety about the laser beam as follows in GLS 1000 series We request you ...

Page 8: ...numeric Characters 4 9 4 7 1 Switching between Numerical Input Mode and Alphabetical Input Mode 4 9 4 8 Target 4 11 4 8 1 Selecting the Target Sheet 4 11 4 8 2 Assembling the Target 4 11 5 Instrument Settings 5 1 5 1 Settings by the Star Key 5 1 5 1 1 Star Key Screen Flowchart 5 1 5 1 2 Tilt Setting 5 2 5 1 3 Zoom Control Zoom setting 5 2 5 1 4 Camera Setting 5 3 5 1 5 Contrast Adjust 5 3 5 1 6 Ba...

Page 9: ...e and the Backsight Point Name 7 4 8 Scanning 8 1 8 1 Target Scanning 8 2 8 2 3D Scanning 8 5 8 2 1 Scanning Area 8 5 8 2 2 Setting the Scanning Density 8 5 8 2 3 Performing 3D Scanning 8 6 9 Charging the Internal Power Source BT 65Q 9 1 10 PRECAUTIONS 10 1 11 SPECIAL ACCESSORIES 11 1 12 ERROR DISPLAYS 12 1 13 SPECIFICATIONS 13 1 ...

Page 10: ...er 1 Plastic carrying case Casters included 1 Battery charger BC 30D 2 Charger 2 AC DC Converter AD 12 2 AC Cable 2 Battery BT 65Q 4 Target board small 1 Attach a M middle or S small target sheet magnet type Tool kit with case 1 rod pin 2 screwdriver 1 cleaning brush 1 Wireless LAN card 1 SD card 1 ...

Page 11: ...rchase casters are stored inside the case Remove them from the case and attach as necessary USB cable F 25 1 Silicon cloth 1 Target sheet Magnet type Middle 1 Small 1 Target sheet Middle 10 Small 5 Instruction manual 1 Attachment Removal If you cannot remove casters by pulling them with your hand use commercially available tools sold in stores ...

Page 12: ...ature Instrument center mark Tribrach Display Circular level Adjustment screw for circular level Battery cover lever Battery cover Vertical jog Horizontal jog Operation key Collimating window Handle Optical plummet telescope Battery connector Horizontally rotating part head ...

Page 13: ...NOMENCLATURE AND FUNCTIONS USB memory cannot be used I O cards cannot be used Handgrip Tribrach fixing lever Leveling screw Window SD card slot Cover screw Wireless LAN cover USB connector Back battery cover ...

Page 14: ... the Star Key z Example STATION MENU SCAN MENU PROJECT MENU SETTING MENU Sighting collimator Collimating window Vertical jog Horizontal jog Collimate from here STATION MENU F1 NEW STATION F2 SELECT STATION F3 OCC BS SETTING SCAN MENU F1 3D SCANNING F2 TARGET SCANNING PROJECT MENU F1 NEW PROJECT F2 SELECT PROJECT Refer to Chapter 4 4 Battery Power Remaining Display Battery power remaining mark SETT...

Page 15: ...h presetting or displaying To select function of Star key see Chapter 5 1 Settings by the Star Key ESC Escape key Returning to the previous display F1 F4 Soft key Function key Responds to the message displayed ENT Enter key Press at the end of inputting values Cursor key Moves the selected item or the cursor laterally and vertically Alphanumeric characters key ...

Page 16: ...nication between the instrument and the PC Insert a wireless LAN card after purchasing the instrument 1 Use a coin to remove the cover screw 2 Remove the wireless LAN cover 3 Insert a wireless LAN card 4 Replace the wireless LAN cover 5 Replace the cover screw 1 Inserting a wireless LAN card when the instrument is used connected to a PC Cover screw Wireless LAN cover LAN port ...

Page 17: ...1 Open the battery cover and place four batteries in the instrument 2 Shut the battery cover until click sound can be heard 2 Inserting an SD card when the instrument is used alone stand alone Please make sure you have the front and back of the SD card facing correctly when inserting into the card slot Card slot cover Card slot When SCANNING IN PROGRESS and PAUSING is being displayed do not remove...

Page 18: ...ng screen Refer to Chapter 5 2 2 Network Settings when the instrument is used connected to a PC 2 Match the PC setting with the instrument setting External battery Battery terminal Red clip Black clip PC 21 Battery connector 4 Network Settings when the instrument is used connected to a PC Initial setting of the instrument at shipping IP address 192 168 0 1 SUBNET address 255 255 255 0 SSID gls1000...

Page 19: ...nection via USB cable 1 Connect a USB cable F 25 to the USB connector The USB connection is automatically recognized and PC CONTROL MODE is displayed USB connector USB connector is for connection to PC and USB memory cannot be connected ...

Page 20: ...ning the power OFF When scanning another target within the same project move the instrument to the next station and repeat the procedures above Refer to Chapter 4 2 Mount the Instrument to the Tripod Refer to Chapter 4 3 Power Switch Key ON Refer to Chapter 6 Project Settings Refer to Chapter 7 Station Setting Refer to Chapter 7 3 Setting the Occupied Point Name and the Backsight Point Name Refer ...

Page 21: ...aration Turning the power OFF When scanning another target within the same project move the instrument to the next station and repeat the procedures above Refer to Chapter 4 2 Mount the Instrument to the Tripod Refer to Chapter 4 3 Power Switch Key ON z When the instrument is used connected to a PC Refer to the Instruction Manual for Scan Master ...

Page 22: ...g a New Project SELECT PROJECT Select an existing project Refer to Chapter 6 2 Selecting from Existing Projects SETTING MENU NETWORK SETTING Set the network Refer to Chapter 5 2 2 Network Settings when the instrument is used connected to a PC DATA MANAGE Edit the data Refer to Chapter 5 2 3 Editing the SD Card Data data management TEMP PRES SET Set the temperature and air pressure Refer to Chapter...

Page 23: ...SETTING MENU P2 2 F1 F2 F1 Press the power key Battery marks omitted F3 PROJECT MENU F1 NEW PROJECT F2 SELECT PROJECT F2 SETTING MENU F1 NETWORK SETTING F2 DATA MANAGE P1 4 SETTING MENU F1 TEMP PRES SET F2 LAST CALIB DATE P2 4 SETTING MENU F1 TIME ADJUST F2 UNIT SET P3 4 F3 F4 ESC key Returning to the previous display First page Second page Second page Third page First page F3 F4 SETTING MENU F1 T...

Page 24: ...n 3 Lift the instrument straight upwards and off z Attachment 1 Coincide the white alignment piece on the lower part of the instrument with the tribrach alignment groove 2 Tighten the tribrach fixing lever firmly by turning clockwise 3 Tighten the tribrach fixing screw z Locking the tribrach fixing lever 1 The tribrach fixing lever can be locked from being moved accidentally This is useful if the ...

Page 25: ...lly on the tripod head 3 Loosen the tripod screw and slide the instrument When the instrument is directly above the point lightly tighten the tripod screw 2 Roughly Leveling the Tribrach by Using the Tribrach circular level 1 Turn the leveling screws A and B and adjust the bubble to stay at the top or bottom of the circular level 2 Turn the leveling screw C to bring the bubble to the center of the...

Page 26: ...lar level on the instrument 1 Level the instrument as in procedure 2 using the circular level on the instrument 6 Completely Leveling the Instrument by Using the Tilt Sensor of the Instrument 1 Turn the power ON 2 After initialization of the instrument is complete turn the tilt sensor ON and wait until inclination of the instrument is shown on the display Refer to Chapter 5 1 7 Setting Example Usi...

Page 27: ... tribrach or make a random choice of any two 4 Turn the leveling screws A and B and adjust the Y inclination on the display to 6 or less 5 Turn the leveling screw C and adjust the X inclination on the display to 6 or less Collimating window Tribrach Horizontal jog Leveling screw A Leveling screw B TILT SETTING ON X 0 03 45 Y 0 00 00 ON OFF Leveling screw C TILT SETTING ON X 0 00 00 Y 0 00 06 ON OF...

Page 28: ...eps 6 7 until both leveling and centering are matched TILT SETTING ON X 0 00 08 Y 0 00 06 ON OFF NOTE Since the level may change slightly while scanning we recommend leveling the instrument as precisely as possible Notes on the Tribrach Note that the angle measuring precision may be effected directly if the tribrach has not been installed firmly 1 If there is any slack between the leveling screws ...

Page 29: ...er has been switched ON to initialize the instrument and warm up the laser Do not turn the head or operate any keys while the head and mirror are turning Note Do not turn the head with your hands while the power is ON If it has been turned by force turn the power ON again TOPCON LASER SCANNER CALIBRATING display CALIBRATING will be displayed on the screen once every 20 minutes or when ambient temp...

Page 30: ...nt battery cover and replace 2 batteries 3 Close the front battery cover 4 Open the back battery cover and replace 2 batteries 5 Close the back battery cover 6 Press the F1 key start to resume scanning Note 1 The battery operating time will vary depending on the environmental conditions such as ambient temperature charging time the number of times of charging and discharging etc It is recommended ...

Page 31: ...ogs to set the sighting collimator approximately on the target 2 Look into the sighting collimator 3 Use the vertical and horizontal jogs to adjust the peak of the triangle inside the sighting collimator to the target Sighting collimator Collimating window Vertical jog Horizontal jog Collimate from here Sighting collimator Target ...

Page 32: ...lay The functions are according to the displayed message Letters that can be entered All alphabets small letter a to z Numeric 0 to 9 _ can be entered cannot be entered Number of characters that can be entered up to 8 F3 or Cursor key Press the F3 or Cursor key to delete an entry ALPHA F1 key Press the F1 key to enter alphabetical input mode OCC BS SETTING INPUT OCC NAME ALPH NUME F1 key Press the...

Page 33: ...F1 6 Press the 1 key to select 1 1 7 Press the ENT key Occupied point name is set ENT z When you want to delete an entry press the F3 or Cursor key Then the entry will be deleted SELECT MENU F1 STATION MENU F2 SCAN MENU P1 2 DOWN STATION MENU F1 NEW STATION F2 SELECT STATION F3 OCC BS SETTING OCC BS SETTING INPUT OCC NAME NUME OCC BS SETTING INPUT OCC NAME a NUME OCC BS SETTING INPUT OCC NAME a NU...

Page 34: ...he tribrach fixing lever firmly by turning clockwise 3 Install the target board in the arrow point as shown in the illustration 4 Tighten the settlement screw surely 5 Put the magnetic target sheet on the target board At this point adjust the center marks 4 of the target sheet and the target board exactly Target sheet Distance to the object being scanned m Large 50 200 Middle 10 100 Small 2 50 Tri...

Page 35: ...ge quality mode of the camera CONTRAST ADJUST Adjust the contrast of the display BACKLIGHT ADJ Adjust the backlight of the display F1 TILT ON F2 ZOOM COTROL P1 3 Press the star key TILT SETTING ON X 0 01 02 Y 0 04 05 ON OFF ZOOM CONTROL SELECT DISTANCE F1 UNDER 50M F2 OVER 50M F1 F2 F1 CAMERA HIGH 2 3 F3 F1 CONTRAST 5 F2 BACKLIGHT ON 5 3 3 CAMERA SETTING F1 HIGH MODE F2 MIDDLE MODE F1 CONTRAST ADJ...

Page 36: ...st optical zoom system based on the scanning distance scanning precision and scanning time The GLS 1000 is equipped with three types of optical zoom systems and the ability to change the size of the beam spot according to the scanning object which allows you the choice of obtaining a highly precise three dimensional data or a quick scan Select the following two items below according to the scannin...

Page 37: ...urrounding conditions The contrast range is from 1 light to 10 dark 5 1 6 Backlight Adjust Use the backlight when the display is difficult to read for example at dusk or when you are inside a tunnel There is a switch to keep the backlight always ON or always OFF When selecting the backlight is always ON the brightness can be adjusted The range is from 1 dark to 10 light 5 1 7 Setting Example Using...

Page 38: ...DJUST Adjust the tilt sensor installation error SETTING MENU F1 NETWORK SETTING F2 DATA MANAGE P1 4 NETWORK SETTING IP 192 168 1 0 SUB 255 255 255 0 P1 2 EDIT DATA MANAGE PRO pr 1 pr 2 OPEN EDIT F1 F2 SETTING MENU F1 TEMP PRES SET F2 LAST CALIB DATE P2 4 F3 SETTING MENU F1 TIME ADJUST F2 UNIT SET P3 4 TEMP PRES SET TMP 20 0 C PRES 1017 0 hPa EDIT LAST CALIB DATE 2008 04 28 F1 F2 TIME ADJUST DATE 2...

Page 39: ...matically recognized Example z GLS 1000 settings Operating procedure Operation Display 1 Press F3 key to display the second page of the main menu F3 2 Press the F2 SETTING MENU key to select SETTING MENU F2 3 Press the F1 NETWORK SETTING key to select NETWORK SETTING F1 The IP address subnet address and SSID can be entered on the PC and the GLS 1000 If a wireless connection is used make sure the a...

Page 40: ...SID ENT F4 9 Press the F2 EDIT key to edit SSID F2 10 Input SSID gls1000 Input SSID 11 Press the ENT key ENT 12 Press the ENT key WLAN AdHoc is set ENT NETWORK SETTING INPUT IP ADDRESS NETWORK SETTING INPUT IP ADDRESS 192 168 0 1 NETWORK SETTING IP 192 168 0 1 SUB P1 2 EDIT NETWORK SETTING INPUT SUBNET ADDRESS 255 255 255 0 NETWORK SETTING SSID P2 2 EDIT NETWORK SETTING INPUT SSID NUME NETWORK SET...

Page 41: ...following Network name gls1000 Network authentication Open Data encryption Disabled 7 Select Advanced under Preferred networks 8 Select Computer to computer ad hoc networks only under Network to access 9 Enter the IP address subnet address and SSID Settings are complete 5 2 3 Editing the SD Card Data data management You can delete or rename the folders on the SD card Data that can be renamed or de...

Page 42: ...tion calibration data binEXT file format 3D Scan2 Directory Station2 Directory Station information file sta file format Point cloud file of back sight clt file format 3D coordinate of back sight trg file format Camera orientation calibration data binEXT file format Project2 Directory Station21 Directory Station information file sta file format Point cloud file of back sight clt file format Project...

Page 43: ...ile The stations list will be showen F2 or F3 F1 6 Choose the station file you want to rename by pressing the F2 key or the F3 key 7 Press the F4 EDIT key F2 or F3 F4 8 Press the F1 RENAME key 9 Press the F3 key to move the curser F1 F3 10 Rename the station name ST 1 ST 9 Rename 11 Press the ENT key The station name has been changed ENT SELECT MENU F1 STATION MENU F2 SCAN MENU P1 2 SELECT MENU F1...

Page 44: ...on Display 1 Press the F3 key to display the second page of the main menu F3 2 Press the F2 SETTING MENU key F2 3 Press the F3 key to display the second page F3 4 Press the F1 TEMP PRES SET key F1 5 Press the F2 EDIT key 6 Press the F3 key to move the curser F2 F3 7 Input a temperature 22 5 C Input a tempera ture 8 Press the ENT key ENT SELECT MENU F1 STATION MENU F2 SCAN MENU P1 2 SELECT MENU F1 ...

Page 45: ... Press the F2 SETTING MENU key F2 3 Press the F3 key to display the second page F3 4 Press the F2 LAST CALIB DATE key F2 Operating procedure Operation Display 1 Press the F3 key to display the second page of the main menu F3 2 Press the F2 SETTING MENU key F2 3 Press the F3 key twice to display the third page F3 F3 SELECT MENU F1 STATION MENU F2 SCAN MENU P1 2 SELECT MENU F1 PROJECT MENU F2 SETTIN...

Page 46: ...4 key F4 10 Press the F2 EDIT key 11 Press the F3 key to move the curser 12 Input time 2230 F2 F3 Input time 13 Press the ENT key Operating procedure Operation Display 1 Press the F3 key F3 2 Press the F2 SETTING MENU key F2 TIME ADJUST DATE 2007 12 24 TIME 22 00 EDIT TIME ADJUST INPUT DATE 20080101 NUME SPC TIME ADJUST DATE 2008 01 01 TIME 22 00 EDIT TIME ADJUST DATE 2008 01 01 TIME 22 00 EDIT TI...

Page 47: ...isplay the second page of the main menu F3 2 Press the F2 SETTING MENU key F2 3 Press the F3 key 3 times to display the fourth page F3 F3 F3 SETTING MENU F1 TIME ADJUST F2 UNIT SET P3 4 UNIT SET TEMP PRES ANGLE P1 2 EDIT UNIT SET DISTANCE FEET P2 2 EDIT UNIT SET DISTANCE ft in F1 METER F2 FEET F3 FEET INCH SET UNIT SET DISTANCE mt F1 METER F2 FEET F3 FEET INCH SET UNIT SET DISTANCE METER P2 2 EDIT...

Page 48: ...e unit to within 30 F1 6 Press the F4 START key Begin the calibration of tilt sensor 0 datum When TILT OVER is displayed while calibrating press the ENT key and level the unit once again F4 TILT 0 ADJUST X 0 00 25 Y 0 00 20 START TILT 0 ADJUST PROCESSING PLEASE WAIT TILT 0 ADJUST SET PRESS ENT KEY ...

Page 49: ...s one project The station information of each scanning is stored inside the same project Create a new project when you scan a new object If you continue scanning for the same project or control the existing data select from the existing projects Station1 Station2 Station3 Station4 Project1 pt01 pt02 pt03 pt04 pt05 pt06 pt04 pt05 pt06 Target ...

Page 50: ...sight clt file format Project information file prj 3D coordinate of back sight trg file format Camera orientation calibration data binEXT file format 3D Scan2 Directory Point cloud file clr file format JPEG file e g 0001 jpg 0002 jpg Angle file e g 0001 ang 0002 ang Tilt orientation file e g 0001 tor 0002 tor F3 z Project menu operation SELECT MENU F1 STATION MENU F2 SCAN MENU P1 2 SELECT MENU F1 ...

Page 51: ...JECT MENU key F1 3 Press the F2 SELECT PROJECT key F2 4 Select the project p02 by pressing the F2 or F3 key F2 or F3 5 Press the F4 SELECT key Project p02 is selected F4 NEW PROJECT INPUT PROJECT NAME p03 NUME PROJECT MENU F1 NEW PROJECT F2 SELECT PROJECT SELECT MENU F1 STATION MENU F2 SCAN MENU P1 2 SELECT MENU F1 PROJECT MENU F2 SETTING MENU P2 2 PROJECT MENU F1 NEW PROJECT F2 SELECT PROJECT SEL...

Page 52: ...tations Station data is saved on the SD card Station1 Backpoint1 Station1 Project1 Directory Station1 Directory 3D Scan1 Directory Target Scan1 Directory Station information file sta file format Point cloud file of back sight clt file format Project information file prj 3D coordinate of back sight trg file format Camera orientation calibration data binEXT file format 3D Scan2 Directory Point cloud...

Page 53: ... set ENT F1 F2 F1 z Station menu operation SELECT MENU F1 STATION MENU F2 SCAN MENU P1 2 STATION MENU F1 NEW STATION F2 SELECT STATION F3 OCC BS SETTING NEW STATION INPUT STATION NAME NUME SELECT STATION st 1 st 2 SELECT OCC BS SETTING INPUT OCC NAME NUME F3 SELECT MENU F1 STATION MENU F2 SCAN MENU P1 2 STATION MENU F1 NEW STATION F2 SELECT STATION F3 OCC BS SETTING NEW STATION INPUT STATION NAME ...

Page 54: ... 2 Press the F2 SELECT STATION key F2 3 Select the station st 2 by pressing the F2 or F3 key F2 or F3 4 Press the F4 SELECT key Station st 2 is selected F4 SELECT MENU F1 STATION MENU F2 SCAN MENU P1 2 STATION MENU F1 NEW STATION F2 SELECT STATION F3 OCC BS SETTING SELECT STATION st 1 st 2 SELECT SELECT PROJECT st 1 st 2 SELECT STATION MENU F1 NEW STATION F2 SELECT STATION F3 OCC BS SETTING ...

Page 55: ...on Display 1 Press the F1 STATION MENU key to select the station menu F1 2 Press the F3 OCC BS SETTING key to input the occupied point name F3 3 Input the occupied point name a 1 Input occupied point name 4 Press the ENT key ENT 5 Input instrument height 1 5m Input unit is meters m Input instrument height 6 Press the ENT key ENT z The only target you can use is Topcon target sheets z The target sh...

Page 56: ... collimated select the F1 FINISH key When the backsight point is not correctly collimated there is a possibility of a reflecting object other than the target being scanned Select either the F2 REVOKE or F3 SCAN AGAIN key and redo The backsight point name and the occupied point name are set ENT F1 1 If the instrument is tilted 10 or more the screen shown below will be displayed OCC BS SETTING INPUT...

Page 57: ... become large Select OK NG or RETRY depending on the precision you are seeking Angle deviation deviation of measured angle 10 Distance deviation deviation of measured distance 10mm DEVIATION IS LARGE ANG_DEV 14 5asec DIST_DEV 12mm OK NG RETRY TARGET SCANNING FINISHED PRESS ENT KEY SCAN MENU F1 3D SCANNING F2 TARGET SCANNING TARGET SCANNING AREA SELECT AIM TO TARGET AND PRESS ENT KEY F1 F2 F3 ...

Page 58: ...hree dimensional data Determine the scanning area first and set the parameters scanning density Project1 Directory Station1 Directory 3D Scan1 Directory Station information file sta file format Point cloud file of back sight clt file format Project information file prj 3D coordinate of back sight trg file format Camera orientation calibration data binEXT file format Point cloud file clr file forma...

Page 59: ...et you can use is Topcon target sheets z In order to coordinate positional information of the data scanning data on 3 or more targets is needed Set targets at 3 or more locations where it is possible to collimate from each station z 3D data cannot be obtained where the target sheets are placed so avoid putting them on important scanning locations z Do not set the targets on a straight line Also sp...

Page 60: ...FINISH key When the target is not correctly collimated there is a possibility of a reflecting object other than the target being scanned Select either the F2 REVOKE or F3 SCAN AGAIN key and redo ENT F1 pt01 target scanning is finished 10 Press the F2 TARGET SCANNING key to input the target name F2 11 Input the target name pt02 Input target name TARGET SCANNING TARGET NAME INPUT pt01 NUME TARGET SC...

Page 61: ...iation may become large Select OK NG or RETRY depending on the precision you are seeking Angle deviation deviation of measured angle 10 Distance deviation deviation of measured distance 10mm TILT OVER PRESS ENT KEY TARGET SCANNING SCAN START PRESS ENT KEY ENT After leveling the instrument press the ENT key DEVIATION IS LARGE ANG_DEV 14 5asec DIST_DEV 12mm OK NG RETRY TARGET SCANNING FINISHED PRESS...

Page 62: ...zontal distance and the intervals between scanning points Distance Interval V H 2 Enter the total number of scanning points Point Num V H Maximum VxH point value 100000000 points 3 Enter the angle between scanning points Scan Degree V H Selecting items Range What is set 1 DISTANCE m 1 300 Enter the rough distance between the instrument and the target INTERVAL V mm 0 1 1000 Enter the vertical dista...

Page 63: ...ed and number of the range is entered as DISTANCE automatically 削除 ENT Setting the scanning density Example setting the SCAN DEGREE 9 Press the F1 UNIT key F1 10 Press the F1 UNIT key F1 11 Select SCAN DEGREE H by pressing F3 or F4 key 12 Press the F2 EDIT key to input the scan degree F3 or F4 F2 SELECT MENU F1 STATION MENU F2 SCAN MENU P1 2 SCAN MENU F1 3D SCANNING F2 TARGET SCANNING P1 2 3D SCAN...

Page 64: ... IMAGE image data only The scanning settings are finished and 3D scanning information is displayed SCAN remaining time of the 3D scan 2 approximate figures IMAGE remaining time of the image scan approximate figures Scanning settings are finished ENT F1 3D SCANNING INPUT SCAN DEGREE H 0 1 3D SCANNING SCAN DEGREE H 0 1 SCAN DEGREE V 0 3 UNIT EDIT 3D SCANNING SCAN DEGREE H 0 1 SCAN DEGREE V 0 3 UNIT ...

Page 65: ... be displayed at this point 2 Remaining time of the scan is a rough estimate 3D SCANNING SCANNING START PRESS ENT KEY 3D SCANNING SCANNING IN PROGRESS REMAIN 10M 30S PAUSE STOP 3D SCANNING FINISHED PRESS ENT KEY 3D SCANNING F1 SCAN IMG F2 SCAN F3 IMAGE Memory capacity required for scanning is insufficient Replace with an SD card having sufficient memory capacity and press the ENT key Battery capac...

Page 66: ...ery power is at a very low level when beginning charging such as after the instrument has been in storage over an extended period of time in a discharge state a full charge may not be possible with a single charging In such a case recharge a second time 4 After charging remove the battery from the charger Remove the charger from the outlet The power LED Red ON Power is on The charge LED will indic...

Page 67: ...rging should take place in a room with an ambient temperature range of 10 C to 40 C 50 F to 104 F If charging is done at high temperature charging time of the battery may take longer Exceeding the specified charging time may shorten the life of the battery and should be avoided if possible The battery source will discharge when stored and should be checked before using with instrument If the instr...

Page 68: ... on the case never use thinner or benzine Use a clean cloth moistened with neutral detergent 5 Do not store the wet instrument in the case If the instrument is wet wipe off any moisture with a soft cloth let dry and store in the case 6 If the tripod is used for a long time some parts may wear away the tips may loosen up and the butterfly screw may break From time to time check each part 7 When sto...

Page 69: ...magnet type and attach to the prism holder Target sheet Large Middle Small z Special target sheets for the GLS 1000 Select the target sheet based on the scanning distance Target sheet Magnet type Large Middle Small z Special target sheets for the GLS 1000 Select the target sheet based on the scanning distance Tribrach z Holds the prism adapter Prism adapter z Holds the target board ...

Page 70: ...to scan Turn the power off and restart If the error persists have the instrument repaired APD ERROR An error occurred in the laser beam receiving system INTERNAL ERROR An error occurred in the built in calculator Unable to scan or photograph Turn the power off and restart If the error persists have the instrument repaired LEASER ERROR An error occurred in the laser beam emitting system Unable to s...

Page 71: ...PLEASE INUPUT AGAIN Enter a value equal to or above the minimum total points H INTERVAL TOO SMALL PLEASE INUPUT AGAIN Enter a value equal to or above the minimum horizontal interval H INTERVAL TOO LARGE PLEASE INUPUT AGAIN Enter a value not exceeding the maximum horizontal interval V INTERVAL TOO SMALL PLEASE INUPUT AGAIN Enter a value equal to or above the minimum horizontal angle V INTERVAL TOO ...

Page 72: ... Approximately 16mm at 100m Sample Density Maximum 1mm at 100m Selectable Maximum point number 4 VxH 100 000 000 points Field of view Per scan Horizontal 360 maximum Vertical 35 maximum Laser Laser class Class1 IEC EN60825 1 Wave Lengths 1535nm invisible Maximum peak output 815W Maximum average output 10mW Pulse duration 3 6nsec maximum Pulse frequency 3400Hz maximum Target detection accuracy 1 3 ...

Page 73: ...ew 5 On Board Battery BT 65Q Capacity 5000mAh Voltage 7 4V Weight 0 2kg Operating time 20 C 4h 4pcs 1 Continuous scanning use 1 Operating time depends on the ambient temperature and the instrument s condition of use Battery Charger BC 30D Input voltage AC100V to 240V Frequency 50 60Hz Operating temperature range 10 C to 40 C Charging time Approx 5h pc Weight 0 4kg ...

Page 74: ...EMC NOTICE 2008 TOPCON CORPORATION ALL RIGHTS RESERVED ...

Page 75: ......

Page 76: ...551170 survey sales topcon co uk laser sales topcon co uk Blk 192 Pandan Loop 07 01 Pantech Industrial Complex Singapore 128381 Phone 65 6778 3456 Fax 65 6773 6550 www topcon com sg 77 162 Sinn Sathorn Tower 37th Fl Krungdhonburi Rd Klongtonsai Klongsarn Bangkok 10600 Thailand Phone 66 2 4401152 7 Fax 66 2 4401158 No D1 Ground Lower Ground 1st Floor Jalan Excella 2 Off Jalan Ampang Putra Taman Amp...

Reviews: